Installing demo data
Adding demo data to your store is a great way to have an easy start. allowing you simply replace it with your own data. The demo data included in the theme package can easily be installed by a click of a button. You have the option to install the demo banners only, or install the full demo data which consists of the following:
- Banners
- Block backgrounds (from “Call to Action” block and “Testimonials” block)
- Category demo data (demo description, menu icons, menu labels, Mega Menu menu featured products, category page banners)
- Homepage featured products and banners blocks
- Product page quick info
- Content pages
- Contact forms
- Blog pages (from blog pages with images)
- Menus (demo menus with icons)
Whether you want to add only the demo banners or the full demo data, please foolow the steps below in order to insstall it to your site:
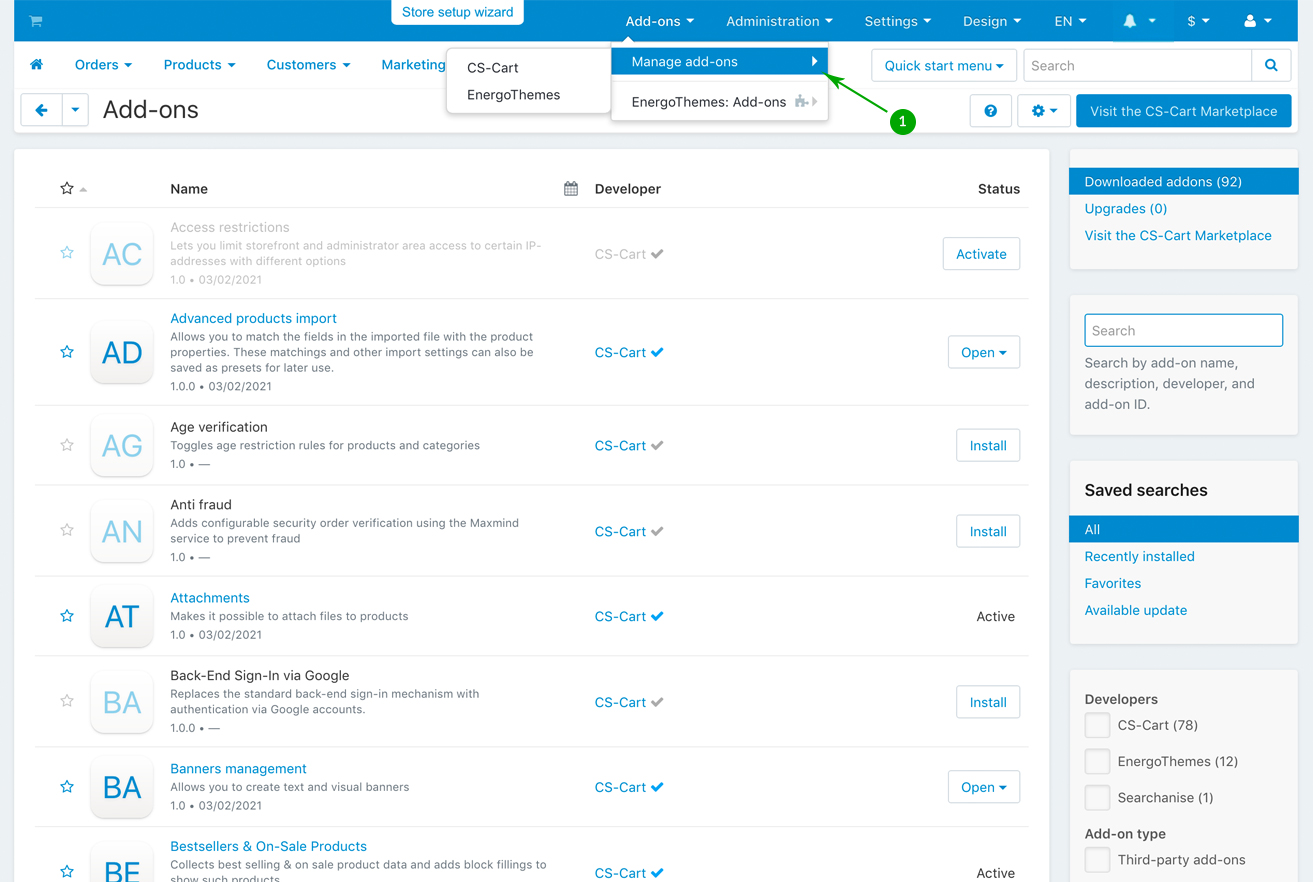
- Step 1
In your admin panel, go to “Add-ons” - “Manage add-ons”
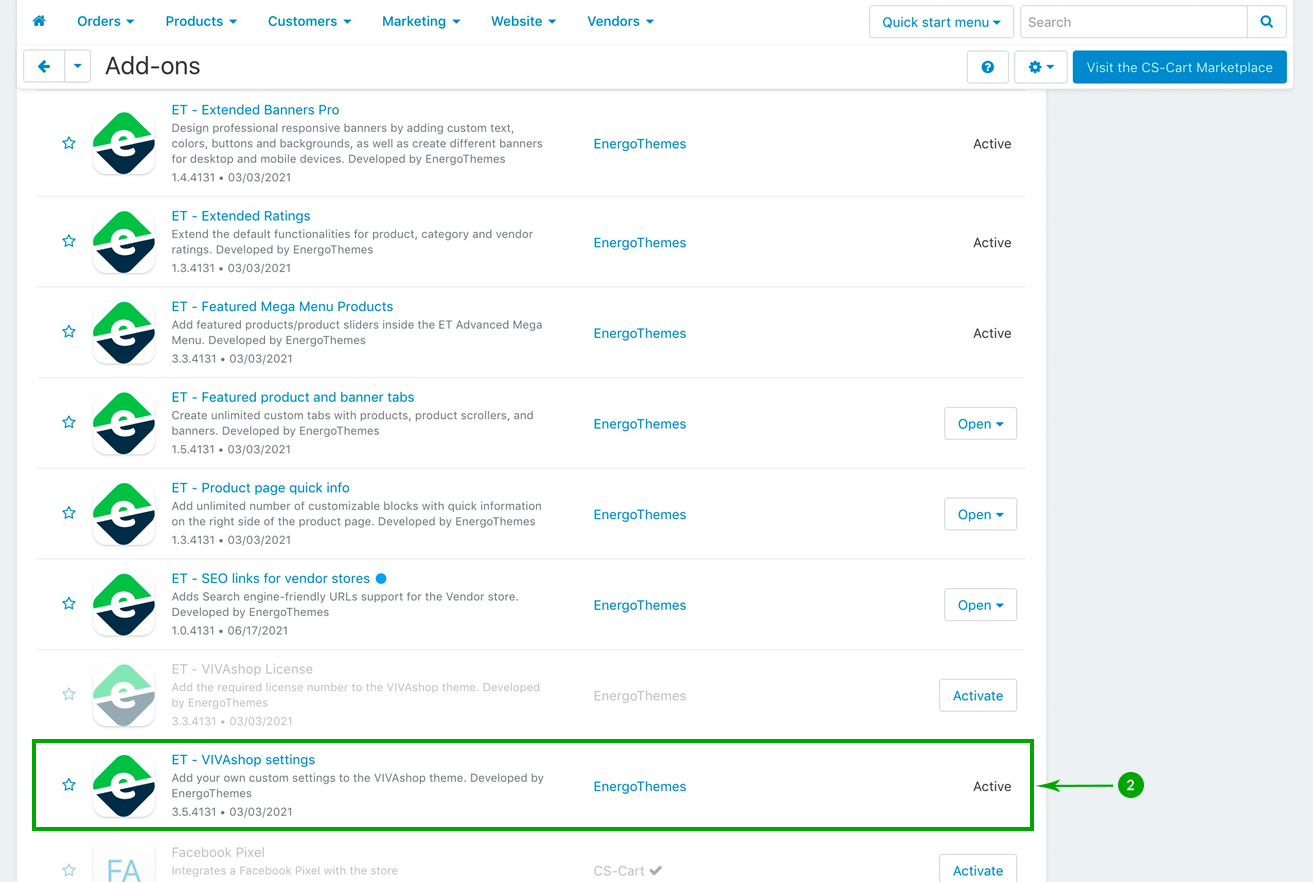
- Step 2
Scroll down untill you see the “ET - VIVAshop settings” add-on, and click on its name:
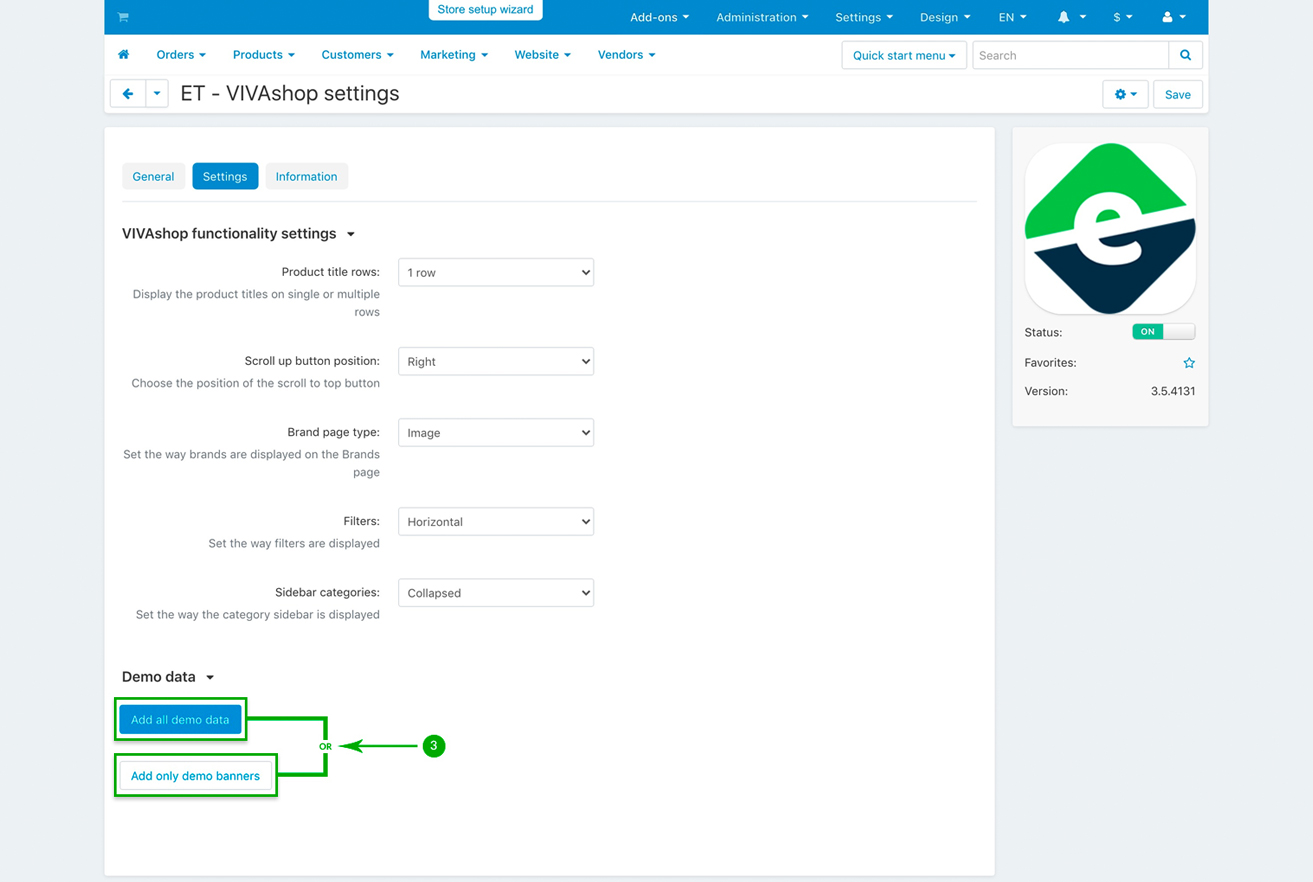
- Step 3
Once you enter the “ET - VIVAshop settings” add-on, simply click on the bottom “Add all demo data” button to install all of the theme demo data, or click on the “Add only demo banners” button to install only the theme demo banners.
The theme demo data will not install the demo images from the Mega Menu, as each store is different and has may have different number of categories, and such number cannot be predicted before the theme installation. Those images are included in the theme archive you have downloaded, and will have to be added manually to the Mega Menu. Please refer to section VIVAshop add-ons - Advanced Mega Menu in order to learn how to add images to the Mega Menu.