Featured Product And Banner Tabs
The “Featured Product And Banner Tabs” add-on allows you to add un unlimited number of customizable tabs per each block. featuring any products of your choice, as well as up to 2 banners per each tab. For Multi-Vendor users, this can also be a great monetizing tool as you can promote any products of your Vendors, as well as promote anything you want though the use of your banners. In these blocks you can add extended banners that you have already learned how to create under section “Extended Banners Pro”.
Please follow the steps below in order to learn how to create and customize a block with Featured Product And Banner Tabs. NOTE: The demo blocks from our demo site will automatically be installed if you have closen to install the demo content under section “Installing demo data”
- Step 1
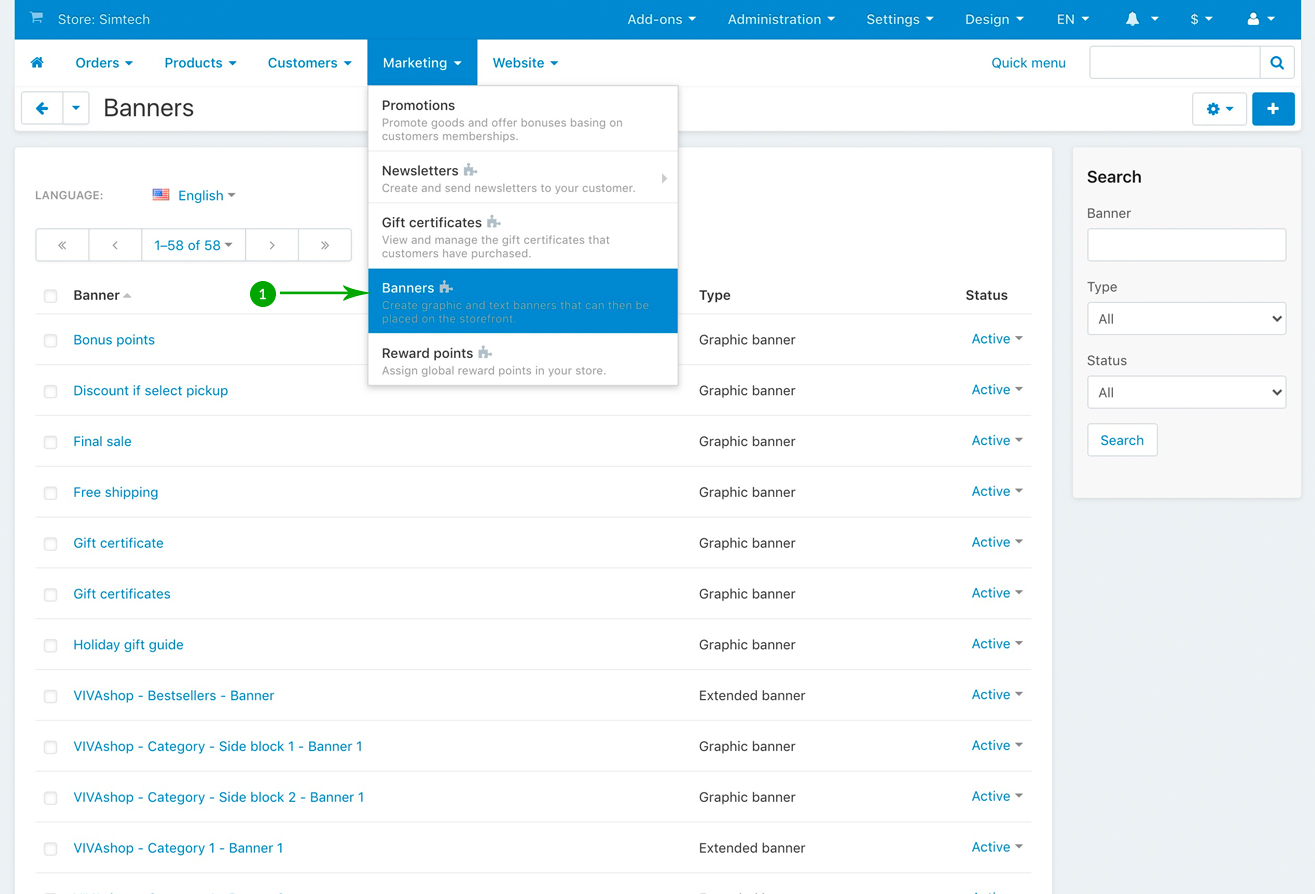
Before you start, please meka sure to have your banners already created. So, go to “Marketing” - “Banners” and ceate your banner. You can also create advanced banners with the help of the ”Extended Banners Pro” add-on. Note that you can add up to 2 (two banners) per each tab. Should you want to add 2 banners, the recommended width of each banner is 785px, and the banners heights is at your own choice, but both banners need to have the same height. On our demo site we have used a height of 276px for each banner. Should you want to add 1 banner, the recommended width is 1580px, and the banner height is at your own choice.. On our demo site we have used a height of 276px for the banner.
- Step 2
Once you have created your banners, go to “EnergoThemes: Add-ons” - “Featured product and banner tabs”

- Step 3
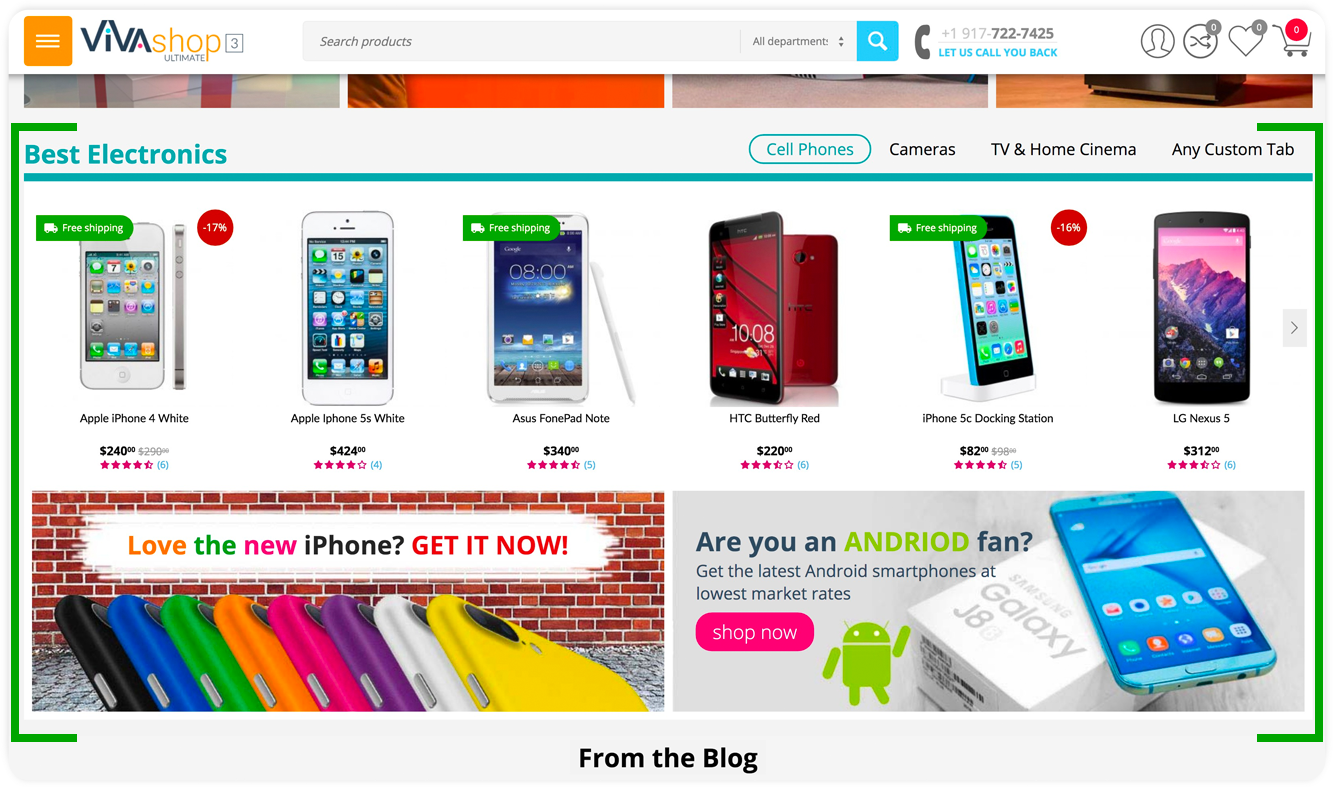
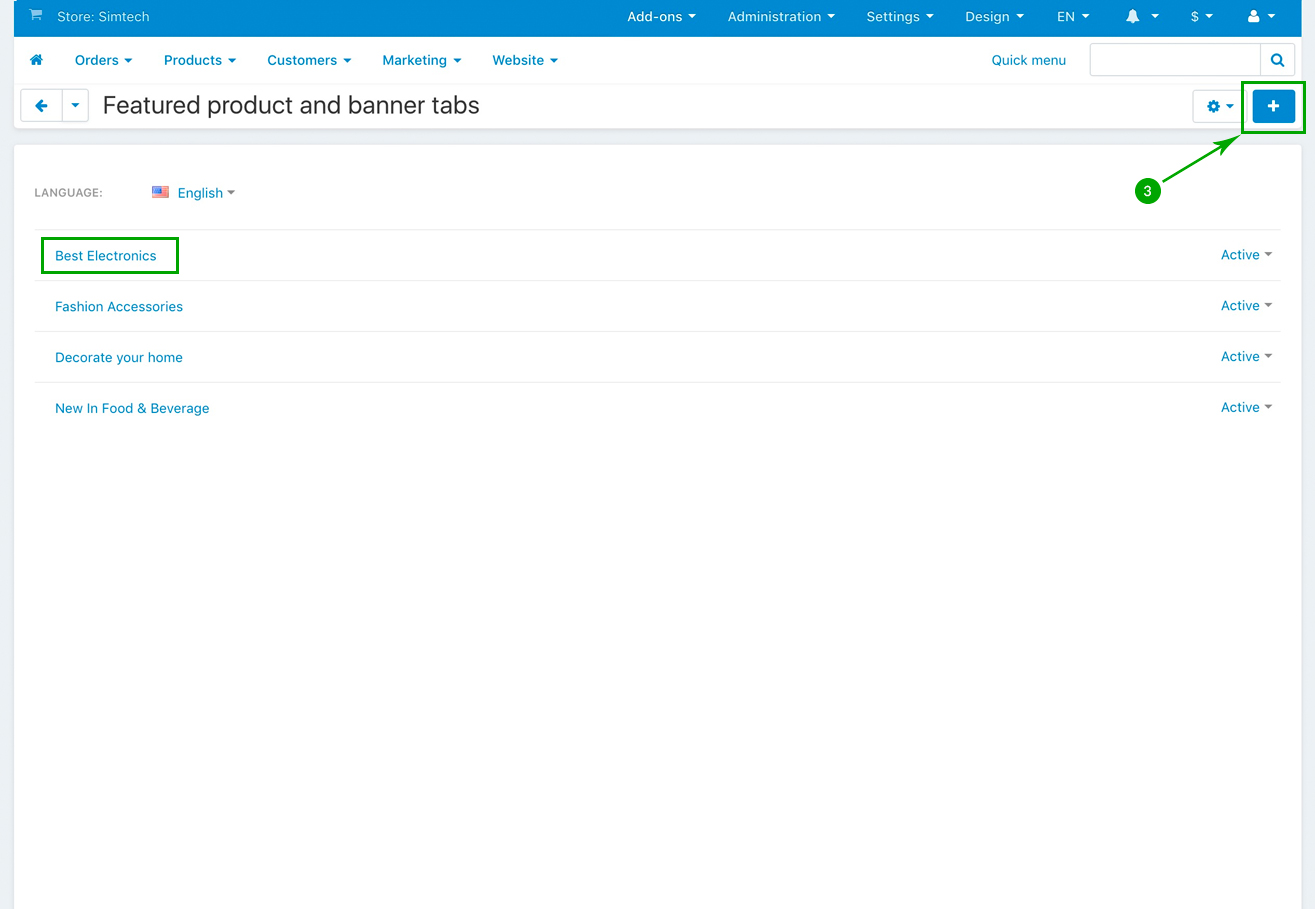
In the next page click on the right side “Plus” to add a new “Featured Products And Banner Tab”. For exemplification, we have cliked on the tab called “Best Electronics” that we have created on our demo site.
- Step 4
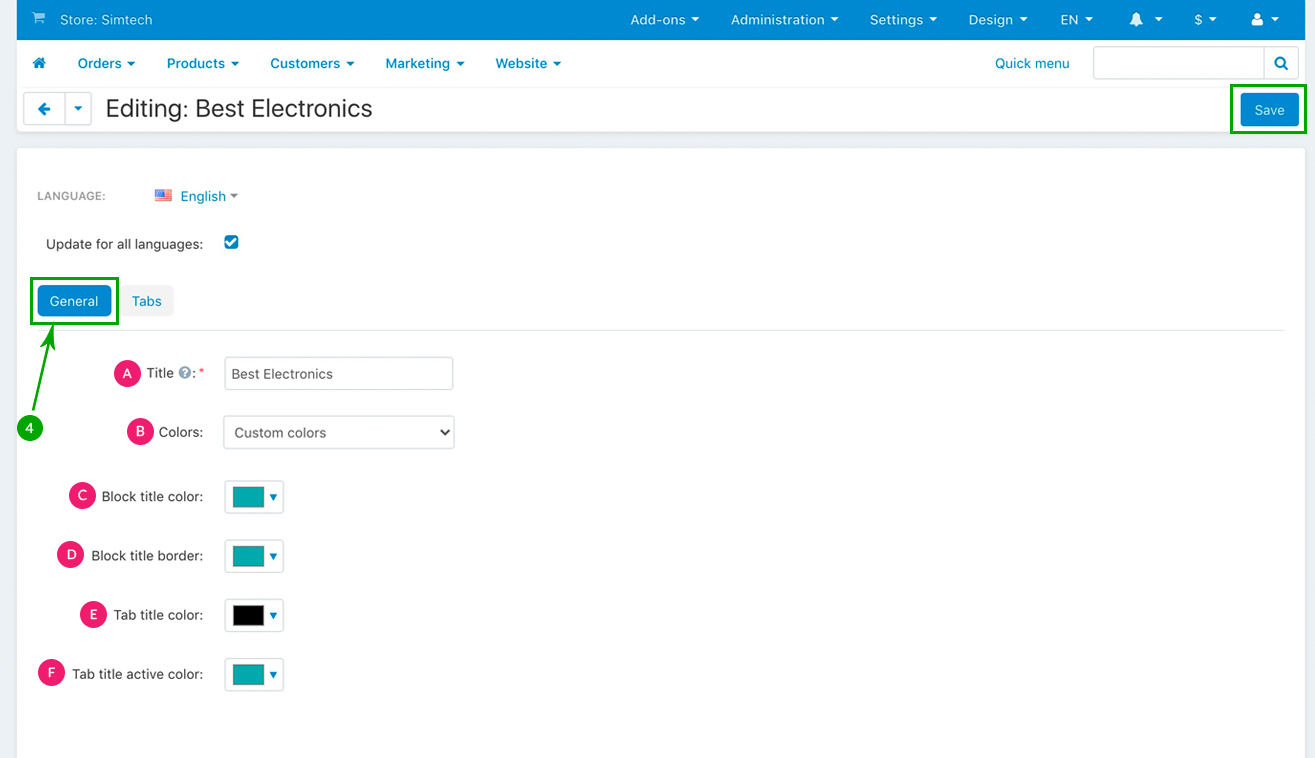
In the newly opned page, under the “General” tab, choose your settings as follows:
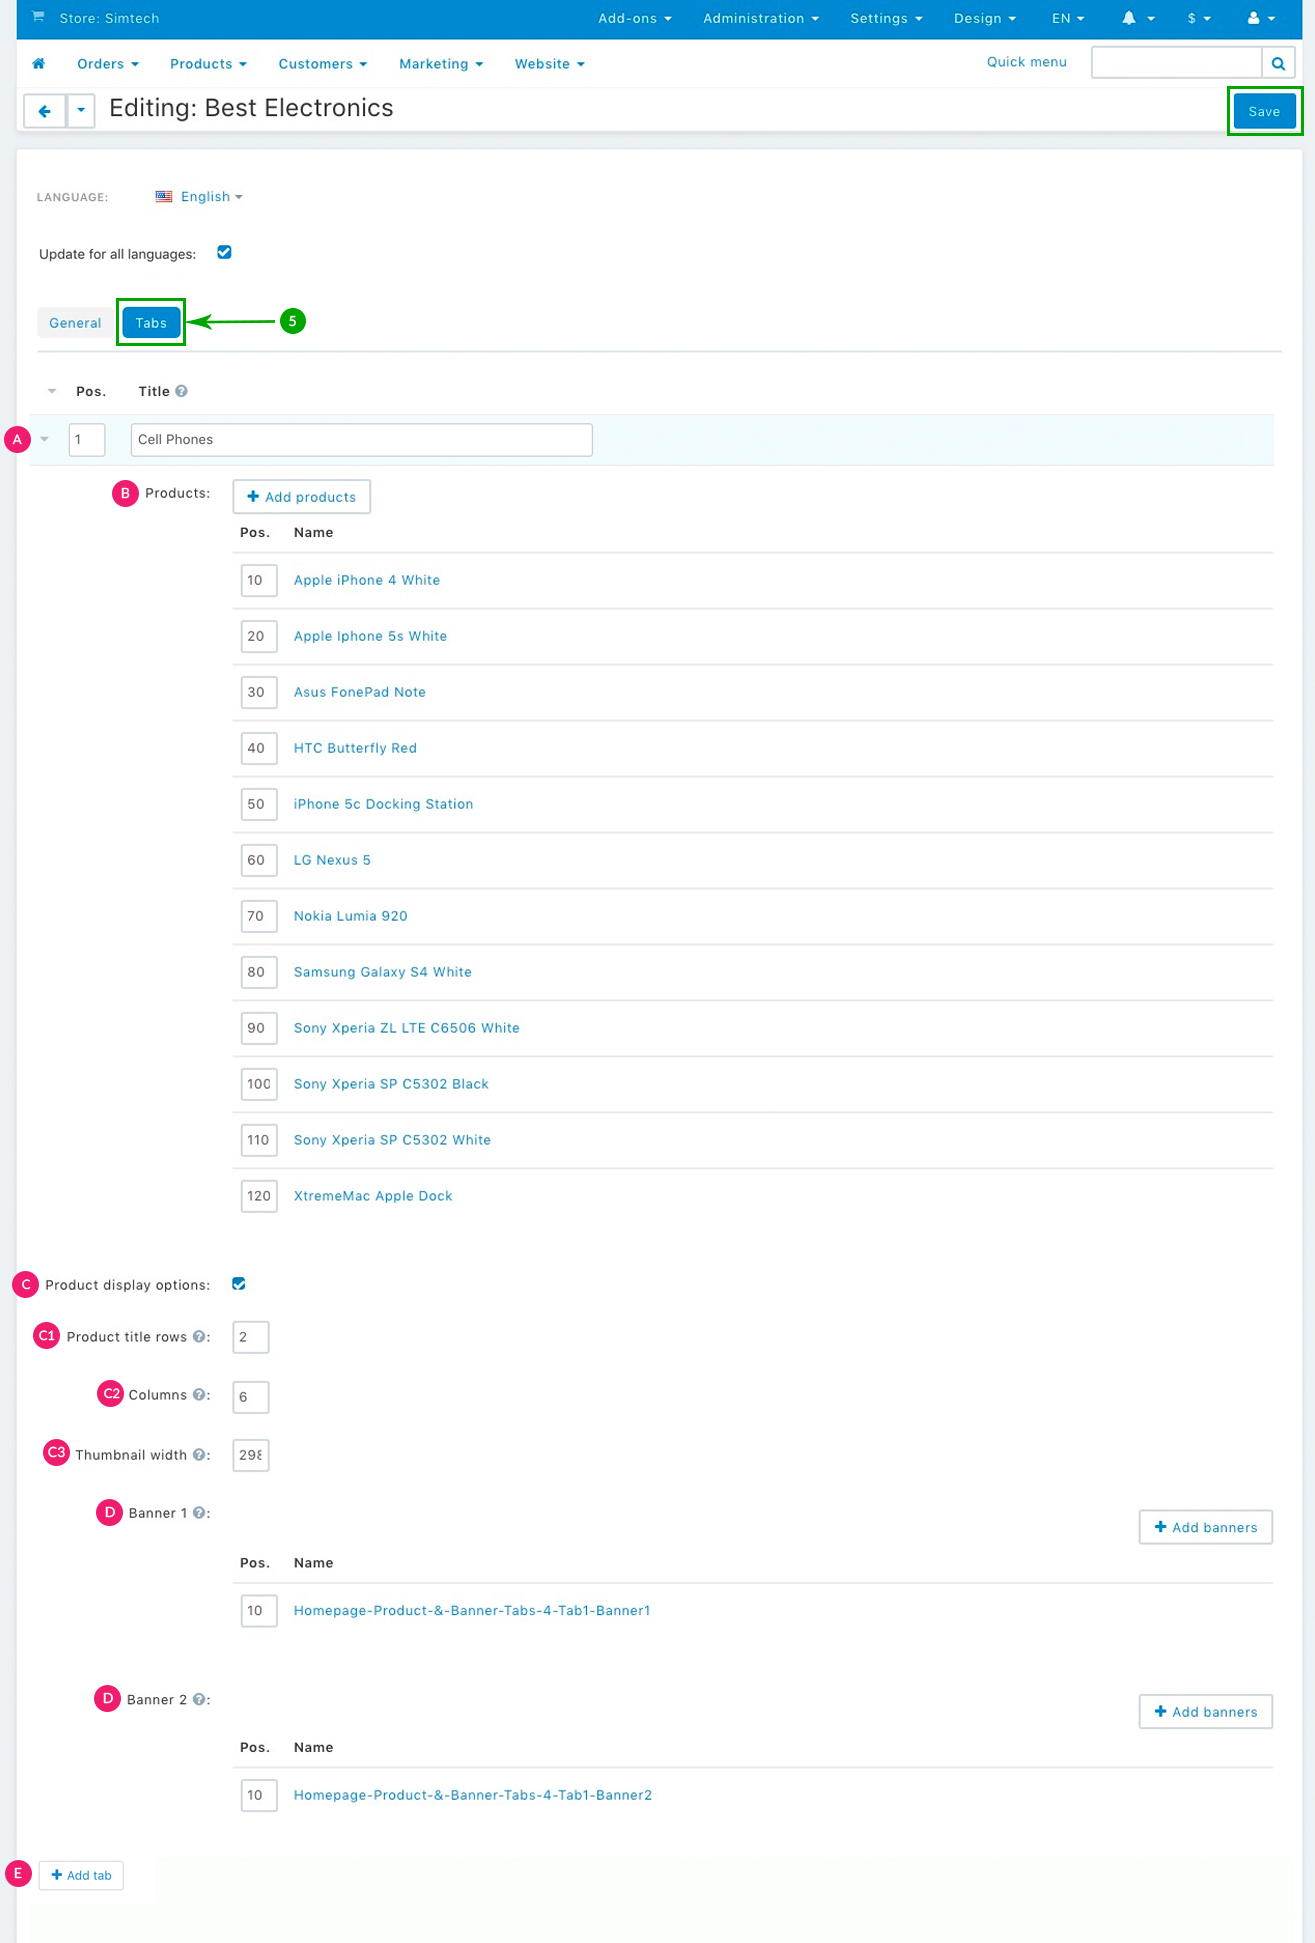
- Step 5
In the newly opned page, under the “Tabs” tab, choose your settings as follows:
- Step 6
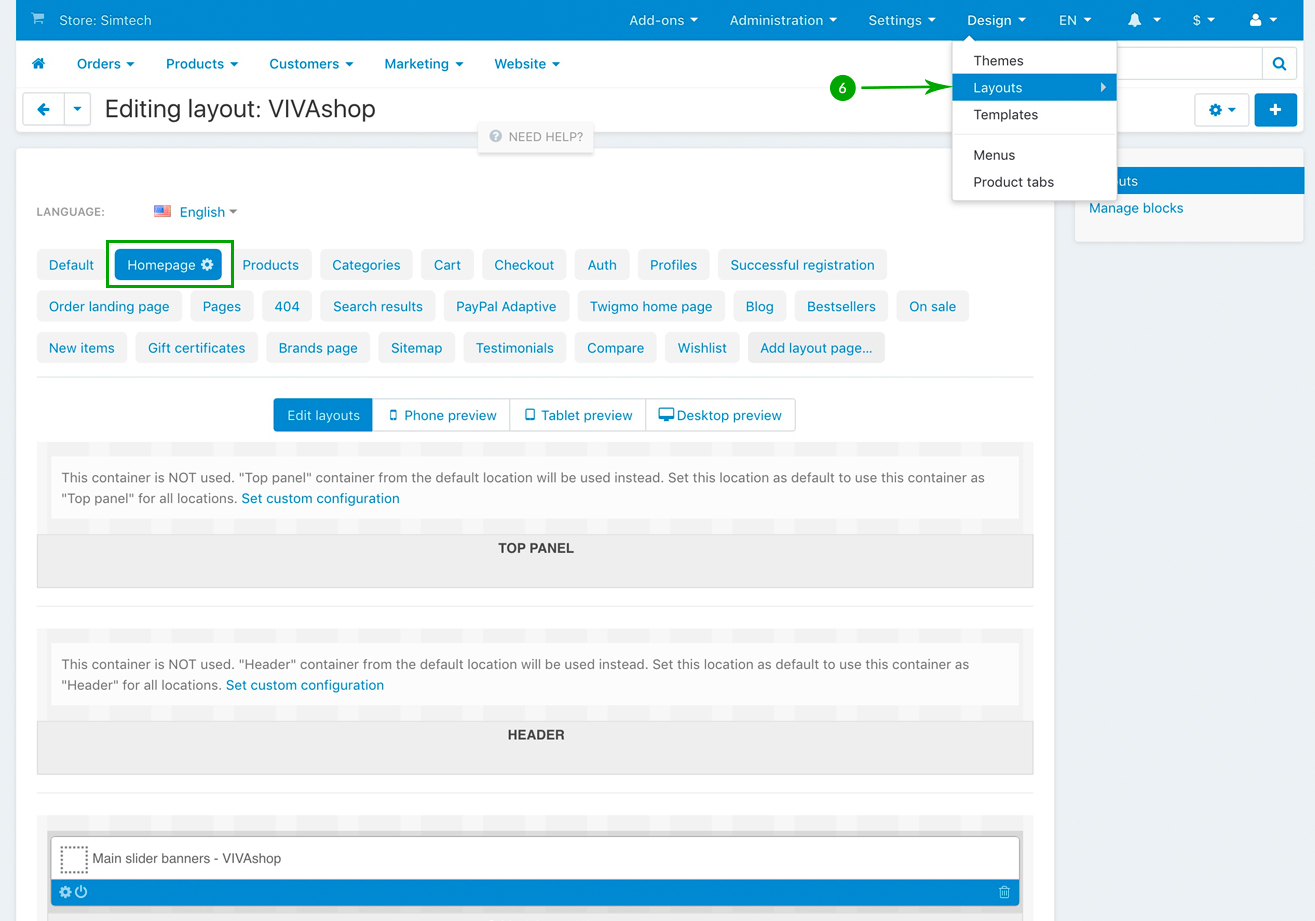
Once you have created your content for the “Featured Product And Banner Tabs”, all you need to do now is to simply allocate this content to their respective blocks. For example, we have placed the ”Best Electronics” block on the homepage, so we need to allocate its content now. So, we need to go to “Design” - “Layouts” and click on the “Homepage” tab.
- Step 7
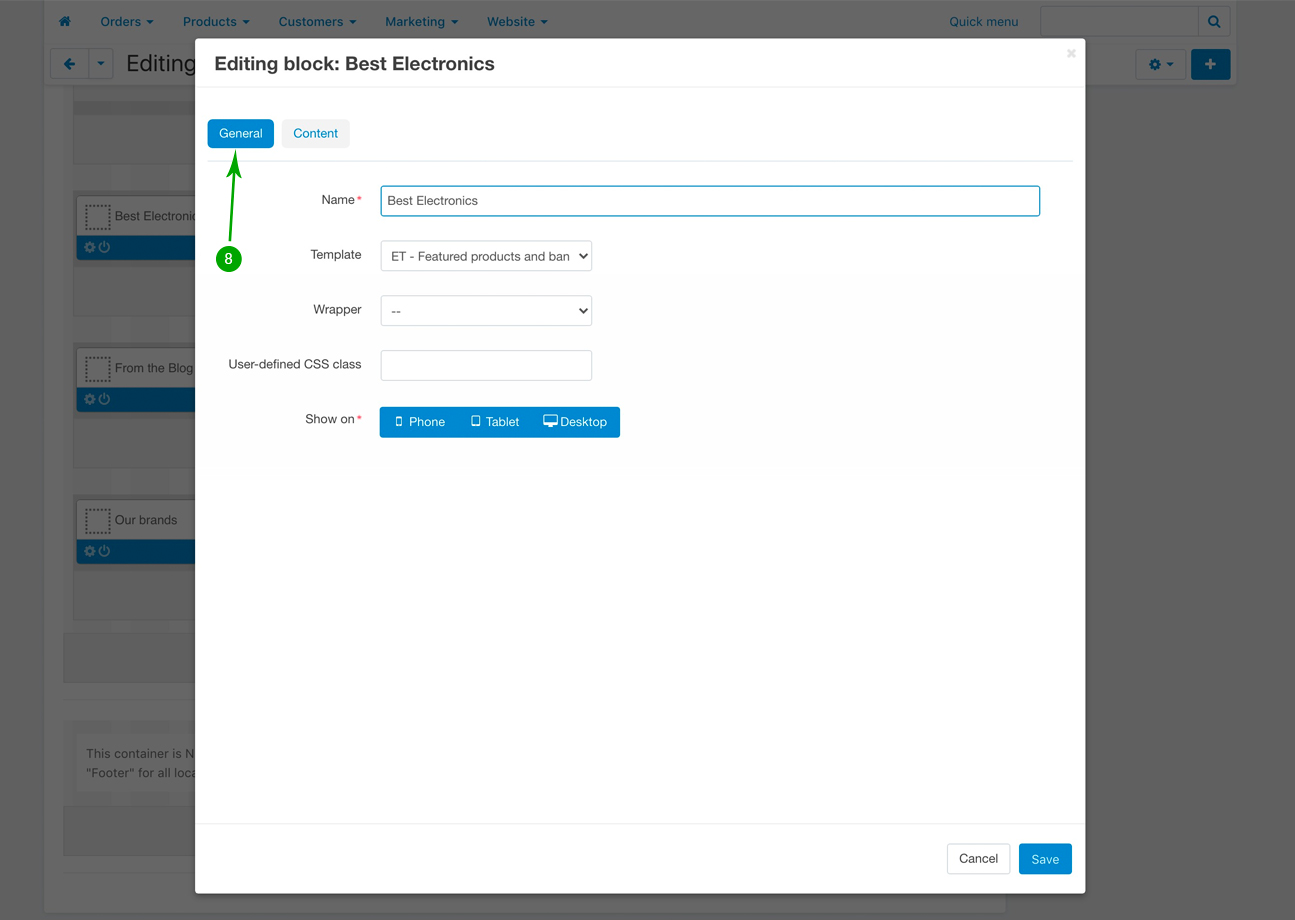
Scroll down the page and, look for the “Best Electronics” block and click on its. “Block options” gear icon
- Step 8
In the newly opened pop-up window, under the “General”, give your block your desired custom name. “Template” should remain “ET - Featured products and banners” .
- Step 9
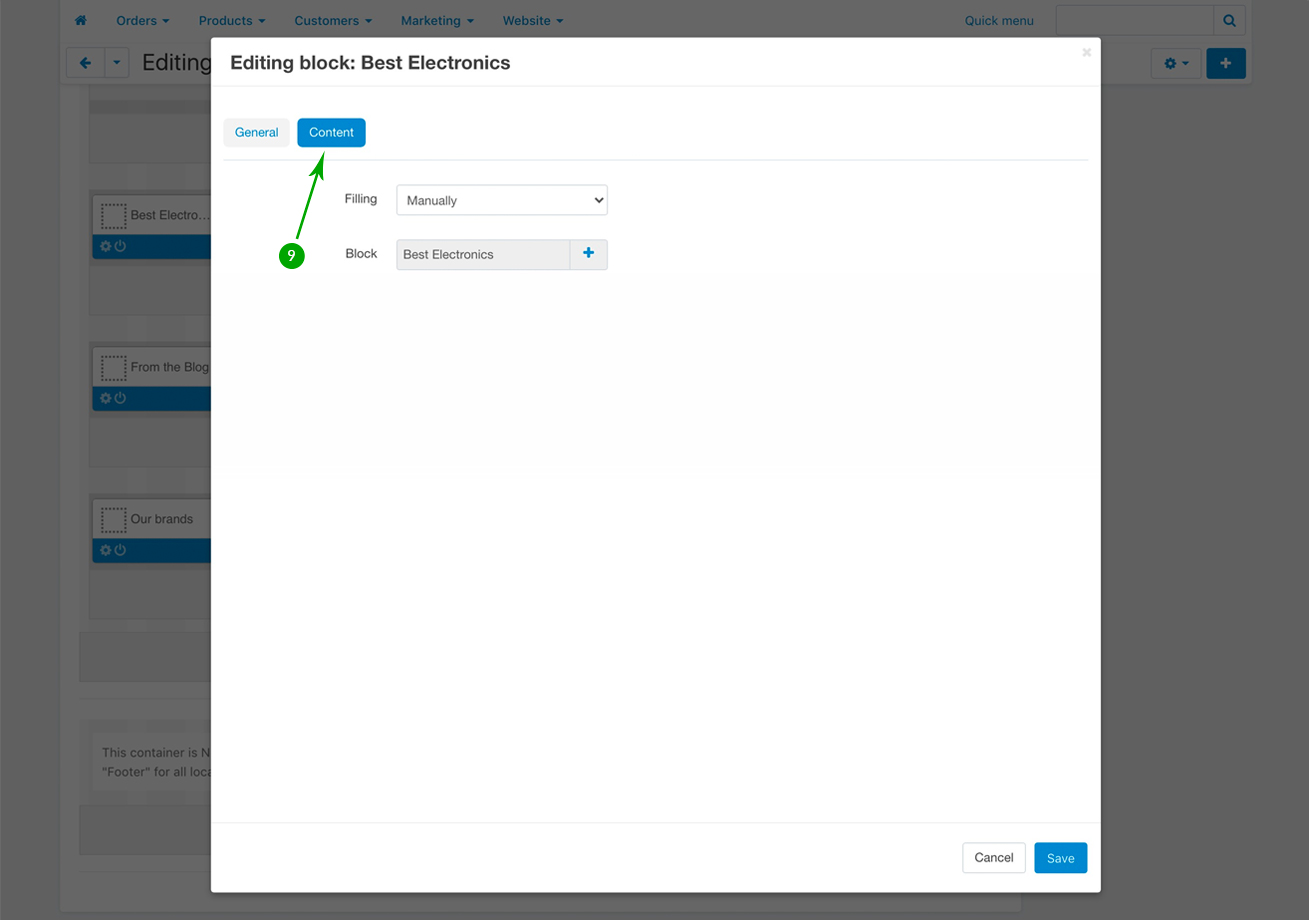
Next, under the “Content” tab, click on the “plus” sign from the ”Block” field, in the new page, choose “Best Electronics” block, then click on the bottom “Save” button
- Step 9
Repeat the above 9 steps in order to create as many “Featured Products And Banner Tabs”, and assign them to their respective blocks