Manually add content: Creating a Blog
The Blog is already created with all of its demo blog posts if you have chosen to install demo data in section “Installing demo data”. If you have not installed demo data, then you will need to create your Blog from scratch. Firstly, we’ll create the Blog root page (main page), then we’ll create blog posts. So let’s go ahead:
Creating the Blog main page
Please follow the steps below in order to learn how to create the main page of your Blog:
- Step 1
In your admin panel, go to “Website” - “Blog”
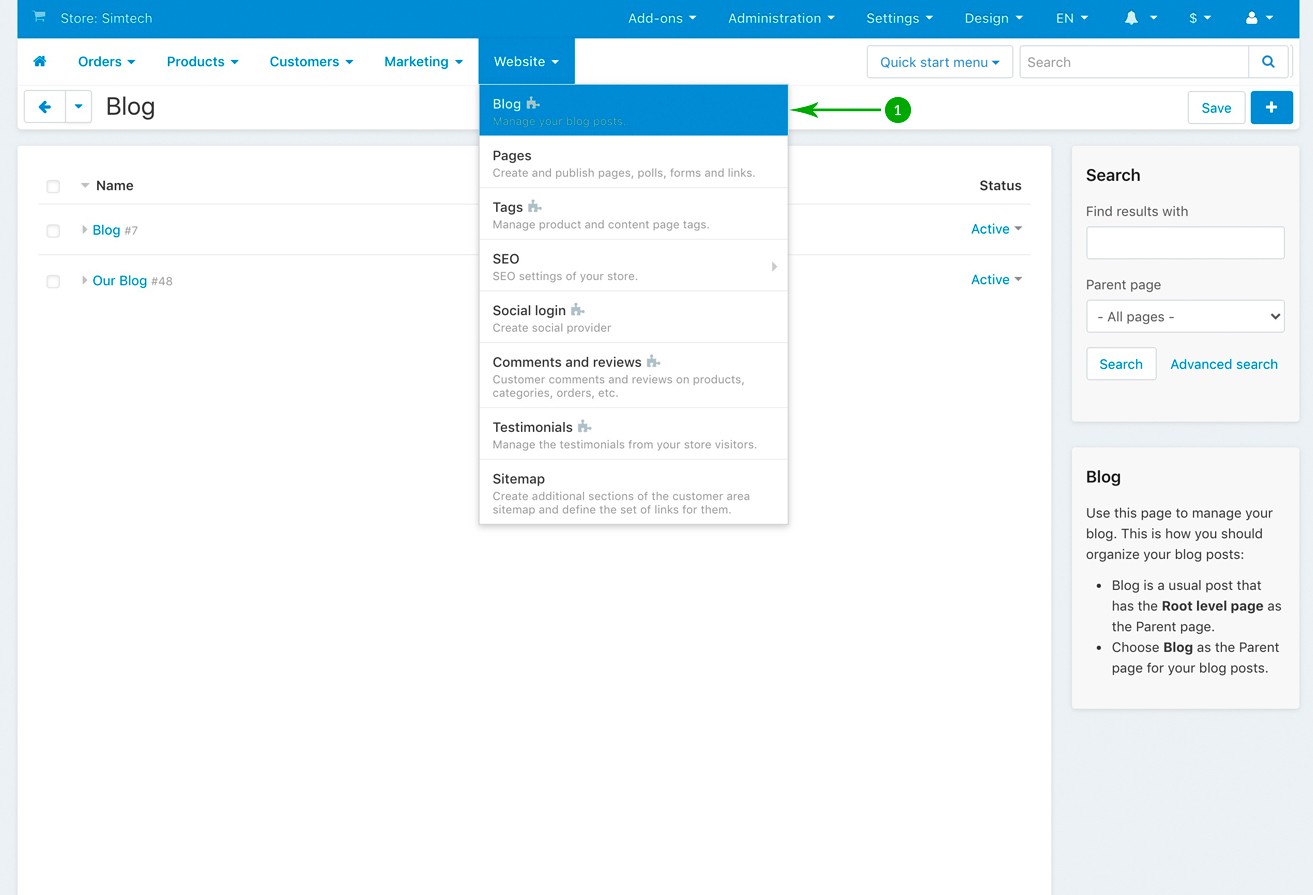
- Step 2
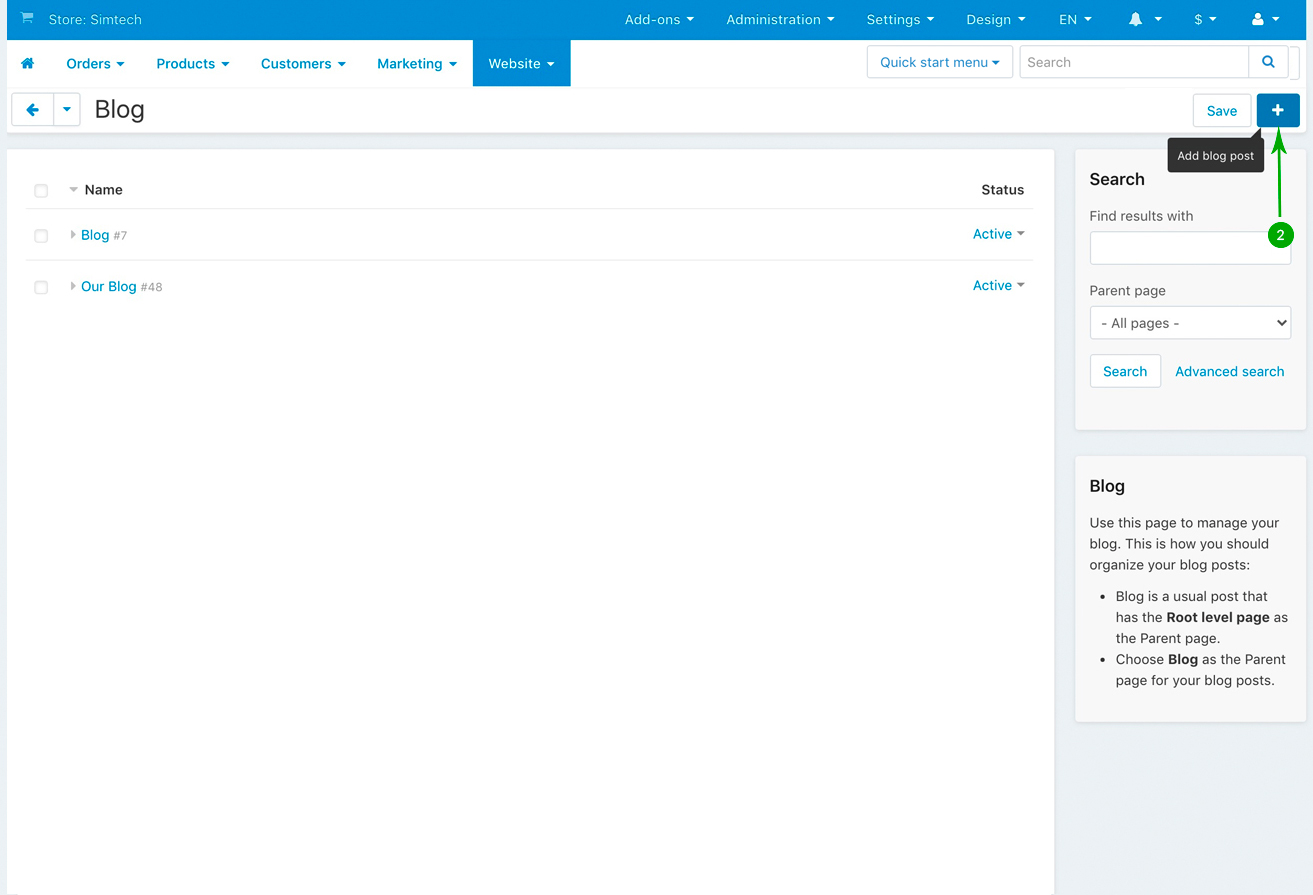
Click on the the right blue “Plus” button to “Add blog post”
- Step 3
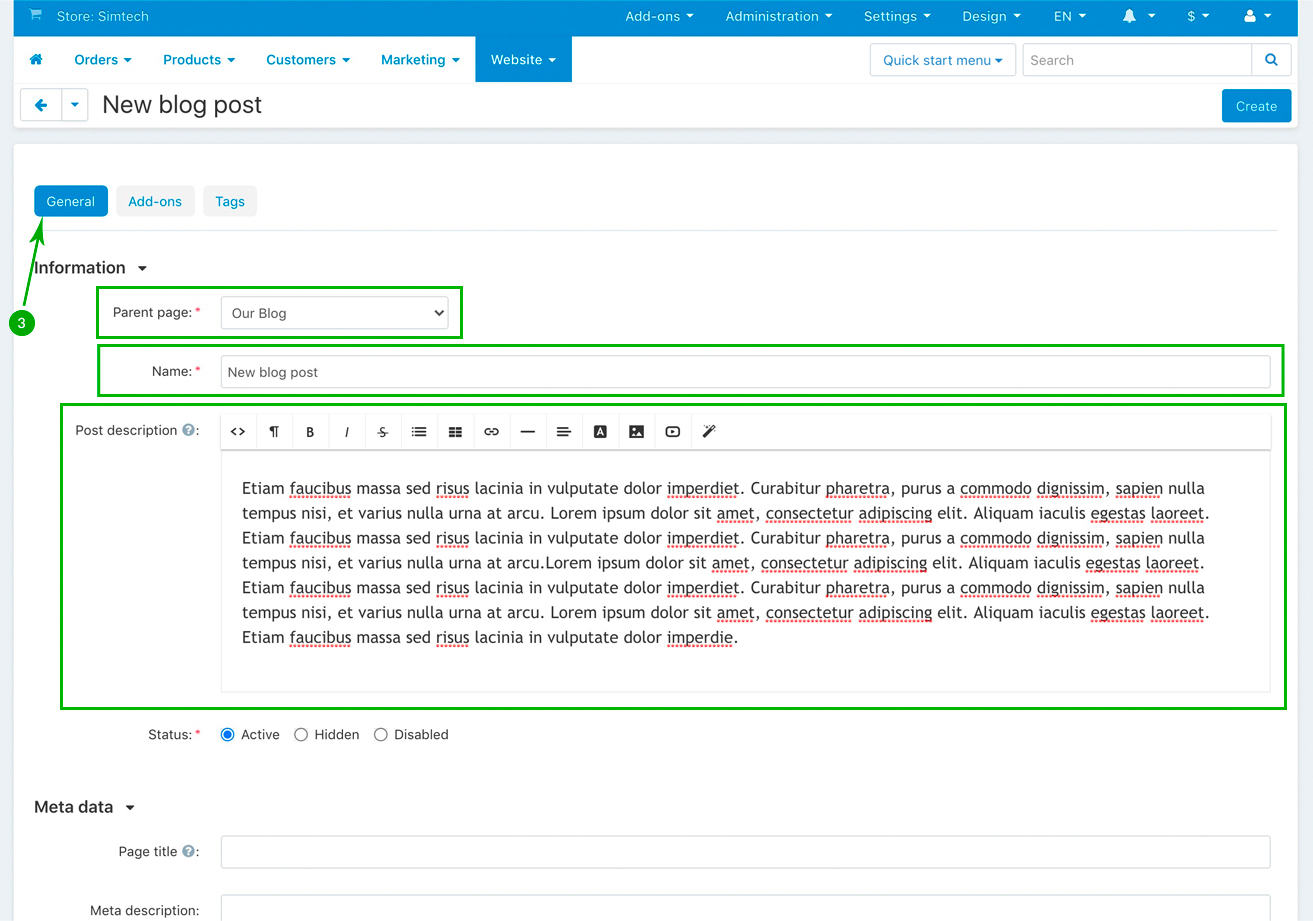
Under the “General” tab set the “Parent page” to “Root level page”, then add the “Name” as per your wishes, as well as add your own “Post description”. The “Post description” will be displayed on the Blog homepage right above the listing of your posts. Click the top right blue “Create” button when you’re done

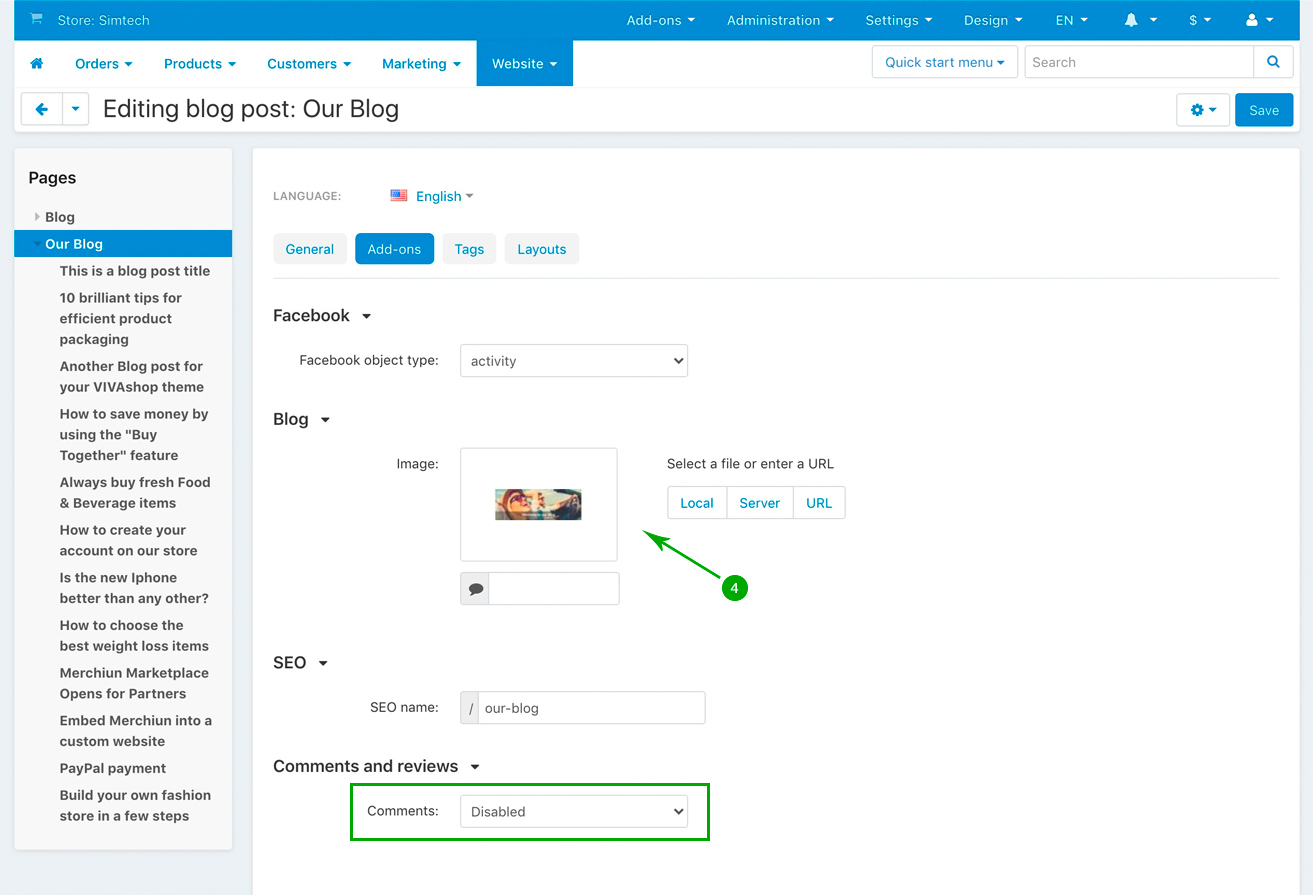
- Step 4
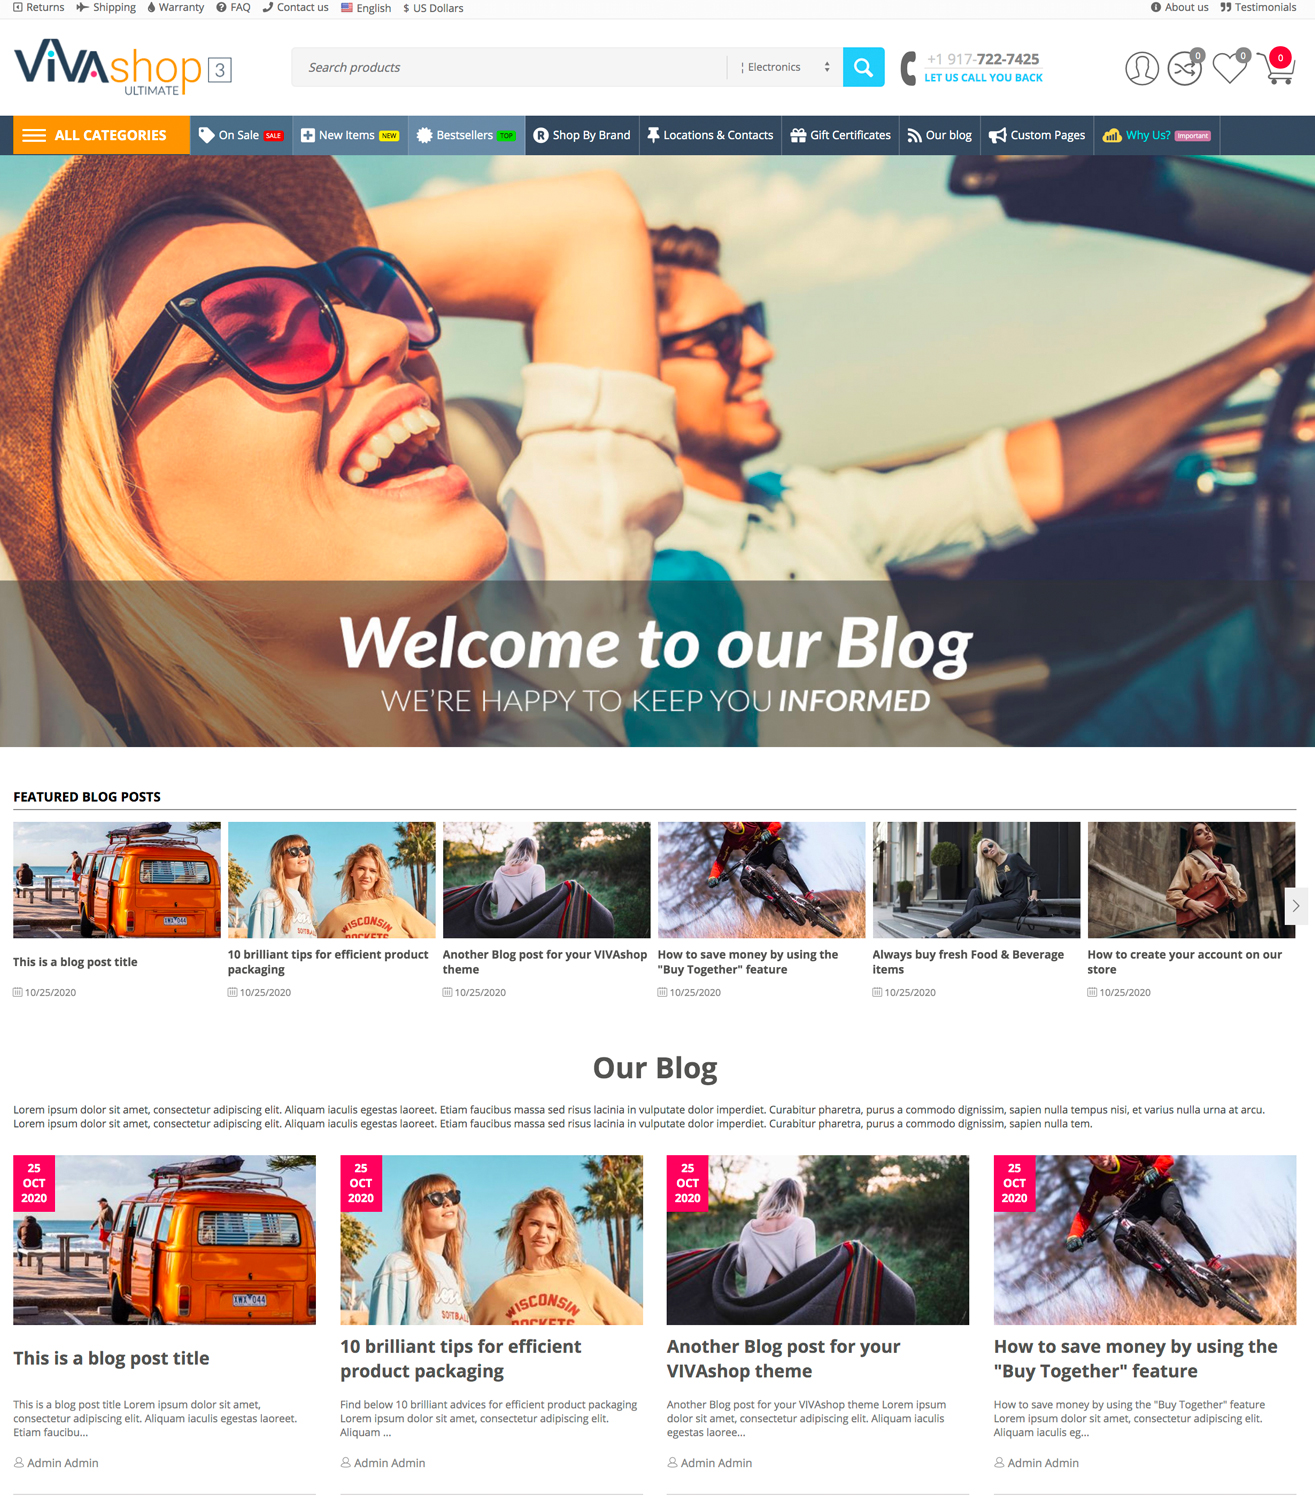
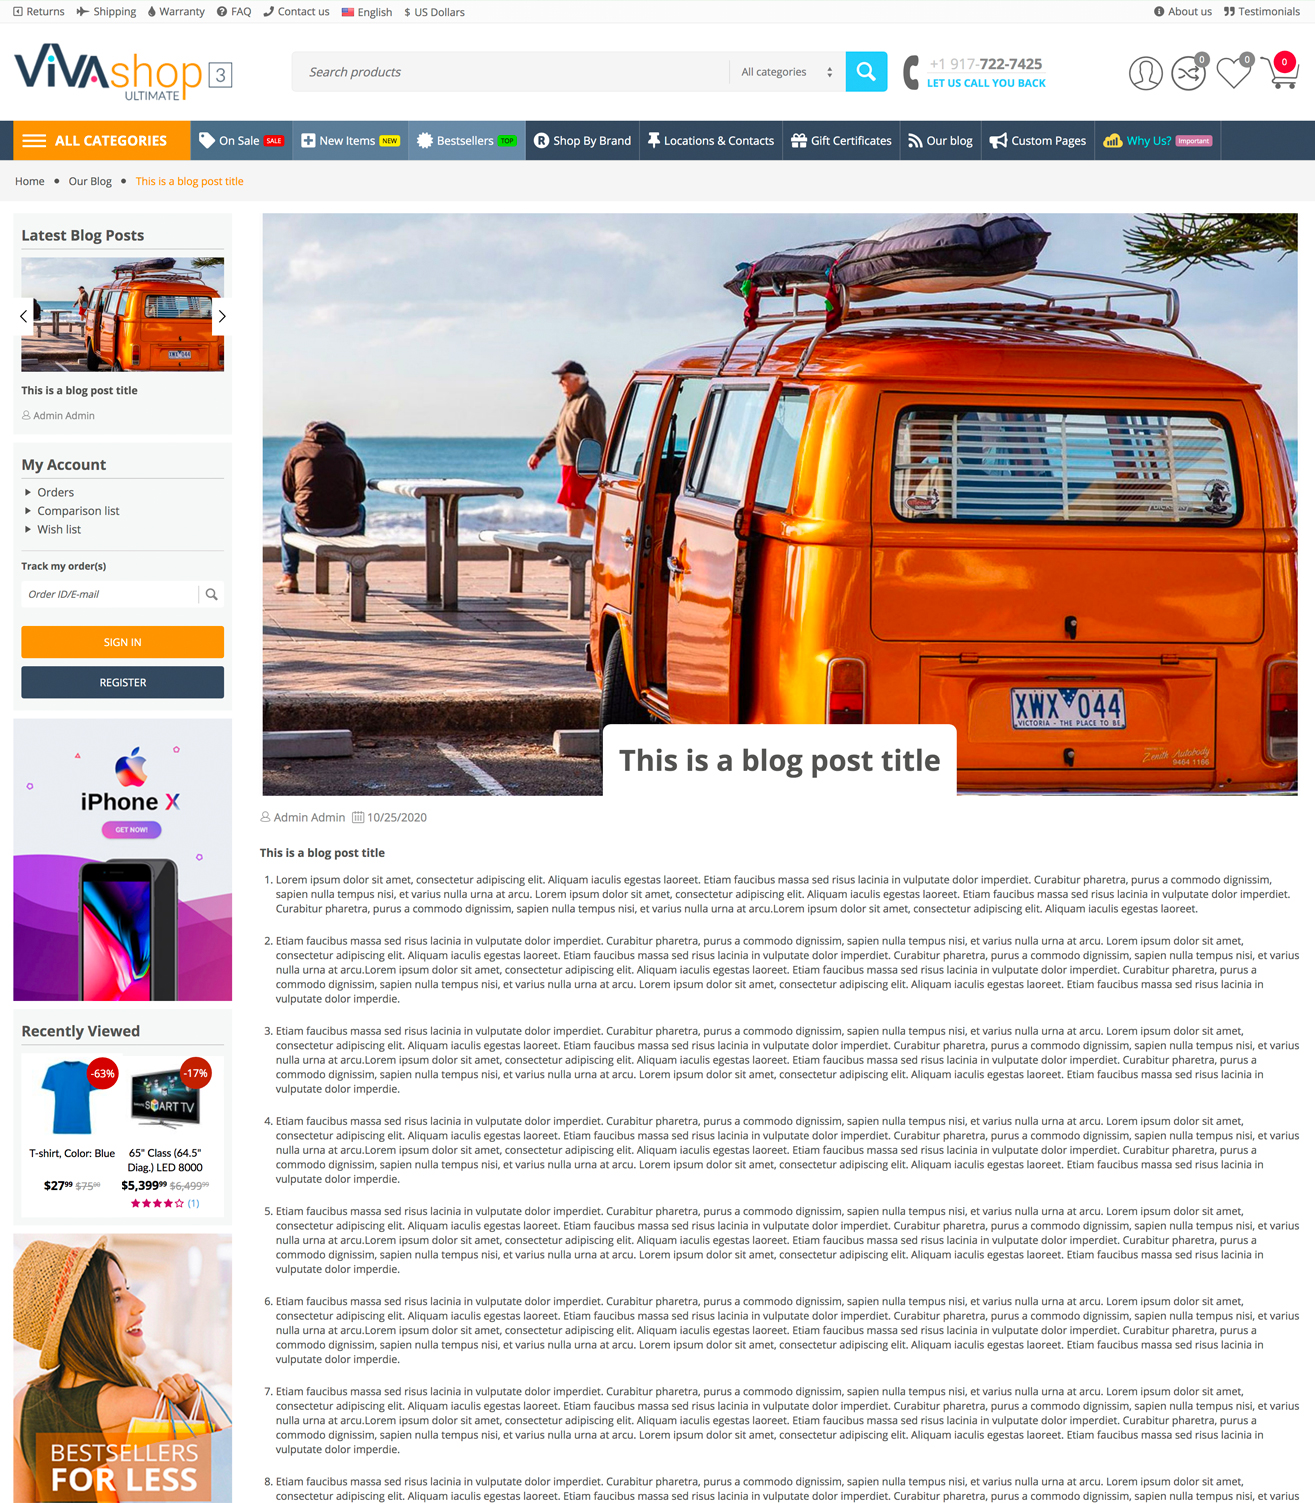
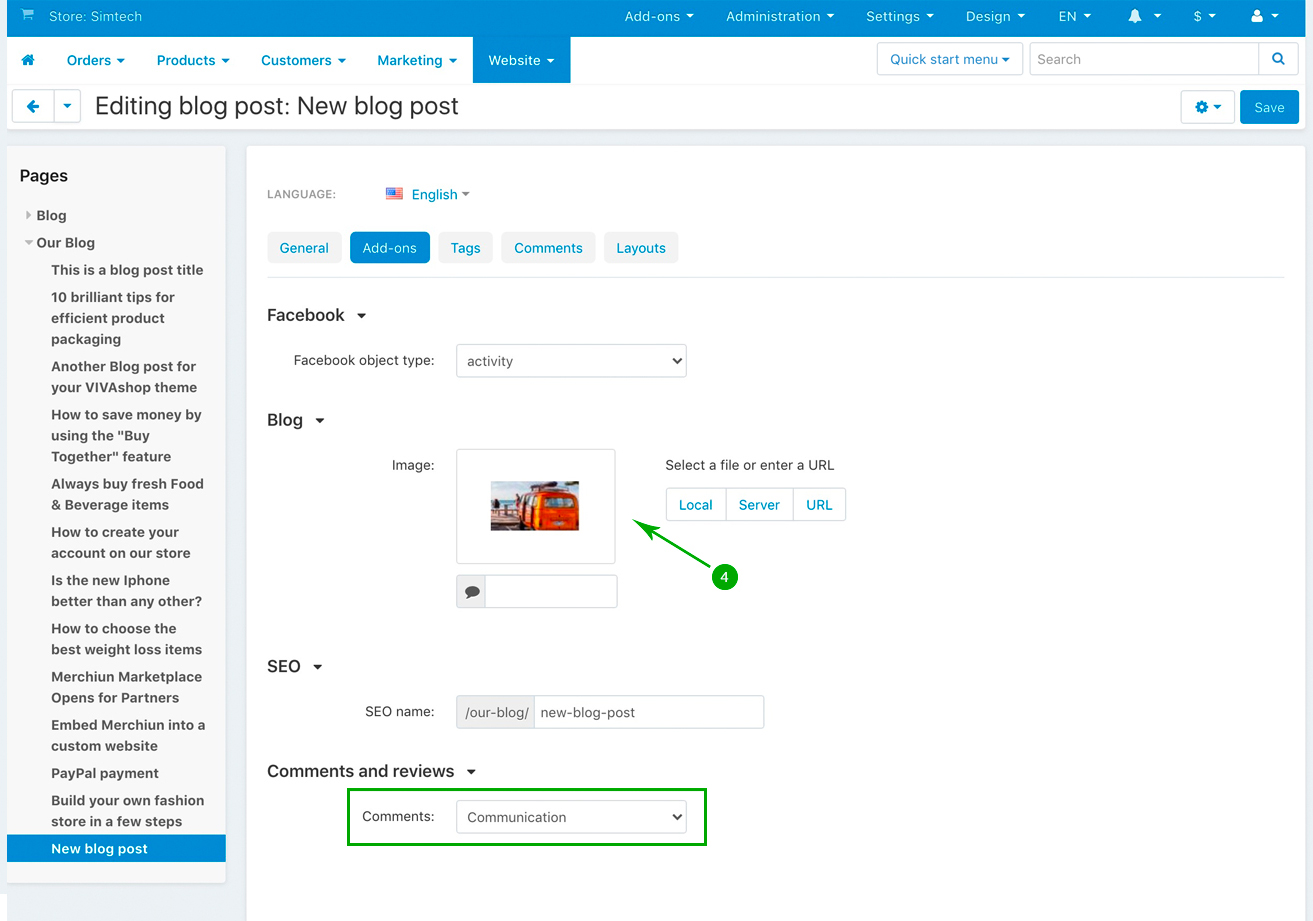
Next, under the “Add-ons” tab, add your blog “Image”. This image will be displayed on the top of the Blog homepage, just like a full width main banner. The recommended width for this image is 2048px, and the height size should be whatever you like (on our demo site the image height is 739px). “Comments” should be disabled for the Blog homepage, so choose this option under the “Comments and reviews” section.
- Step 5
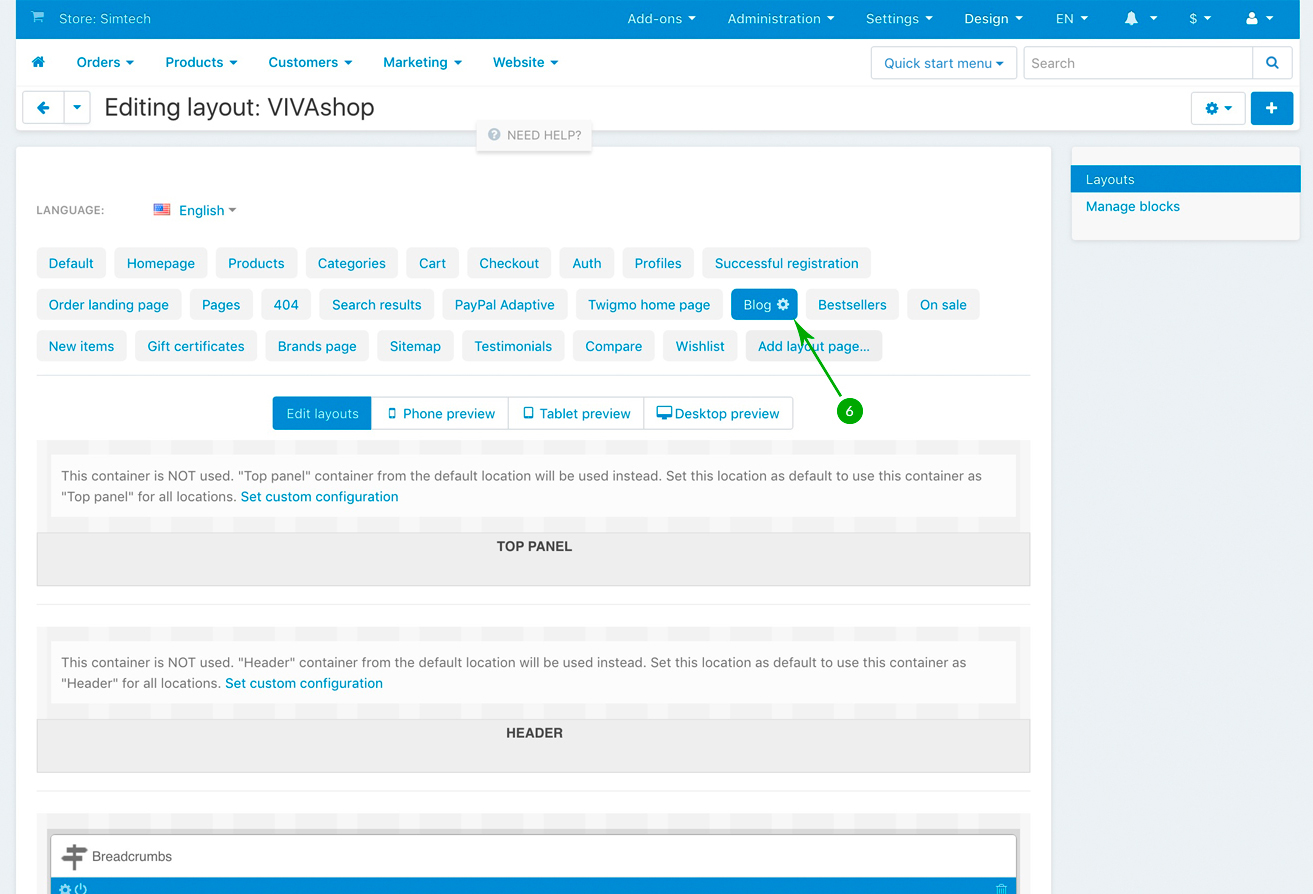
Further, the Blog main page has some special settings, so we’ll have to disable some blocks and enable one block. Therefore, click on the “Layouts” tab
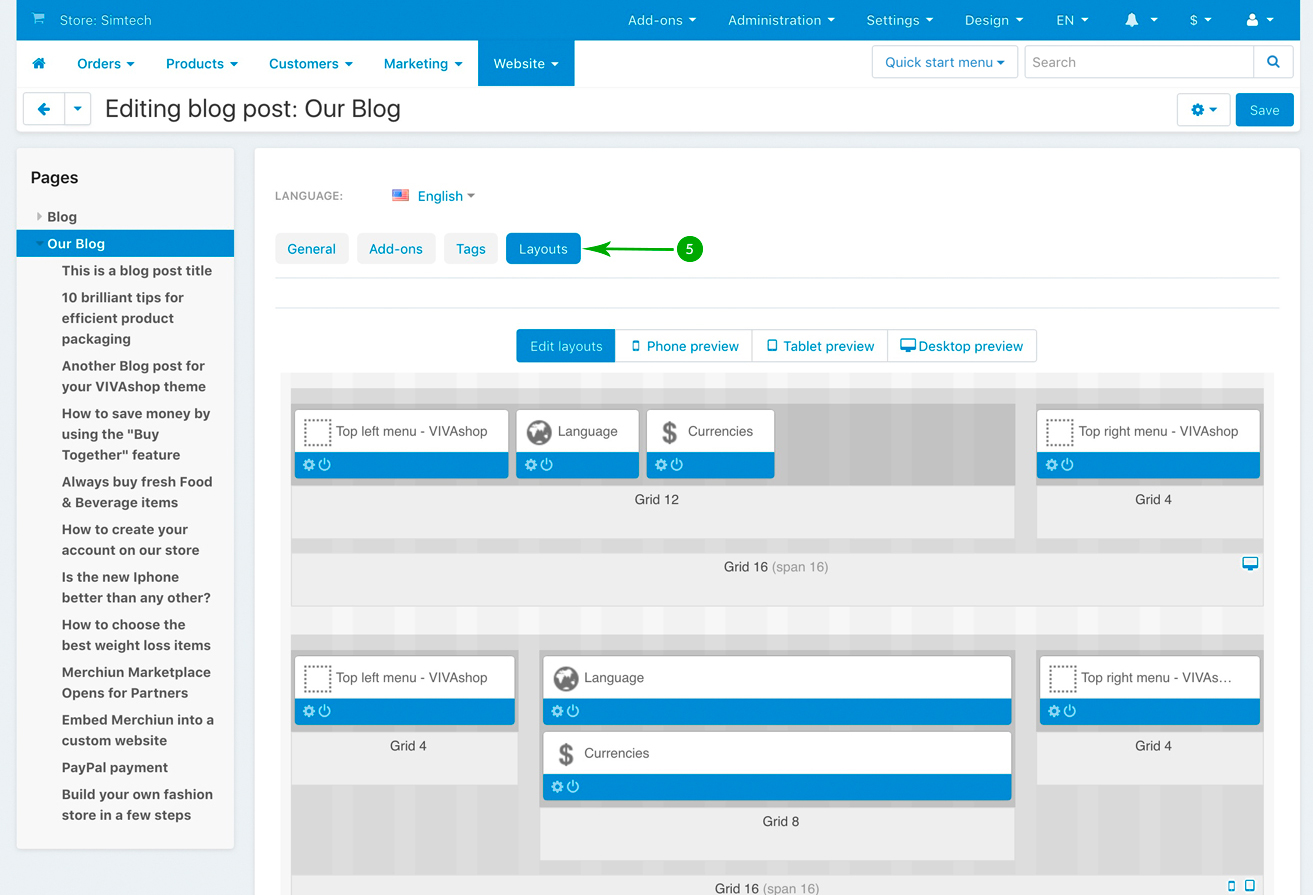
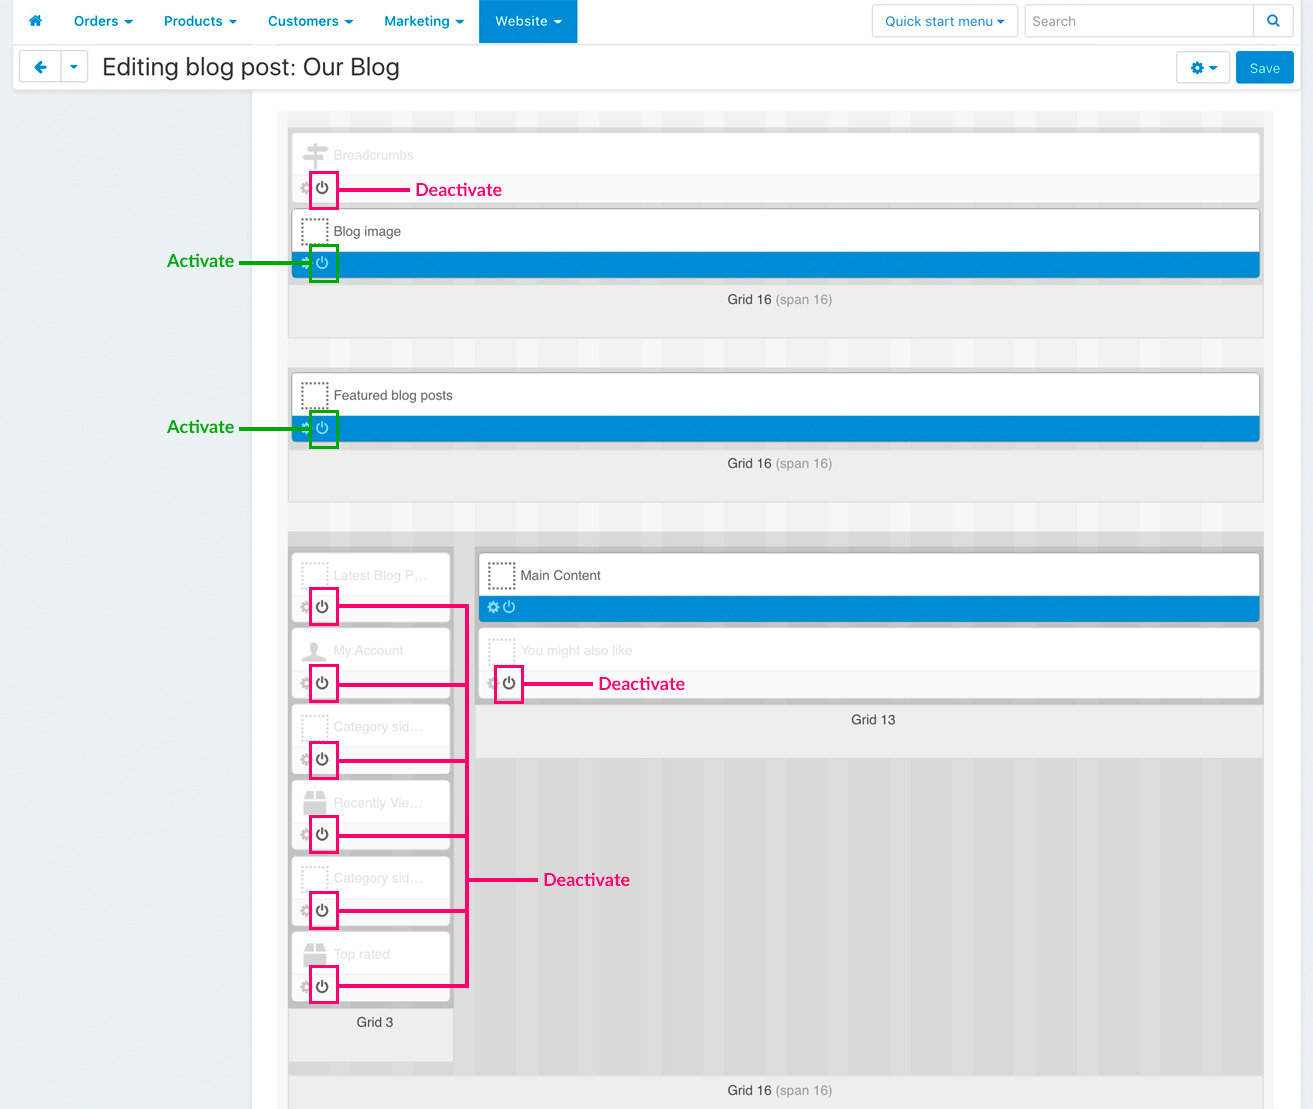
- Step 6
Further, the Blog main page has some special settings, so we’ll have to disable some blocks and enable one block. Therefore, under the “Layouts” tab activate the “Blog image” block and the “Featured blog posts”, and deactivate the following blocks: “Breadcrumbs”, “Latest Blog Posts”, “My Account”, “Category side banner 1 - VIVAshop”, “Recently Viewed”, “Category side banner 2 - VIVAshop”, “Top rated” and “You might also like”
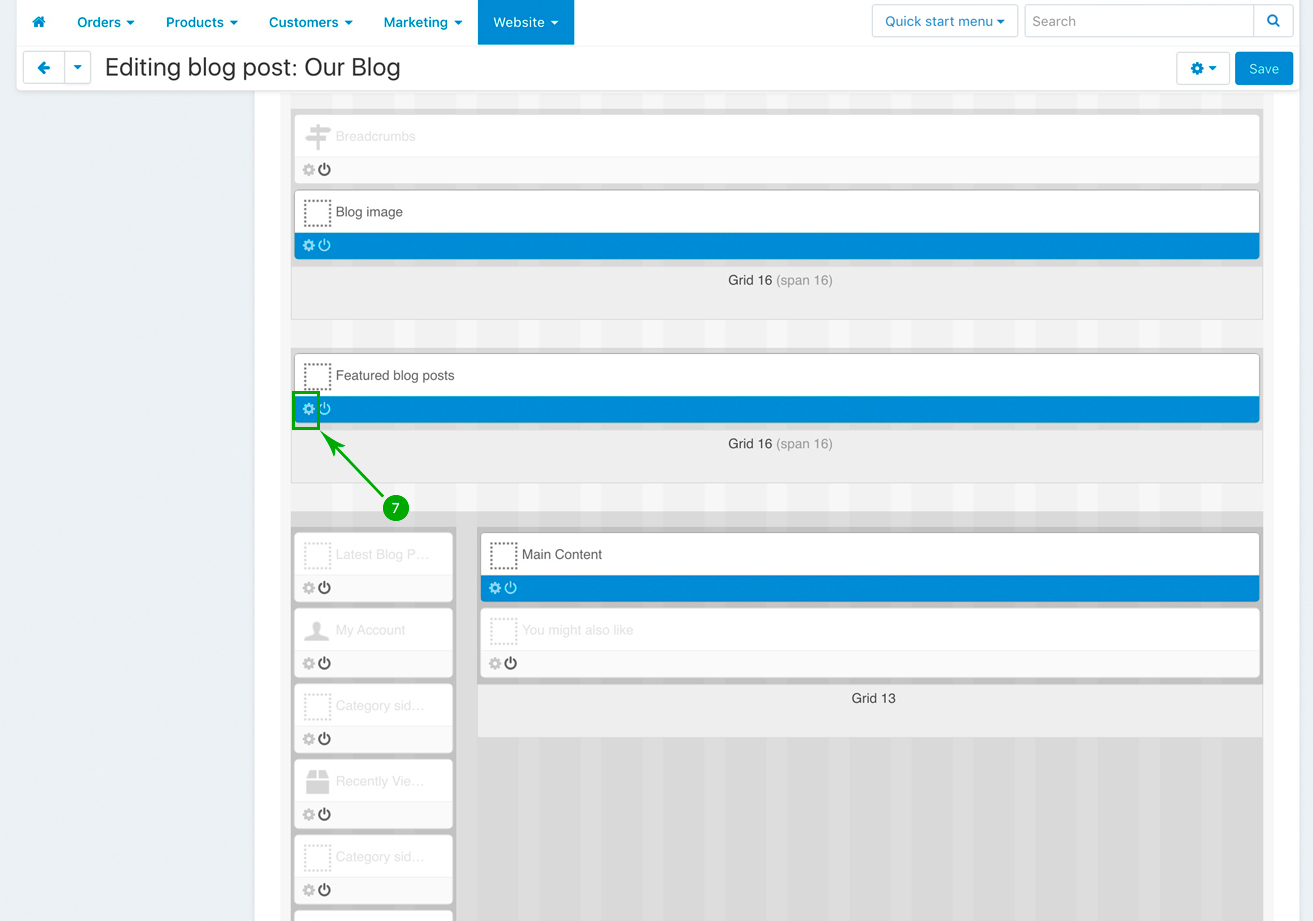
- Step 7
On the Blog main page, right below the main image, we have included a scroller where you can feature any block posts you want. So under the “Layouts” tab click on the block options of the “Featured Blog Posts” block so you may add your featured blog posts
- Step 8
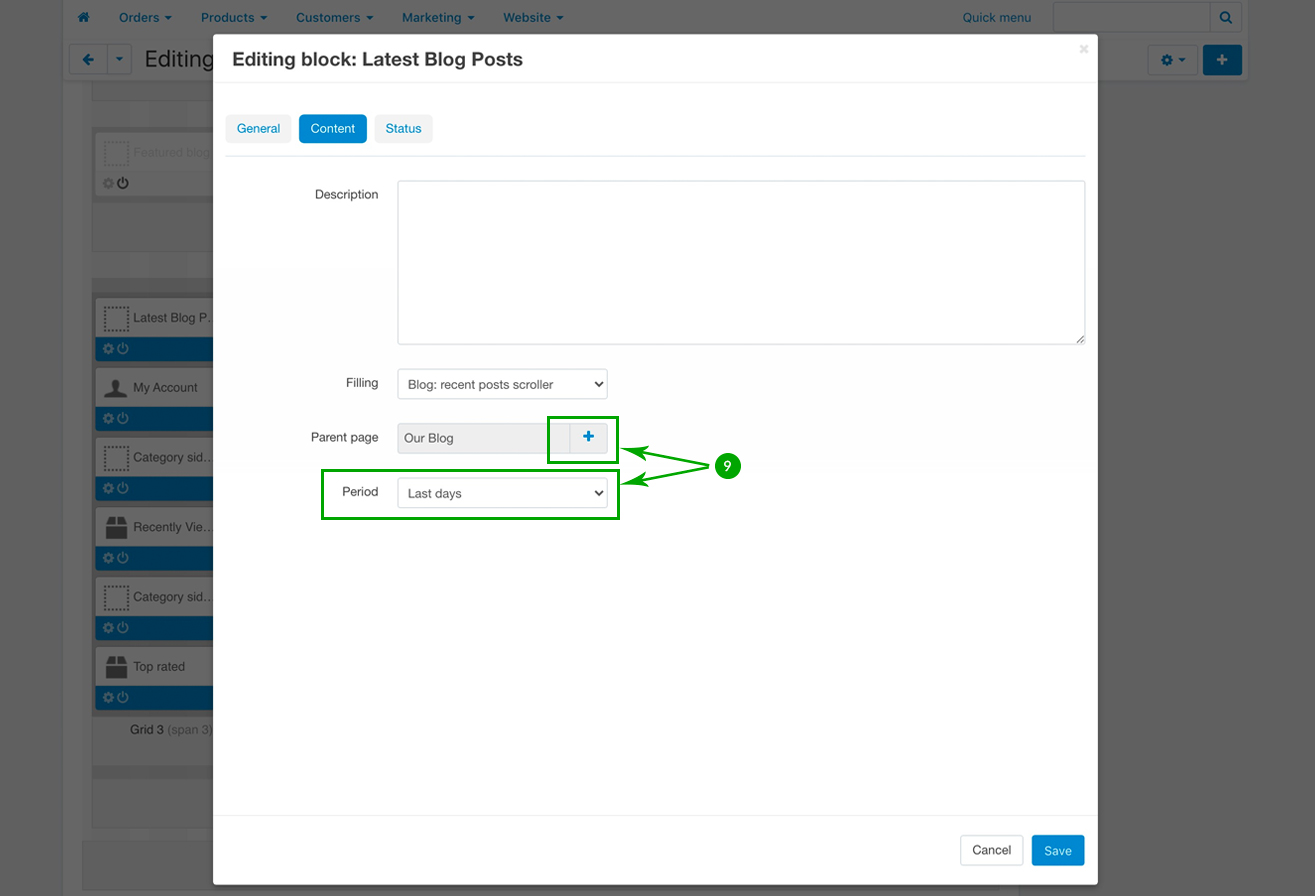
In the newly opened pop-up window, under the “Content” tab, click on the “Plus” sign in order to select the “Parent page” for your featured blog posts scroller.
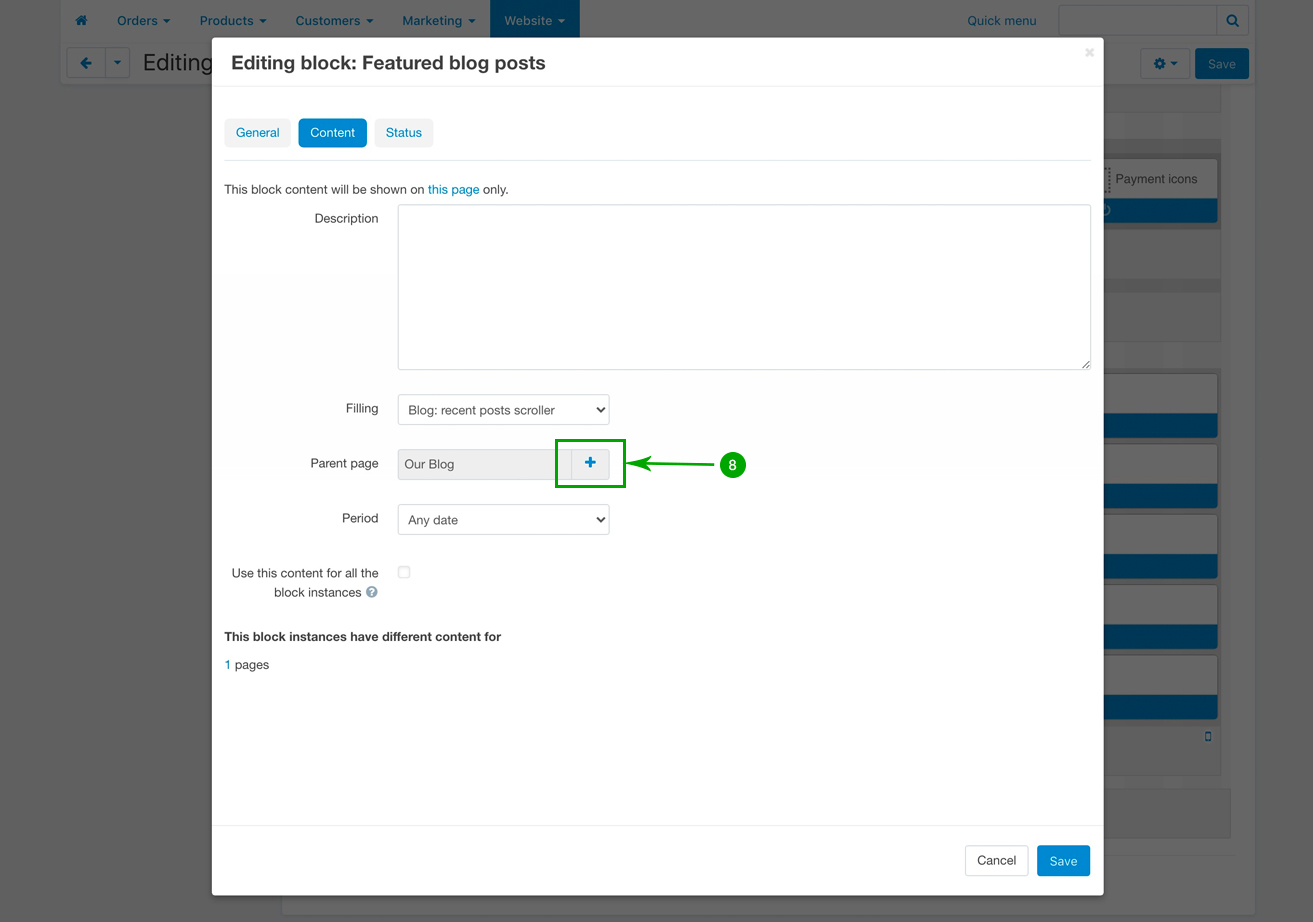
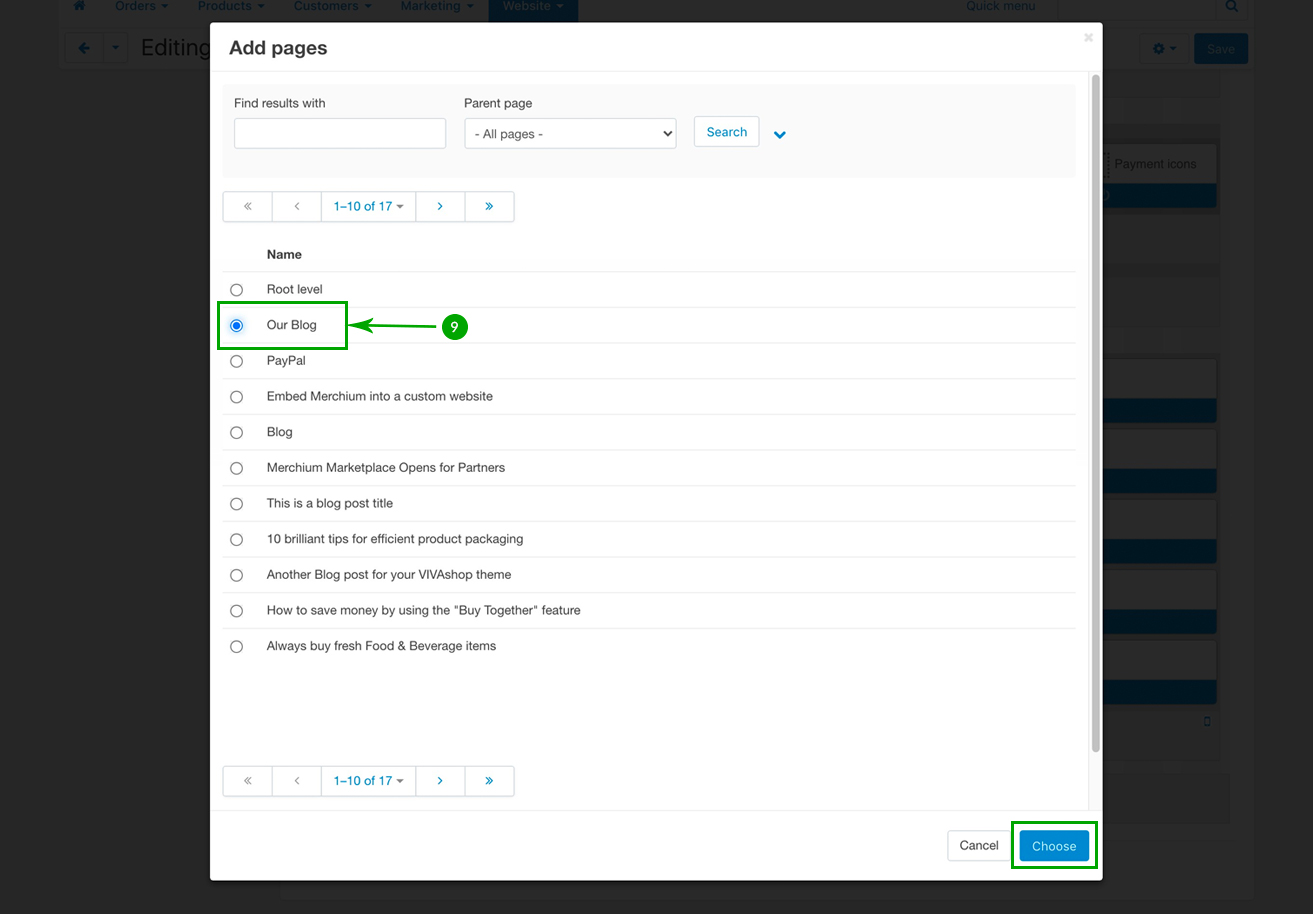
- Step 9
For example purposes, we have chosen the “Our Blog” root page that we have created, but you can just simply create another root page with blog posts, and select that respective page as “Parent page” here. So, choose your “Parent page” and click on the bottom right blue “ Choose” button
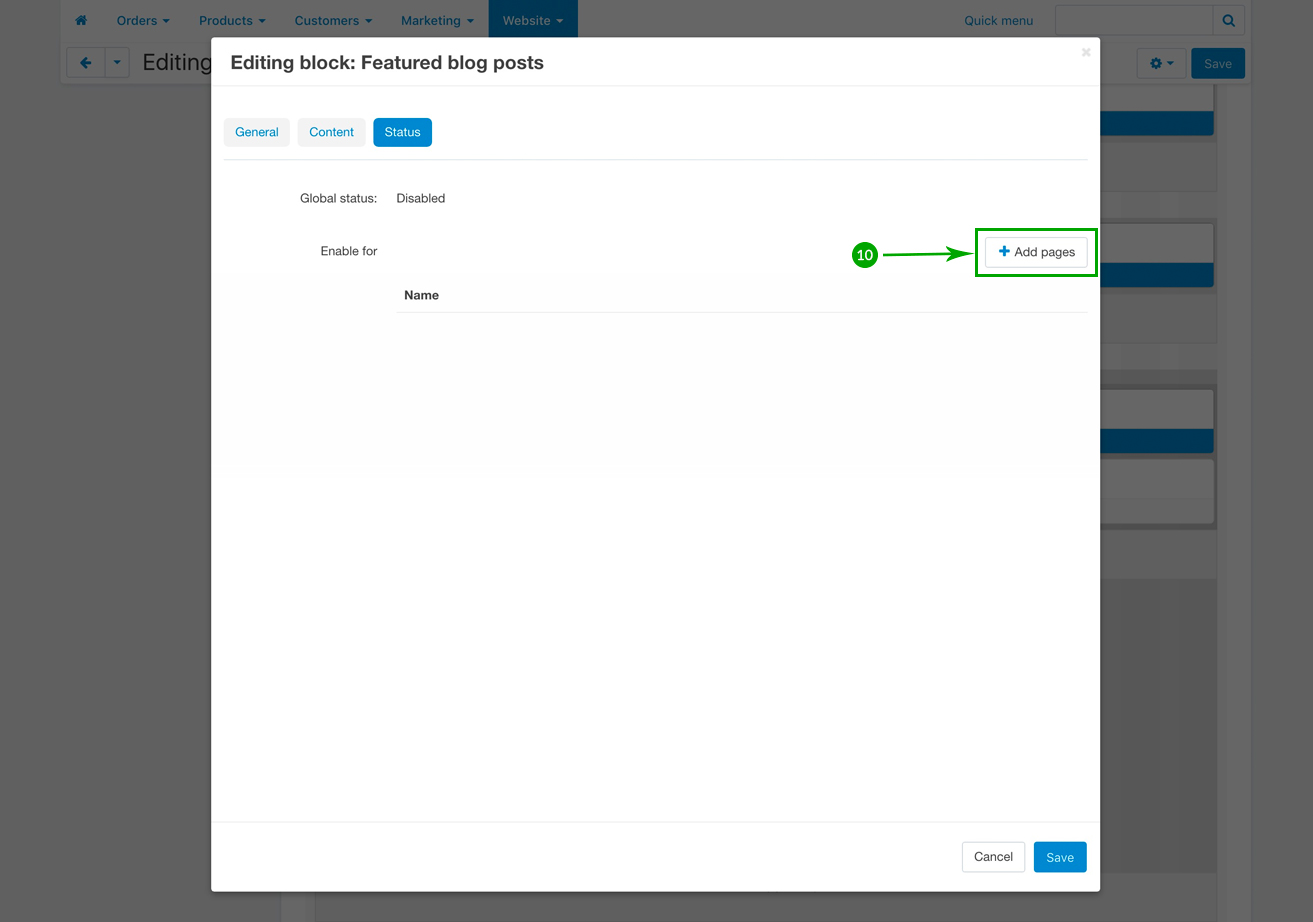
- Step 10
Next, under the “Status” tab, click on the right side “Add pages” button, in order to select the page where you want the “Featured blog posts” scroller to appear. In our case, we need to display the “Featured blog posts” scroller on the main page on “Our Blog”
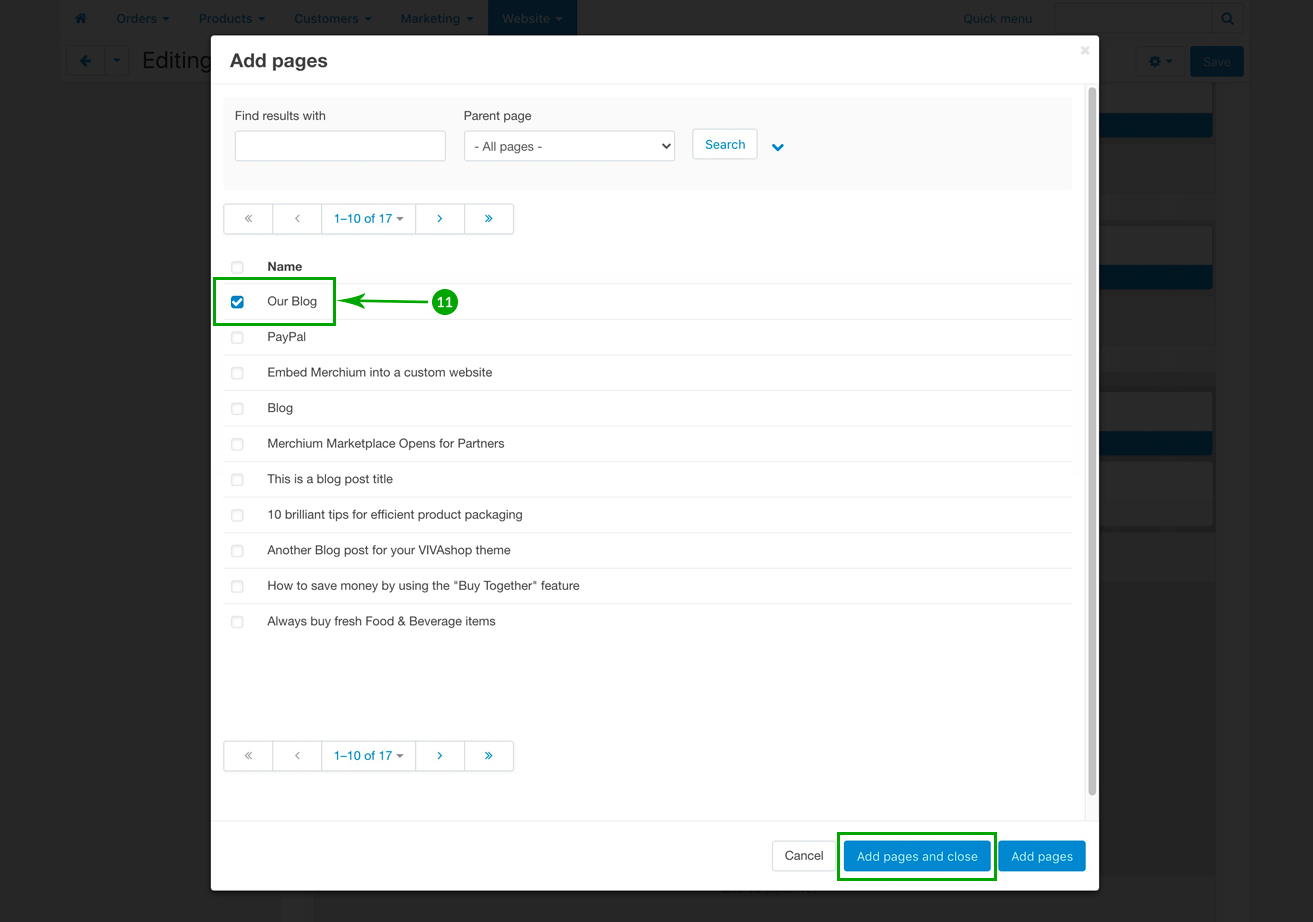
- Step 11
In our case, we need to display the “Featured blog posts” scroller on the main page of “Our Blog”. So select “Our Blog”, then click on the bottom blue “Add pages and close” button. Then, when this page closes, click on the bottom blue “Save” button
Creating the Blog posts
On the “Blog Post” page, on the left sidebar, we have created a “Latest Blog Posts” scroller so you may emphasize the latest posts on your Blog. Please follow the steps below in order to learn how to create blog posts, as well as how to add your latest blog posts in the “Latest Blog Posts” scroller from sidebar of the blog post page:
- Step 1
In your admin panel, go to “Website” - “Blog”
- Step 2
Click on the the right blue “Plus” button to “Add blog post”
- Step 3
Under the “General” tab set the “Parent page” to “Our Blog”, then add the “Name” as per your wishes, as well as add your own “Post description”. Click the top right blue “Create” button when you’re done
- Step 4
Next, under the “Add-ons” tab, add your blog “Image”. This image will be displayed on the top of the blog post page. The recommended width for this image is 1287px and the height size should be whatever you like (on our demo site the image height is 724px). Then choose your option for “Comments” under the “Comments and reviews” section.
- Step 5
Repeat the above 4 steps in order to create as many blog posts as you want. When you’re done, go ahead and add the latest blog posts under the “Latest Blog Posts” on the sidebar of the blog post pages. Therefore, navigate to “Design” - “Layouts”

- Step 6
Click on the “Blog” tab
- Step 7
Scroll down and look for the “Latest Blog Posts” block, and click on the “Block options” of this block
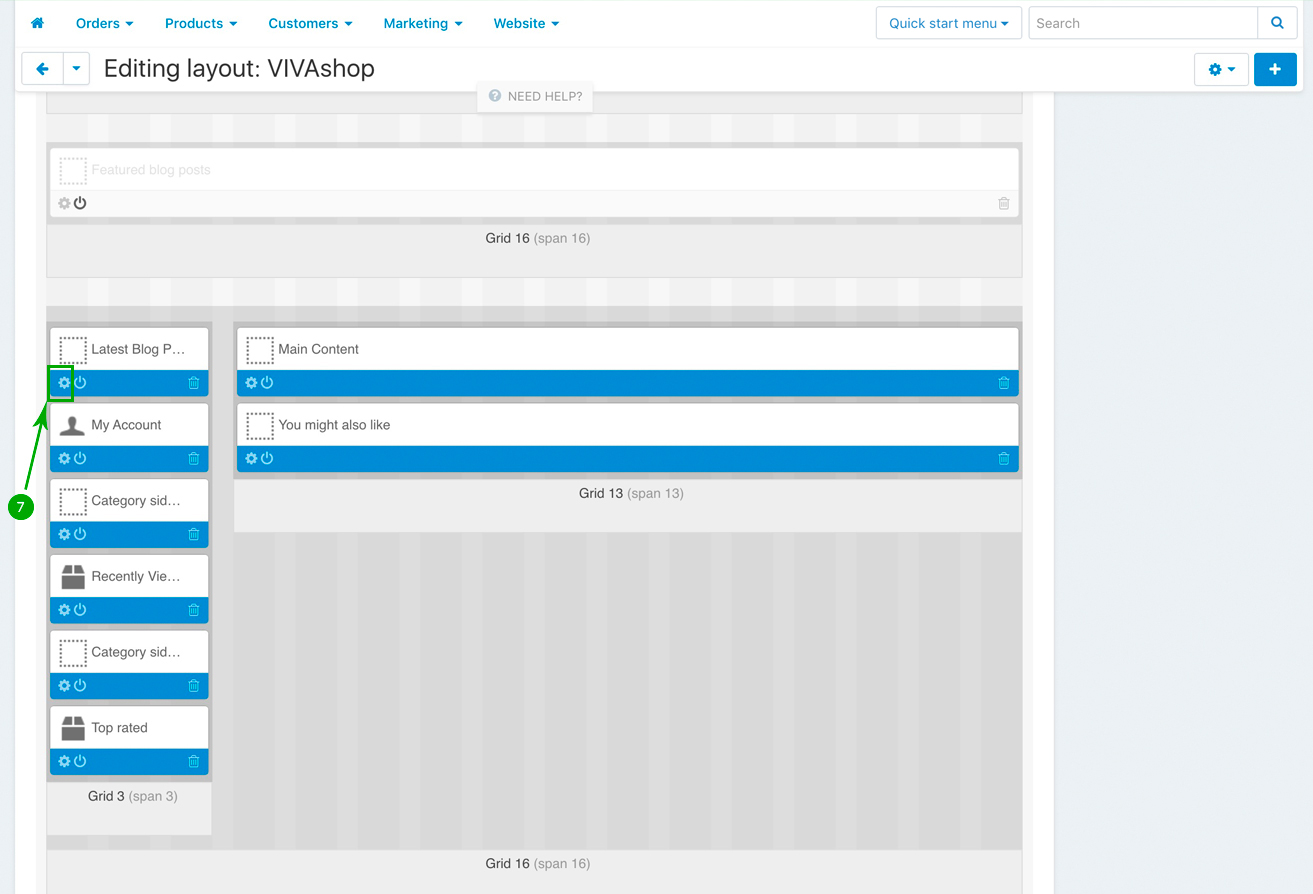
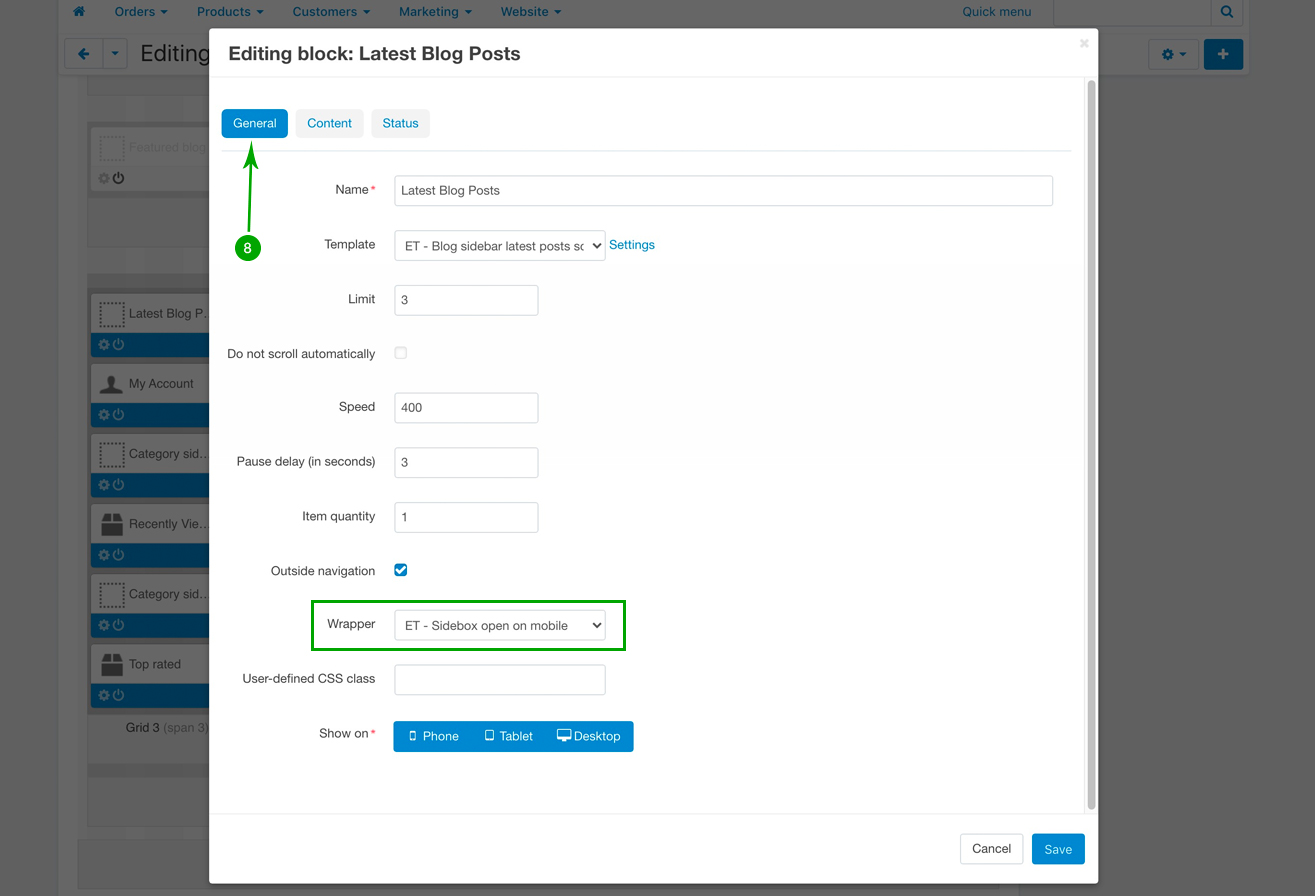
- Step 8
In the newly opened pop-up window, under the “General” tab, if you wish, change the block Name, as well as the other settings according to your preferences. The “Template” should however be “ET - Blog sidebar latest posts scroller”, as well as the “Wrapper” should remain “ET - Sidebox open on mobile”
- Step 9
Under the “Content” tab, click on the “Plus” sign to select your “Parent page”, as well as select the “Period”