Advanced Multi-Vendor (delivered with VIVAshop Multi-Vendor only)
The “Advanced Multi-Vendor” add-on is the most powerful add-on/functionality ever created for CS-Cart Multi-Vendor. Once you install this add-on your site will be transformed in a real Marketplace. The whole idea behind this add-on is that we wanted that each Vendor to have like a regular store inside of a mall/marketplace, to be able to add banners on their homepage, banner sliders, featured products, to create menus, pages, add their own custom menu colors, social links, contact details, etc…
Also, product listings contain information about who is selling the products, and, when a Vendor name is clicked on this product listings, the store homepage opens in a new window so you may easily browse though the Vendor store. And, when you finished browsing the Vendor’s products, can easily exit the store by simply closing the Vendor store window, or by clicking on any of the Marketplace menus/links.
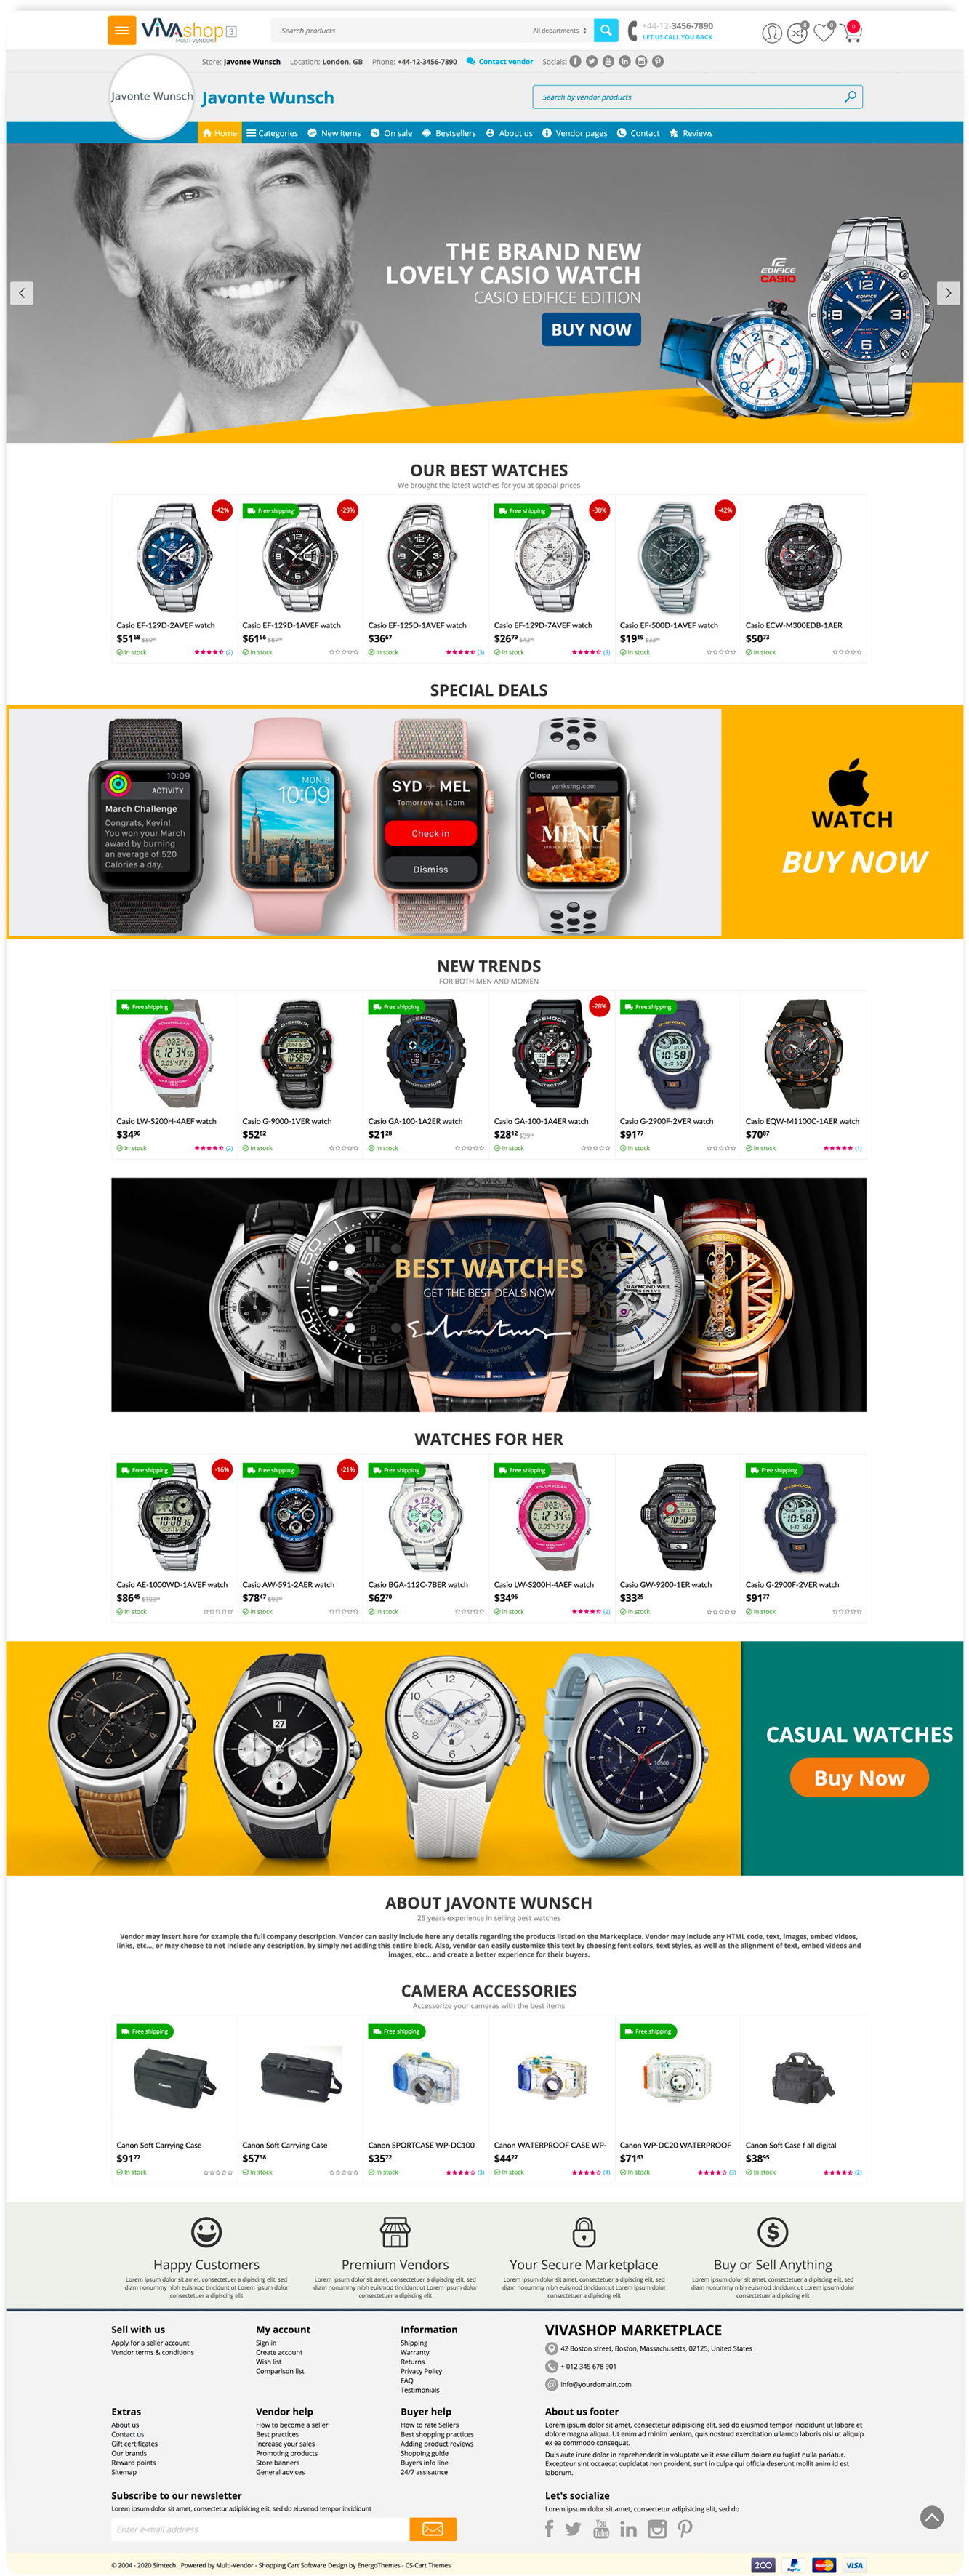
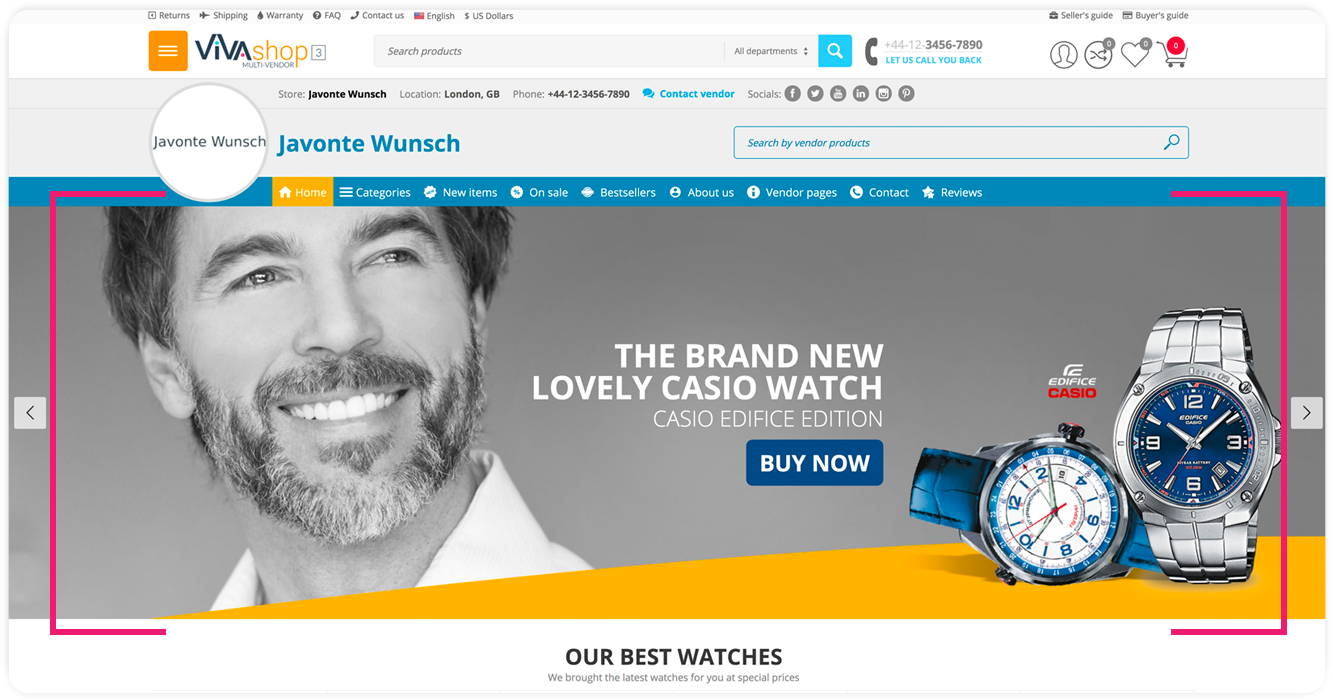
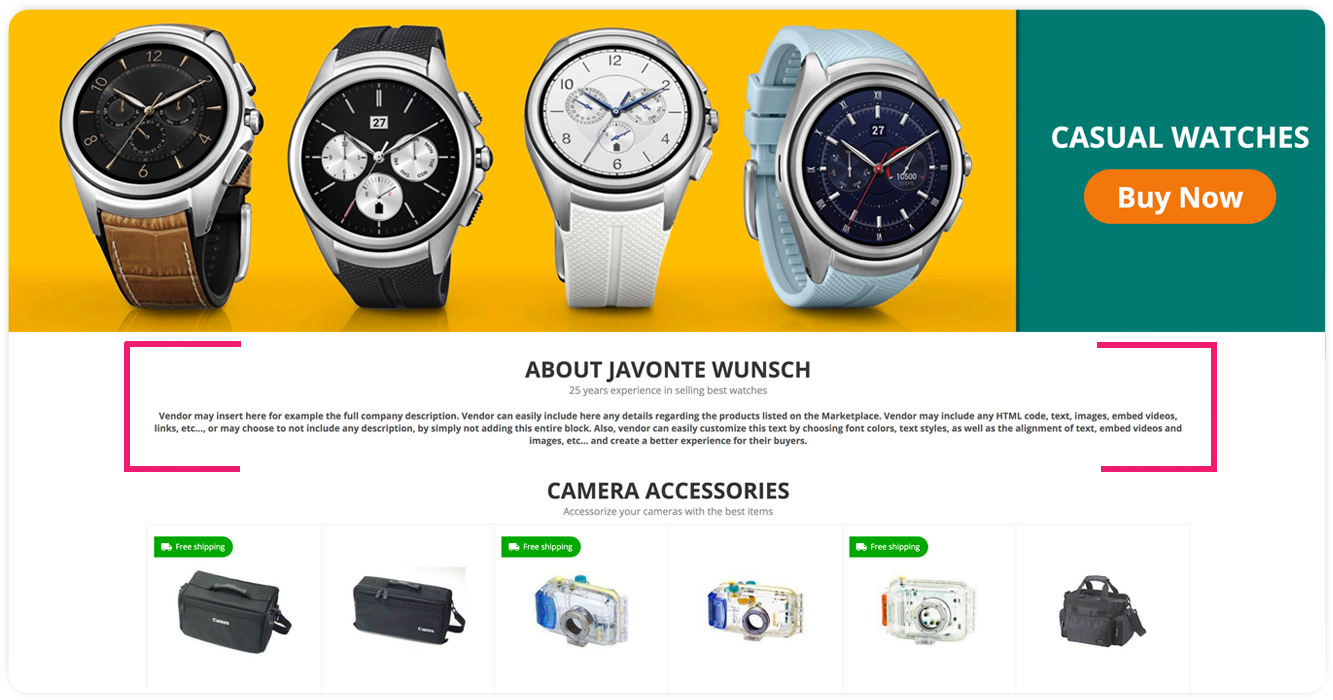
Here’s how a Vendor store looks like:
Add-on settings
Before we go to the Vendor store, lets see how to configure the general settings for the “Advanced Multi-Vendor” addon. Sp please follow the steps below:
- Step 1
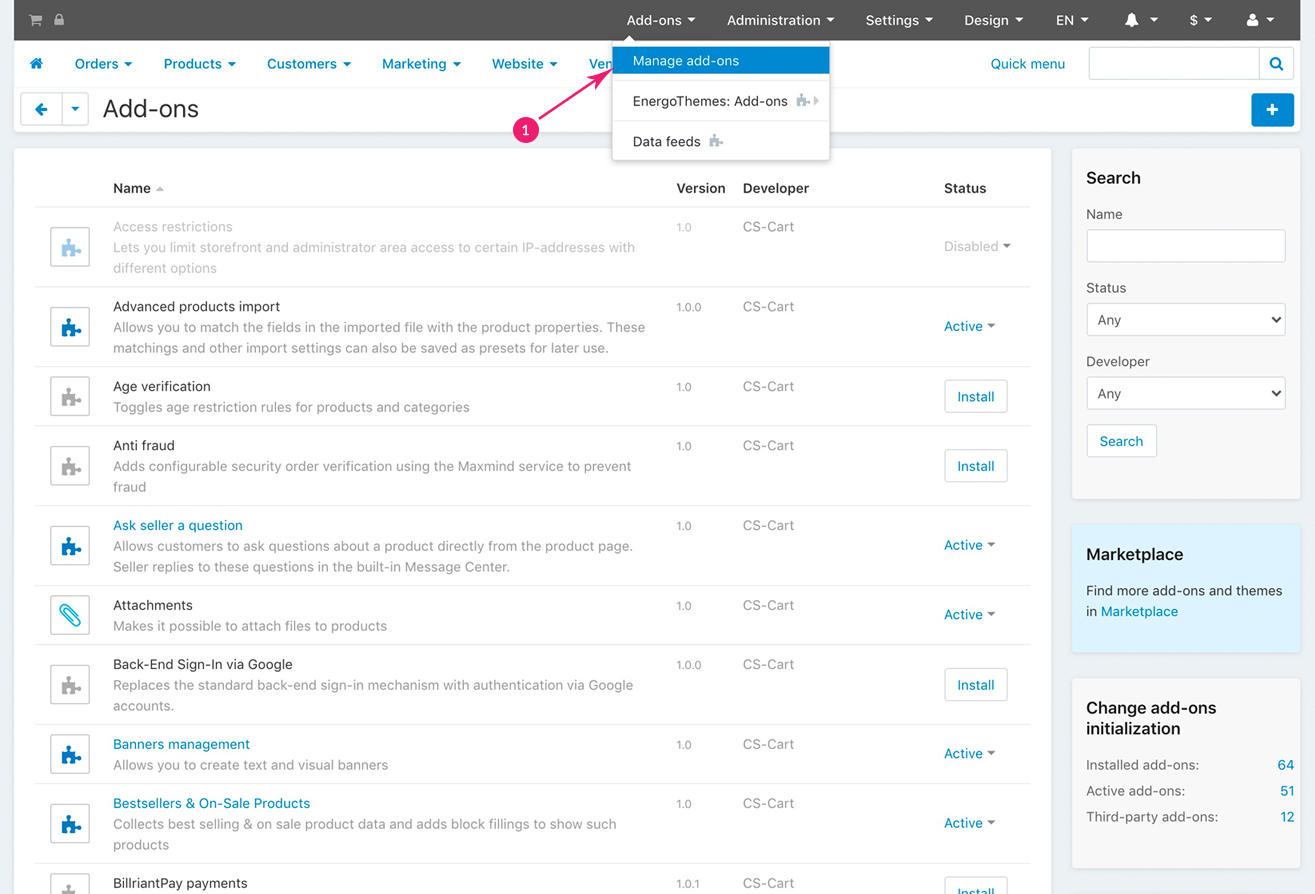
In your admin panel, go to “Add-ons” - “Manage add-ons”
- Step 2
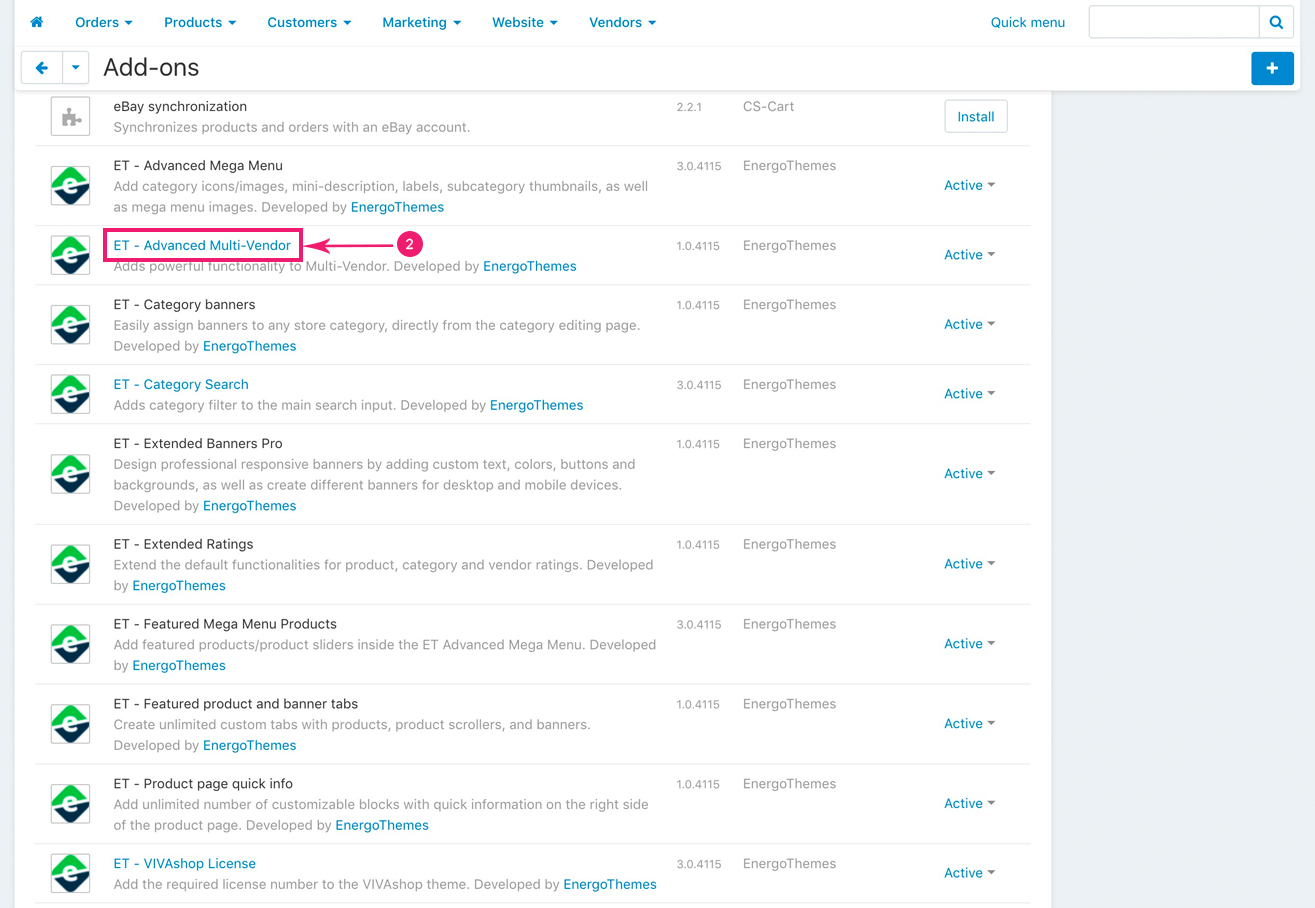
Scroll down until you find the “ET - Advanced Multi-vendor” add-on and click on it
- Step 3
In the newly opened pop-up window select your custom options. When you’re done, click on the bottom right blue “Save” button
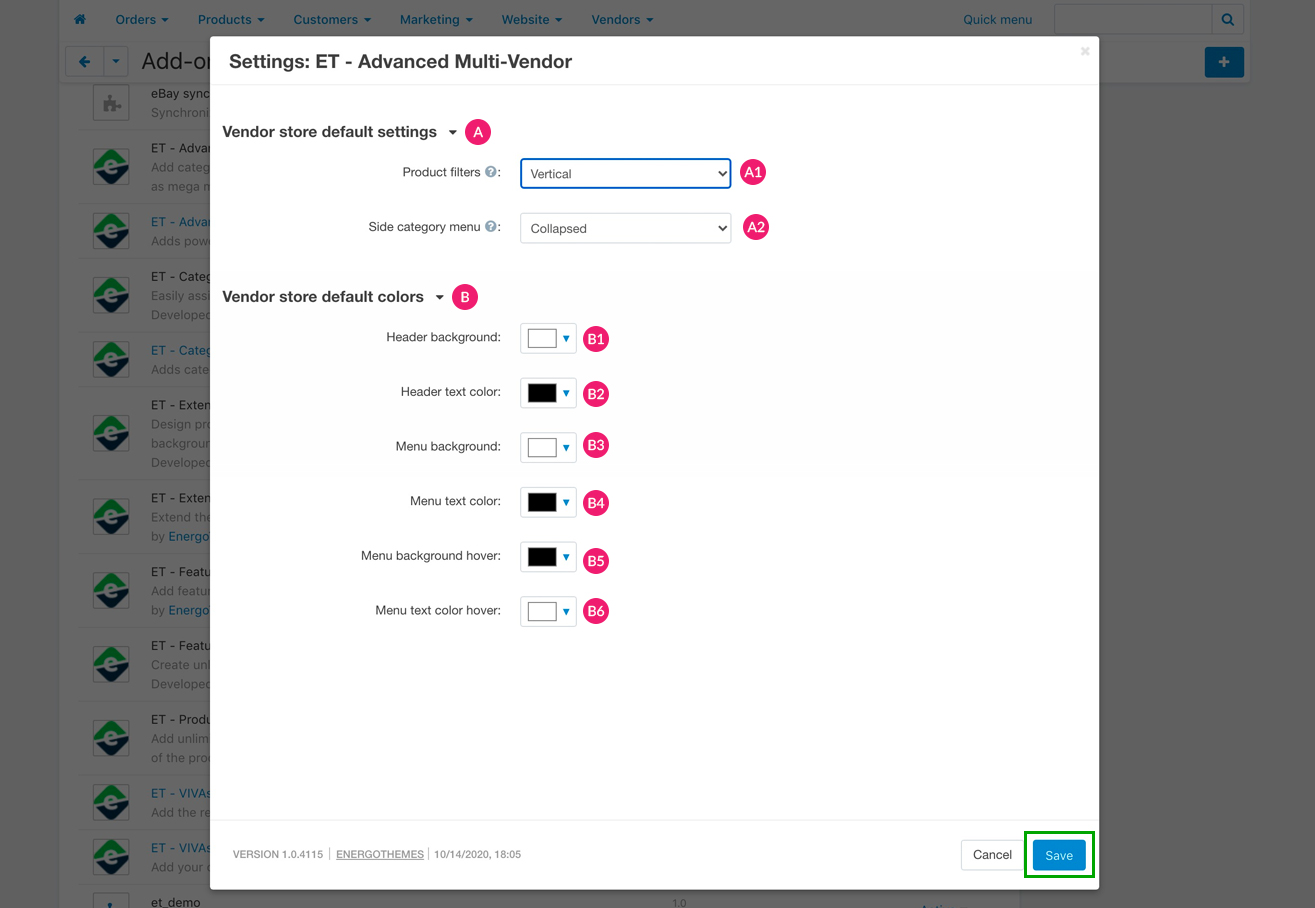
- A1: Product filters - Choose how to display filters on Vendor stores. You have 2 options here, “Vertical” to display vertical filters, and “Horizontal” to display horizontal filters. Note that each Vendor has the ability to change the way filters are displayed in their own stores, form their own admin panel. In other words, if you have set filters to be displayed by default horizontally, Vendors can choose to display their filters vertically
- A2: Side category menu - Set the default Vendor category sidebar style for all Vendor stores. You also have 2 options here: “Collapsed” - to display sidebar categories collapsed and manually expand them, and “Expanded” - to display all of the Vendor’s categories expanded and manually collapse them. Same as filters, Vendor has the ability to change the way sidebar categories are displayed in their own stores, form their own admin panel. In other words, if you have set the sidebar categories to be displayed collapsed by default, Vendors can choose to display their sidebar categories expanded
- B1: Header background - Pick the color for the store header background
- B2: Header text color - Pick the color for the store header text
- B3: Menu background - Pick the color for the store main menu background
- B4: Menu text color - Pick the color for the store main menu text
- B5: Menu background hover - Pick the color for the store main menu background when hover it
- B6: Menu text color hover - Pick the color for the store main menu text when hover it
Store customization
Now, let’s learn how Vendors can configure their own stores. We’ll start by showing how a Vendors are adding the general information as well as other additional details about them. We’ll point out only the sections which are either added by the “Advanced Multi-Vendor” add-on, or are related to this add-on. The rest of the functionalities are part of the default Multi-Vendor, so you may refer to the default Multi-Vendor documentation here.
- Step 1
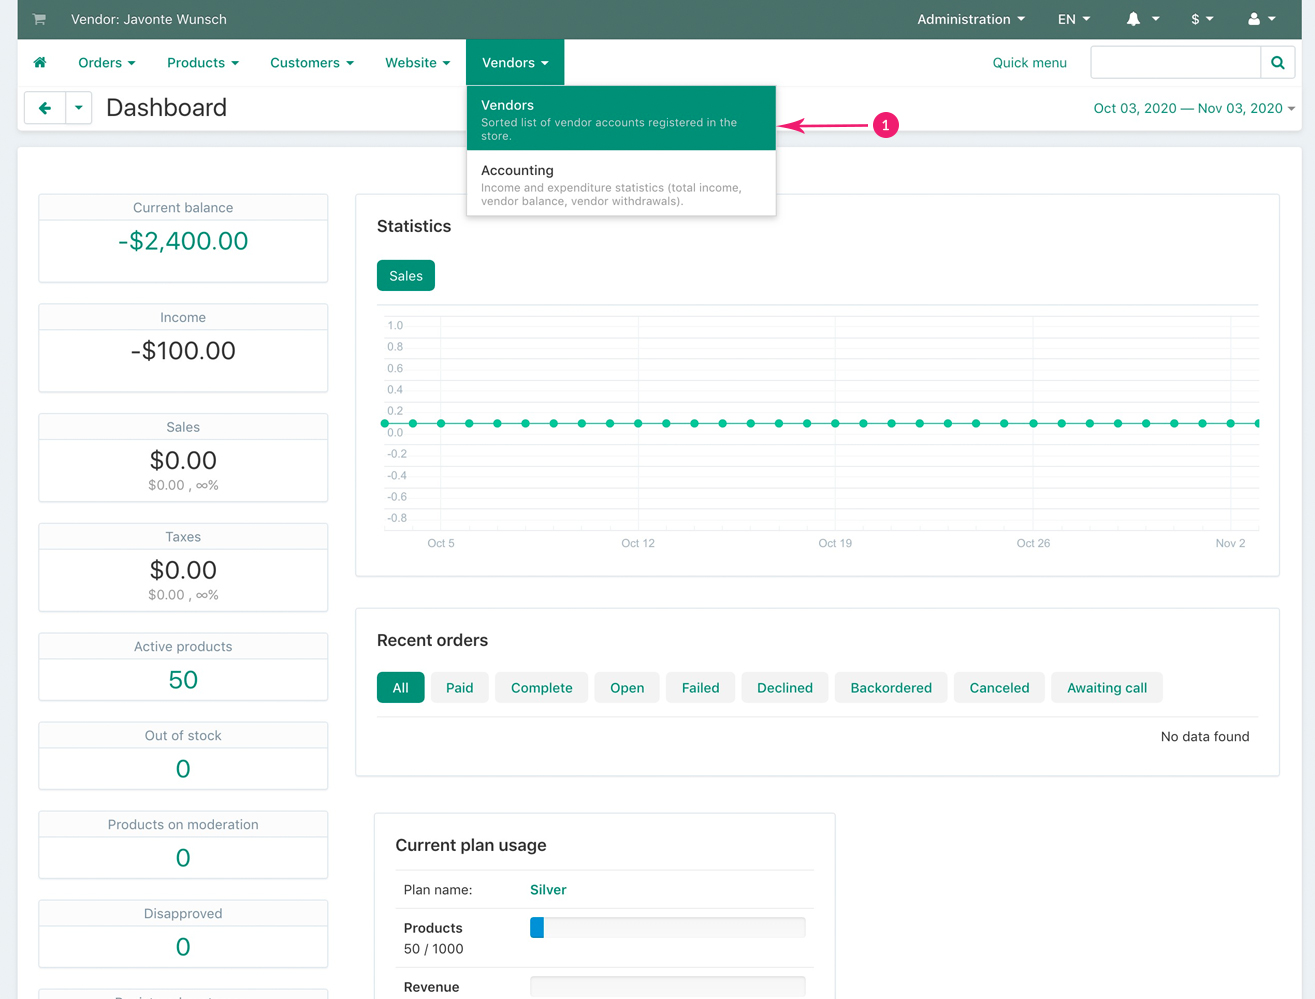
Once Vendor logs into his admin panel, Vendor needs to go to “Vendors” - “Vendors”
- Step 2
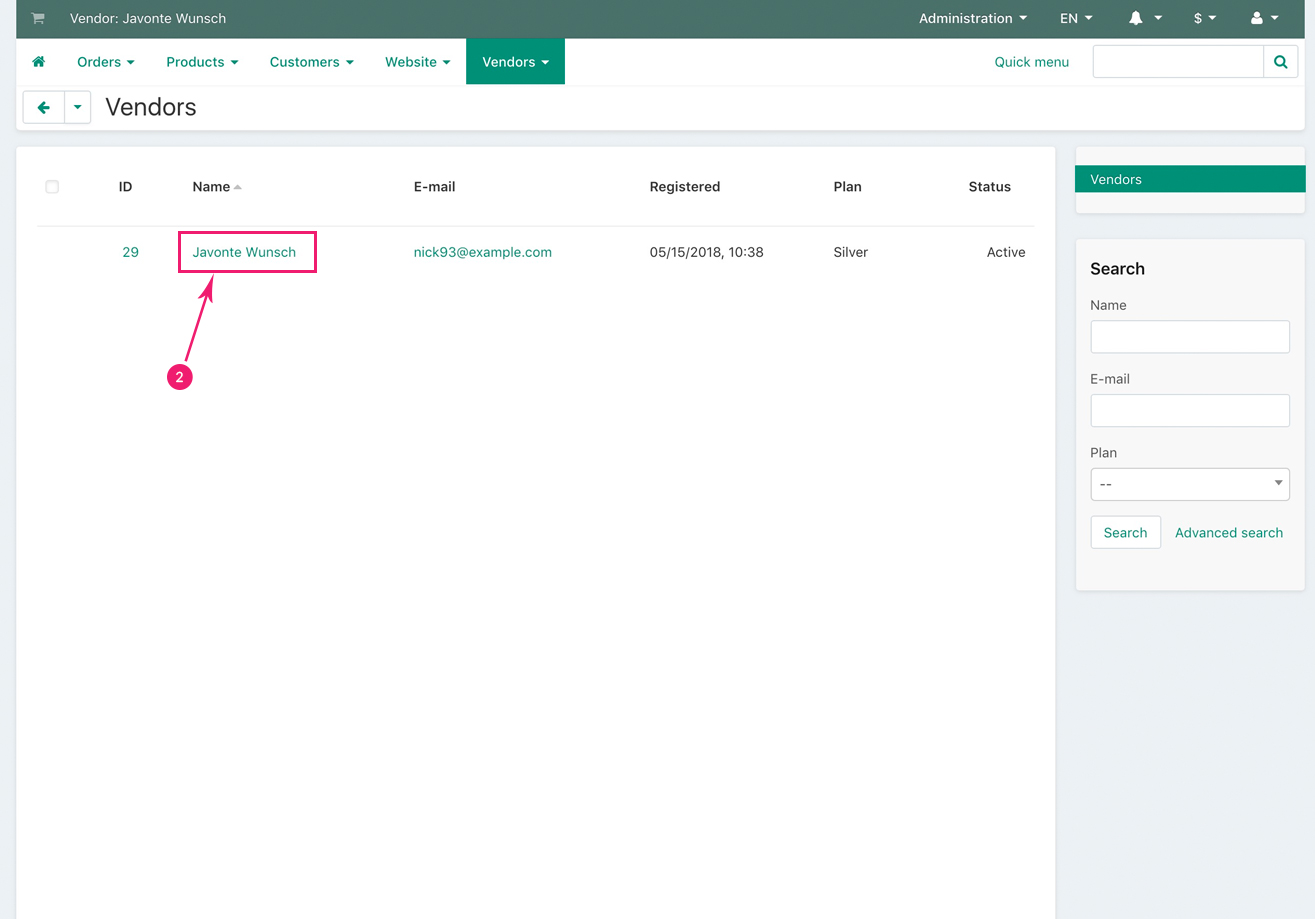
In the newly opened page, Vendor can click on his account
- Step 3
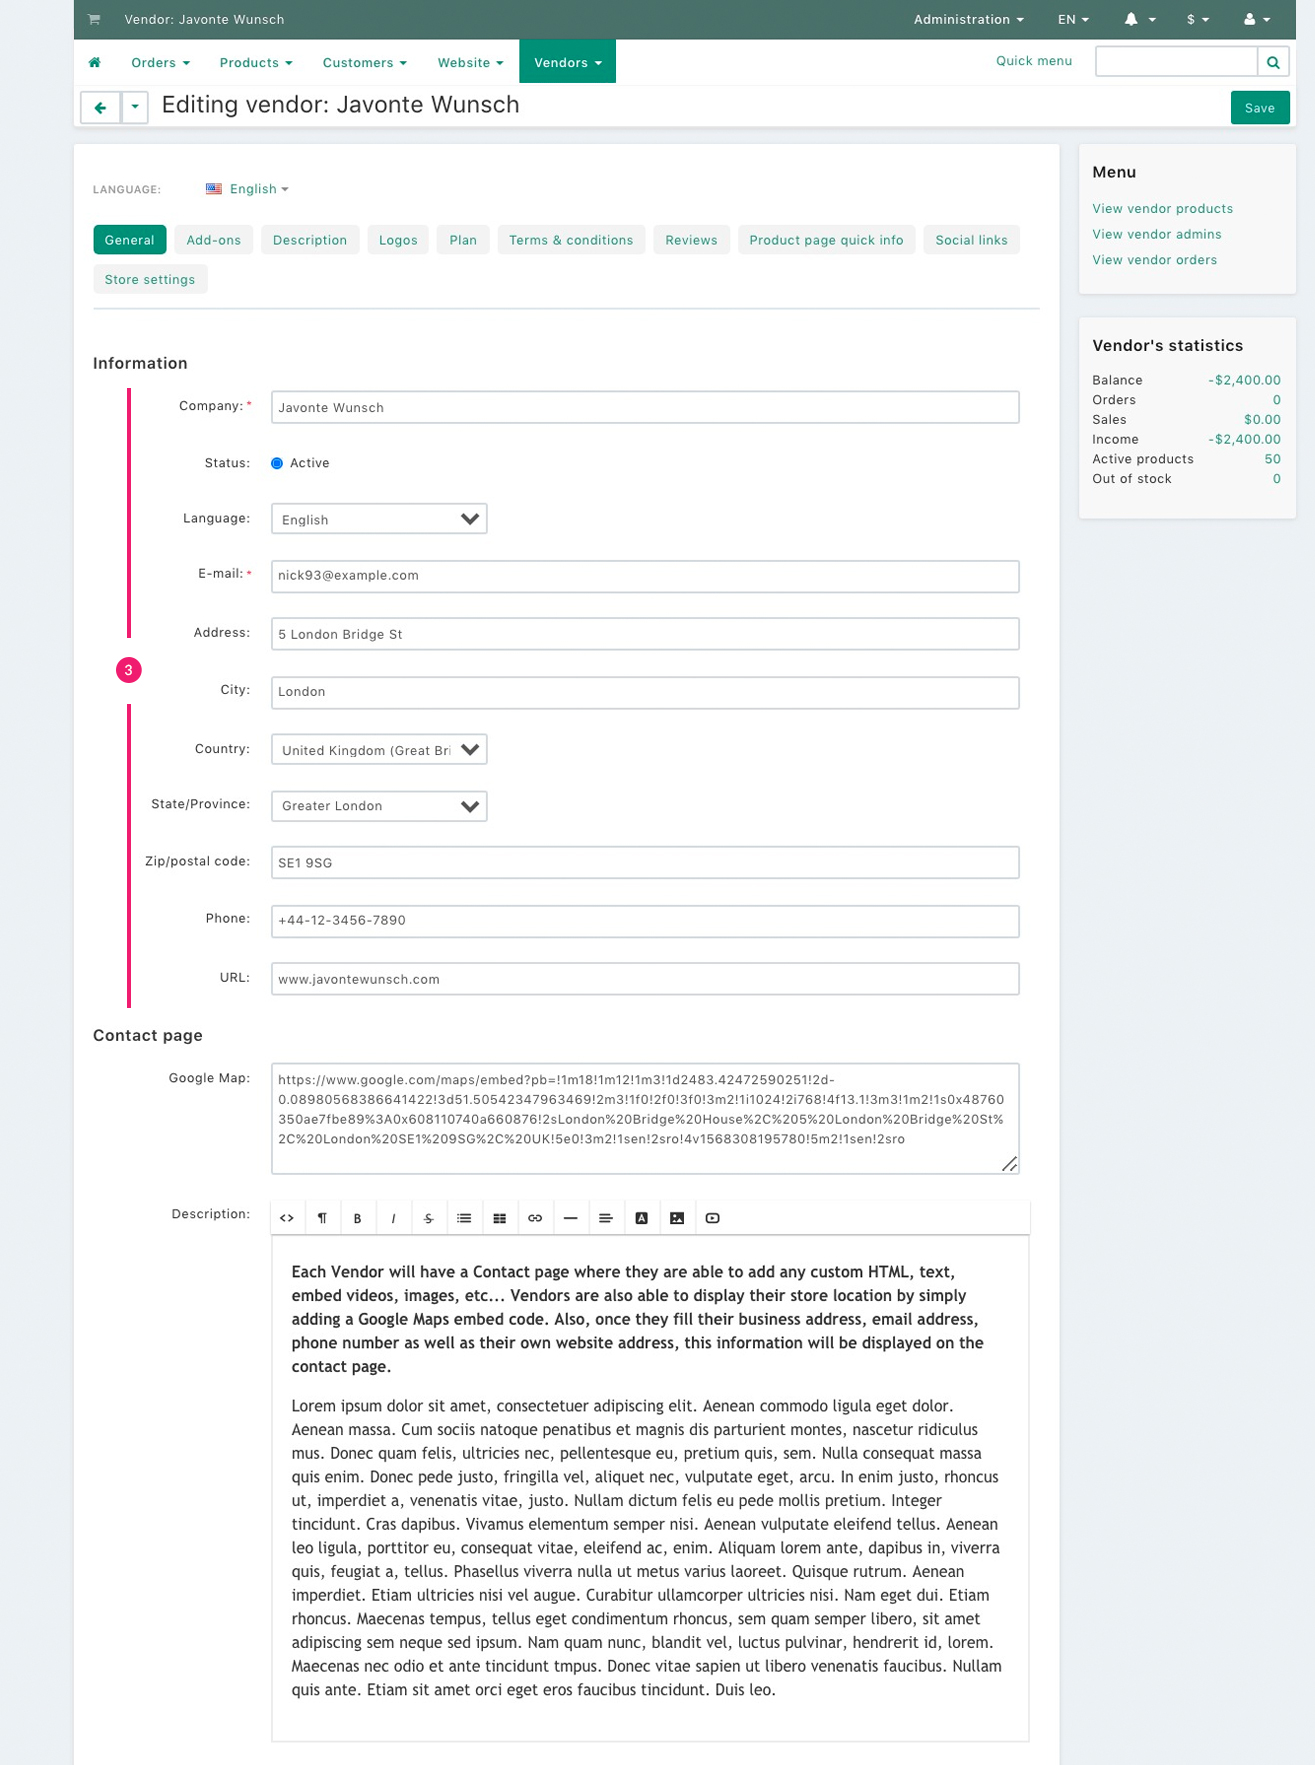
On the next page, under the “General” tab, Vendor can add his details under the “Information” section. This Vendor information will be used by the “Advanced Multi-Vendor” add-on to display it in the Vendor store top info, (name, location and phone number), as well as the URL adders will be used on the Vendor Contact page (full address, email address, phone number and web address). See example here
In addition to the Vendor Information, under the “General” tab, the “Advanced Multi-Vendor” add-on is adding another section called “Contact page” where Vendor can add an embed Google Map indicating his location, as well as a ”Description” section where Vendor can add any HTML text. The Google Map and “Description” will appear on the “Contact” page, of which link may be found in the Vendor main menu. See example here
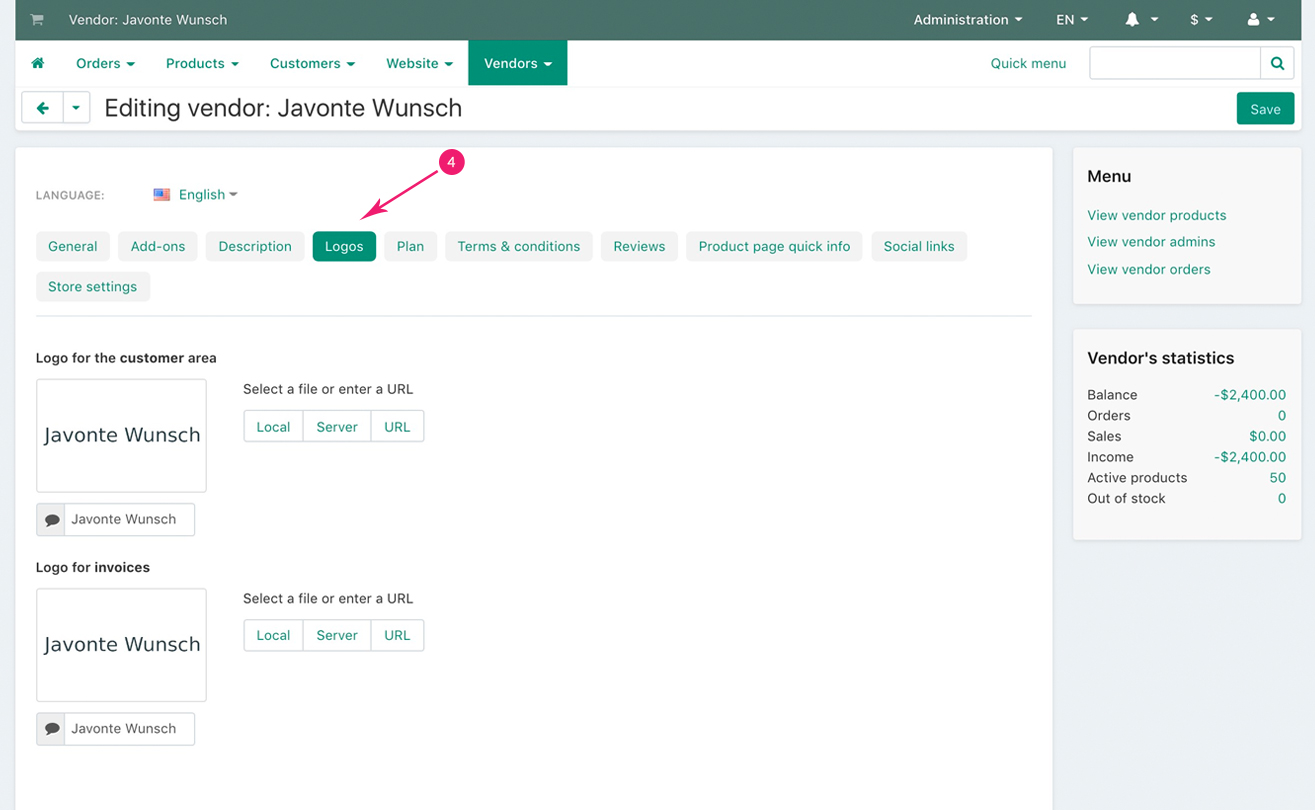
- Step 4
Under the “Logos” tab, Vendor can add his logos for his store as well as for his invoices. We recommend using images that do not have empty spaces around the logo.
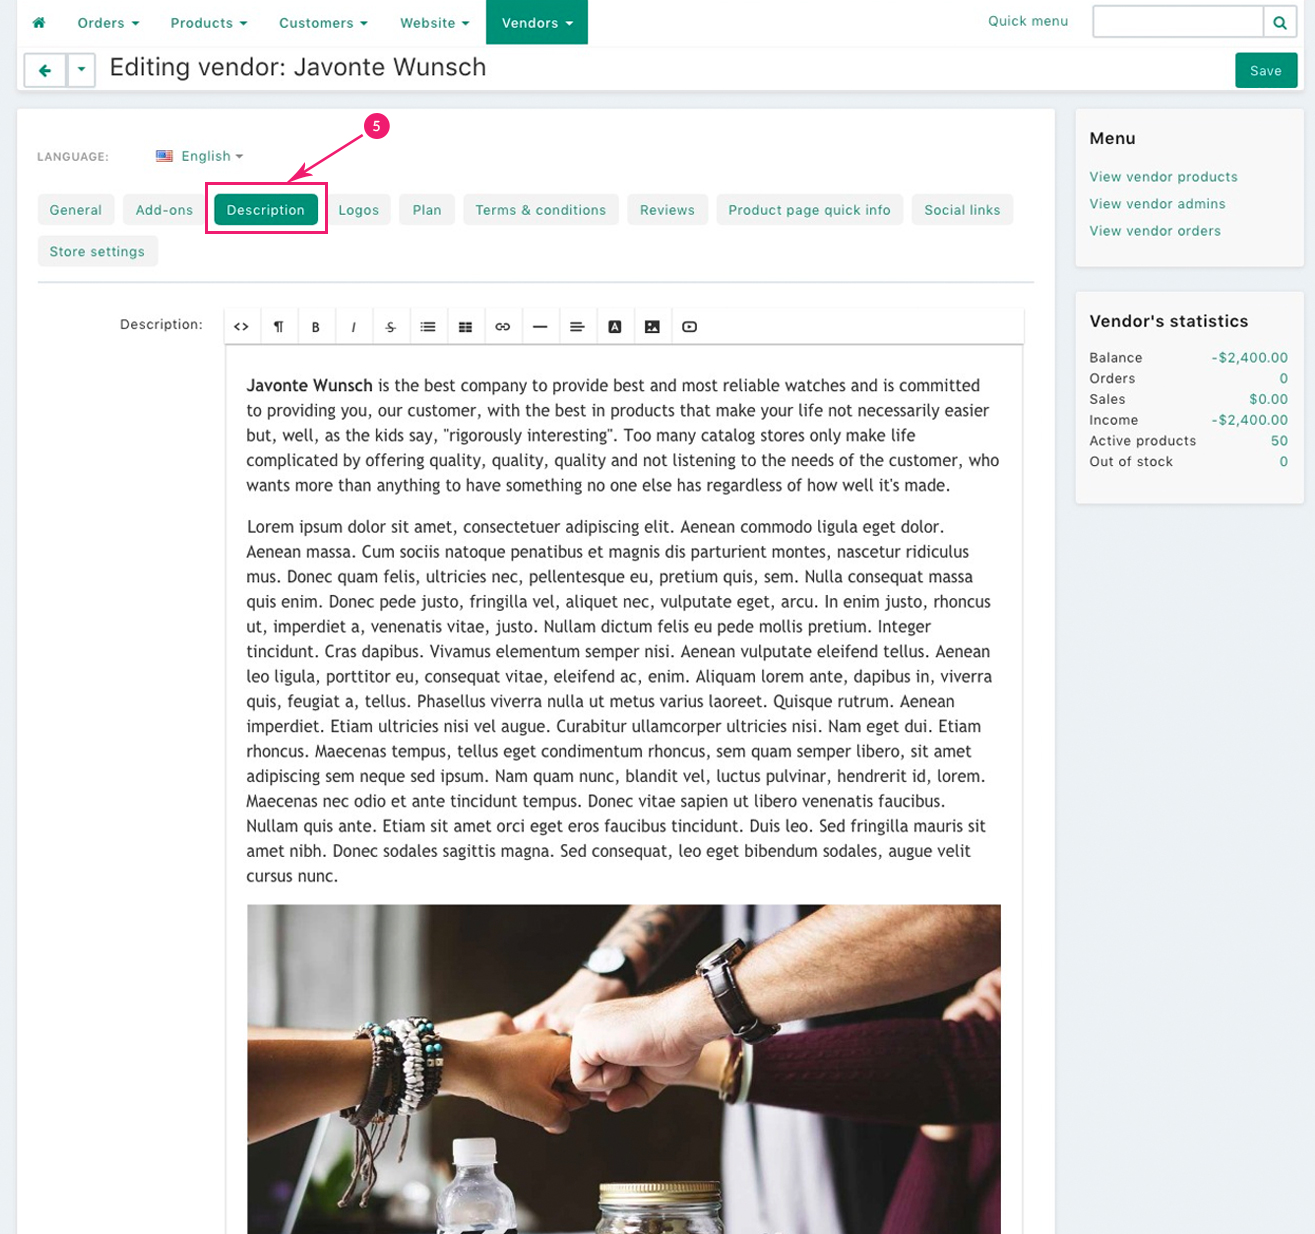
- Step 5
Next, under the “Description” tab, Vendor can add any HTML content describing his company, as well as offering information about his store, products, or anything else. The “Advanced Multi-Vendor” add-on is grabbing all of this HTML content and inserts it in an “About us” page of which link may be found in the main menu of the Vendor store. See example here
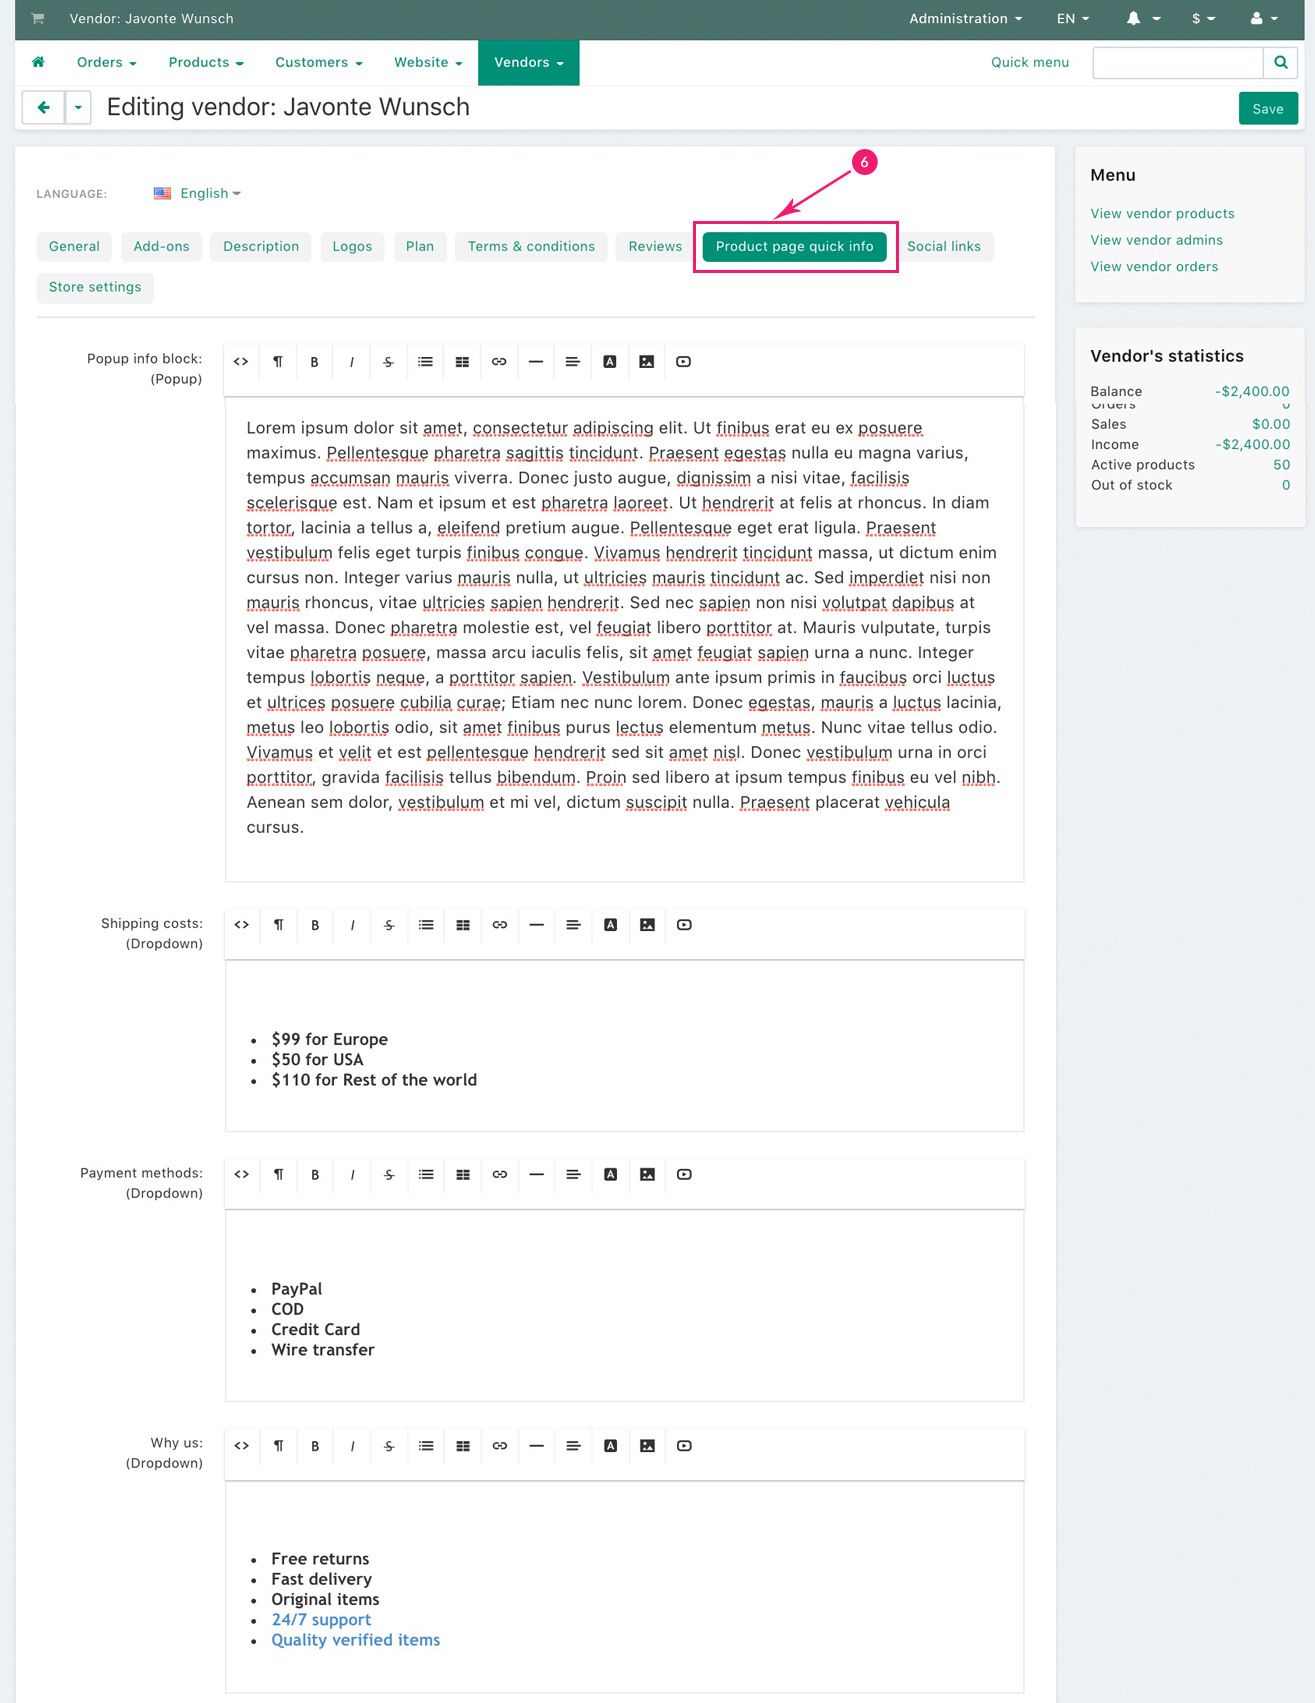
- Step 6
Under section “Product Page Quick Info” we have explained how to add, as Marketplace owner, an unlimited number of Quick Info blocks on the product page. We have also mentioned that each Vendor has the possibility to add their own information in these blocks that you create for your Marketplace. However, Vendors cannot create such blocks, they can only add their own content it the “Product Page Quick Info” blocks pre-created by you. Each Vendor will have his own custom information in the “Product Page Quick Info” blocks on their product pages. Also, Vendors may choose not to add any information in the Quick Info Blocks that you have not set as “required” when you created them, so Vendors will fill their info at least in the mandatory blocks that you have set at “required” when you created them.
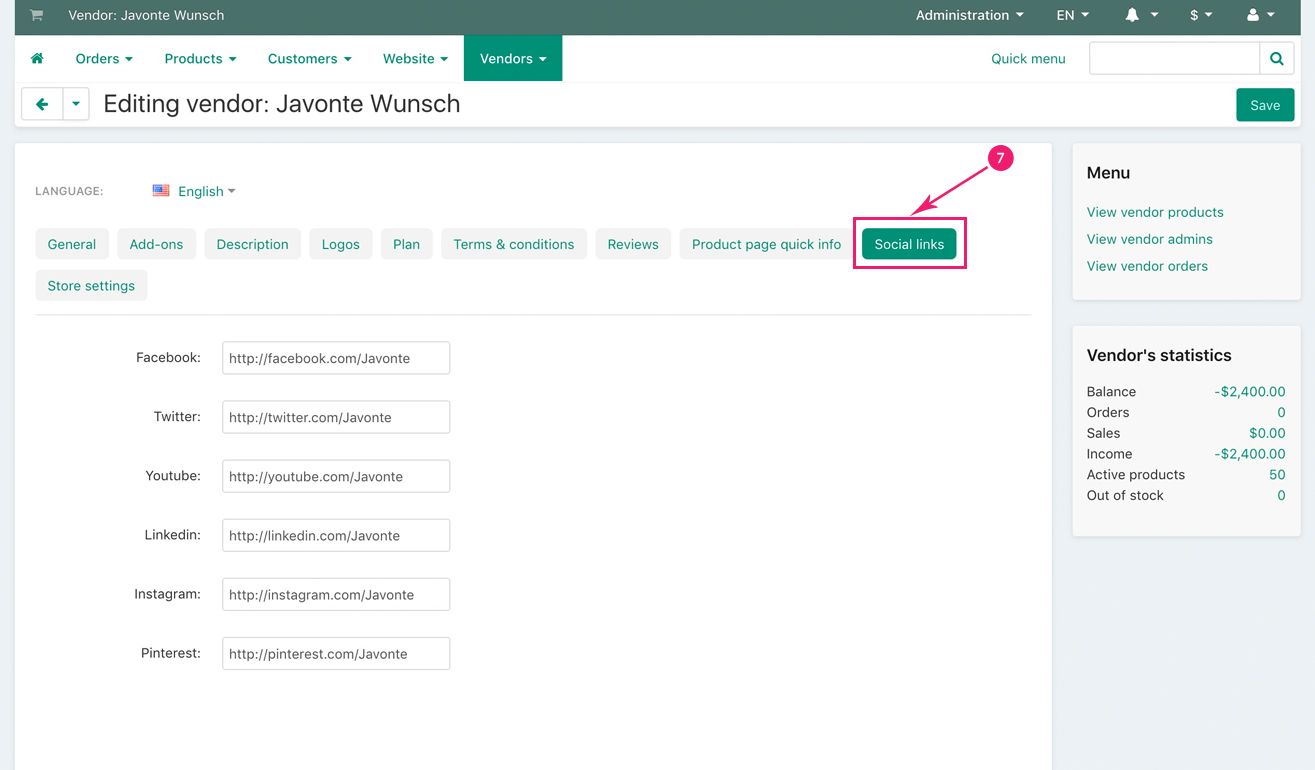
- Step 7
Vendors can add their profile links to the most important social sites: Facebook, Twitter, Youtube, Linkedin, Instagram, Pinterest. Buttons with these links will be displayed in the Vendor store top info. If a field corresponding to a social site is not filled in by Vendor, then the respective button will not be displayed. See example here
- Step 8
By default, when Vendor creates his store, the default colors that you have set in section “Add-on settings“ above will be applied to his store. Under the “Store settings” tab, Vendor can customize the colors of his own tore. Also, in section “Add-on settings” above you have set the global options for displaying the product filters and sidebar categories. Vendors can also change here the way product filters and sidebar categories are displayed on their own stores.
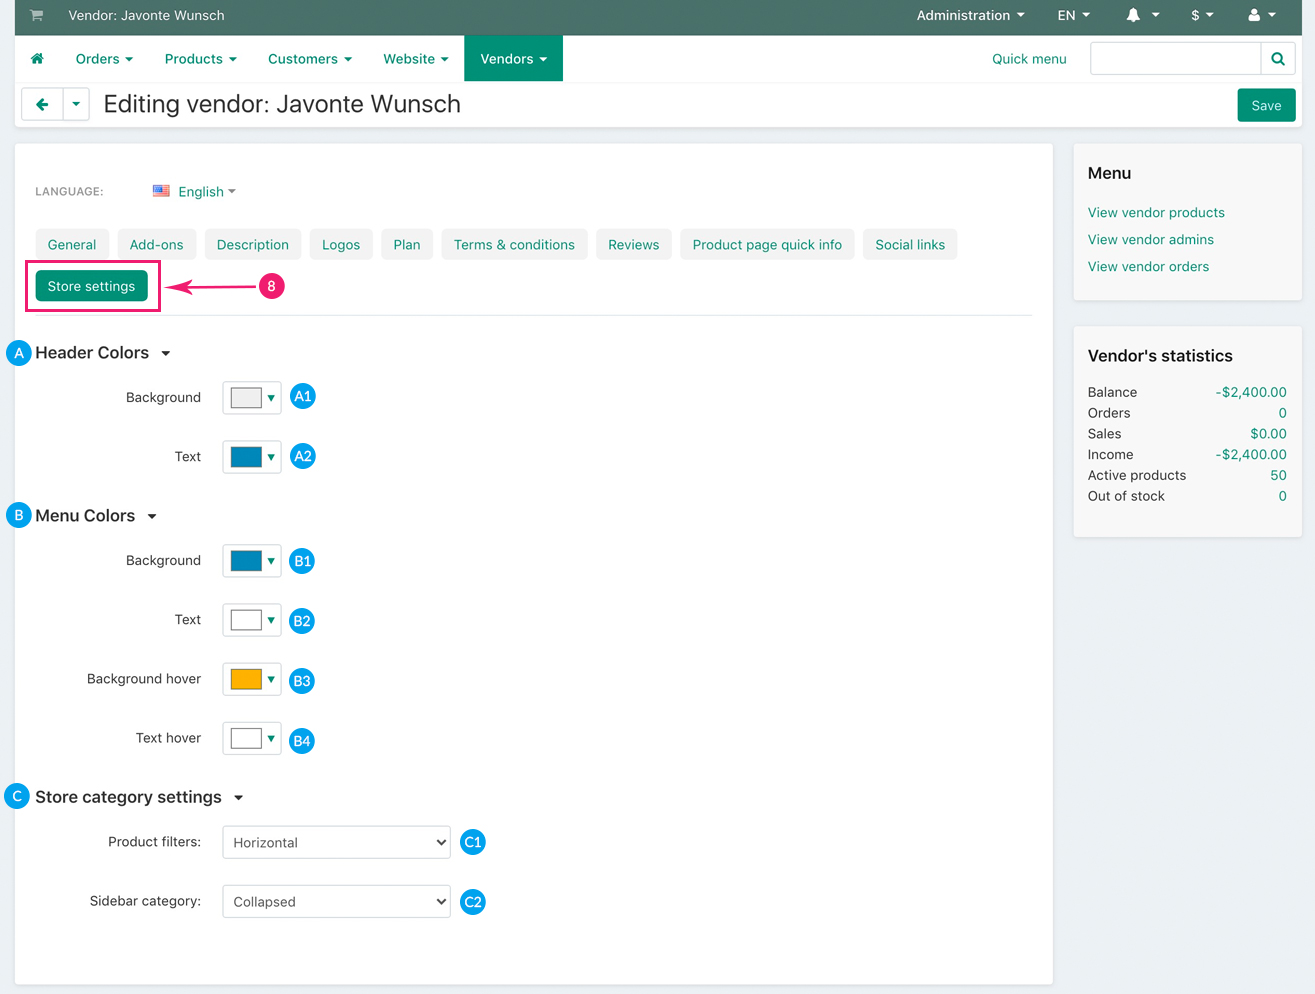
- A1: Background - Pick the color for the store header background
- A2: Text - Pick the color for the store header text
- B1: Background - Pick the color for the store main menu backgound
- B2: Text - Pick the color for the store menu text
- B3: Background hover - Pick the color for the store main menu background when hover it
- B4: Menu text color hover - Pick the color for the store main menu text when hover it
- C1: Product filters - Vendors can choose how to display filters on their own stores. They have 2 options here, “Vertical” to display vertical filters, and “Horizontal” to display horizontal filters
- C2: Background - Vendors can choose how to display their sidebar categories on their own stores. They also have 2 options here: “Collapsed” - to display sidebar categories collapsed and manually expand them, and “Expanded” - to display all of the Vendor’s categories expanded and manually collapse them.
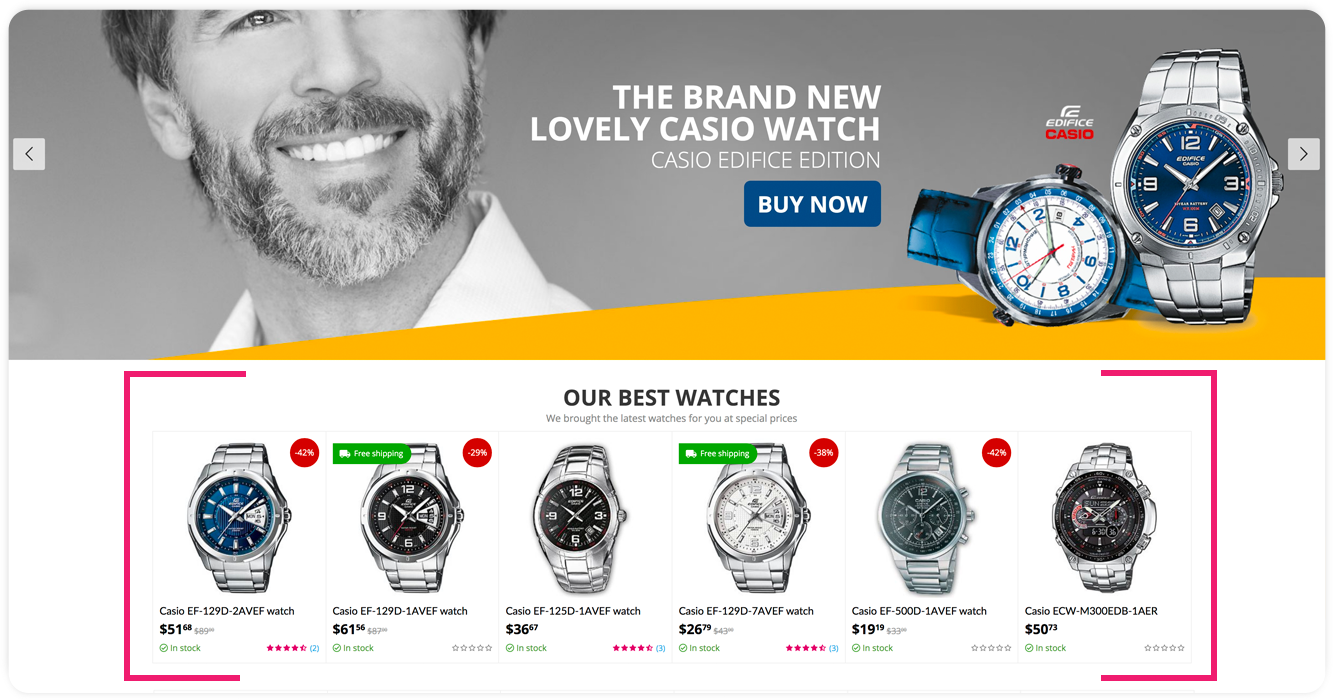
Vendor store homepage and content pages
Vendors can add any number of blocks on their store homepage, including banners and/or slider banners, featured products, as well as blocks that include any HTML content, as well as customize each of these blocks.
Adding banners and/or banner sliders
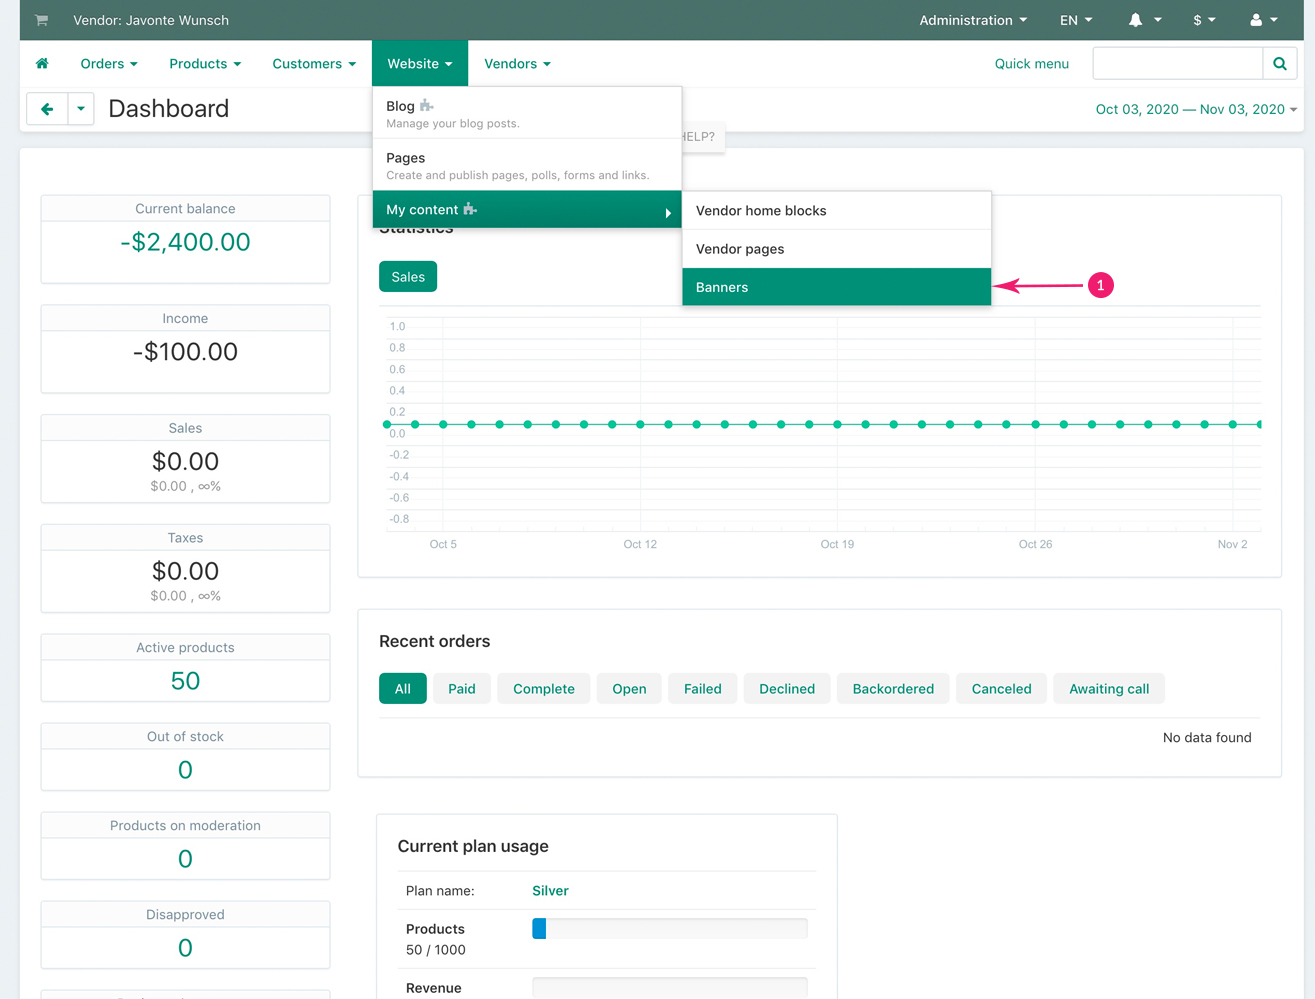
Before adding banners and/or banner sliders on their store homepage, Vendors need to firstly create those banners. To create banners, Vendor needs to follow these steps:
- Step 1
In the Vendor admin panel, go to “Website” - “My content” - “Banners”
- Step 2
In the newly opened window, click on the top right blue “Plus” button in order to add a new banner.
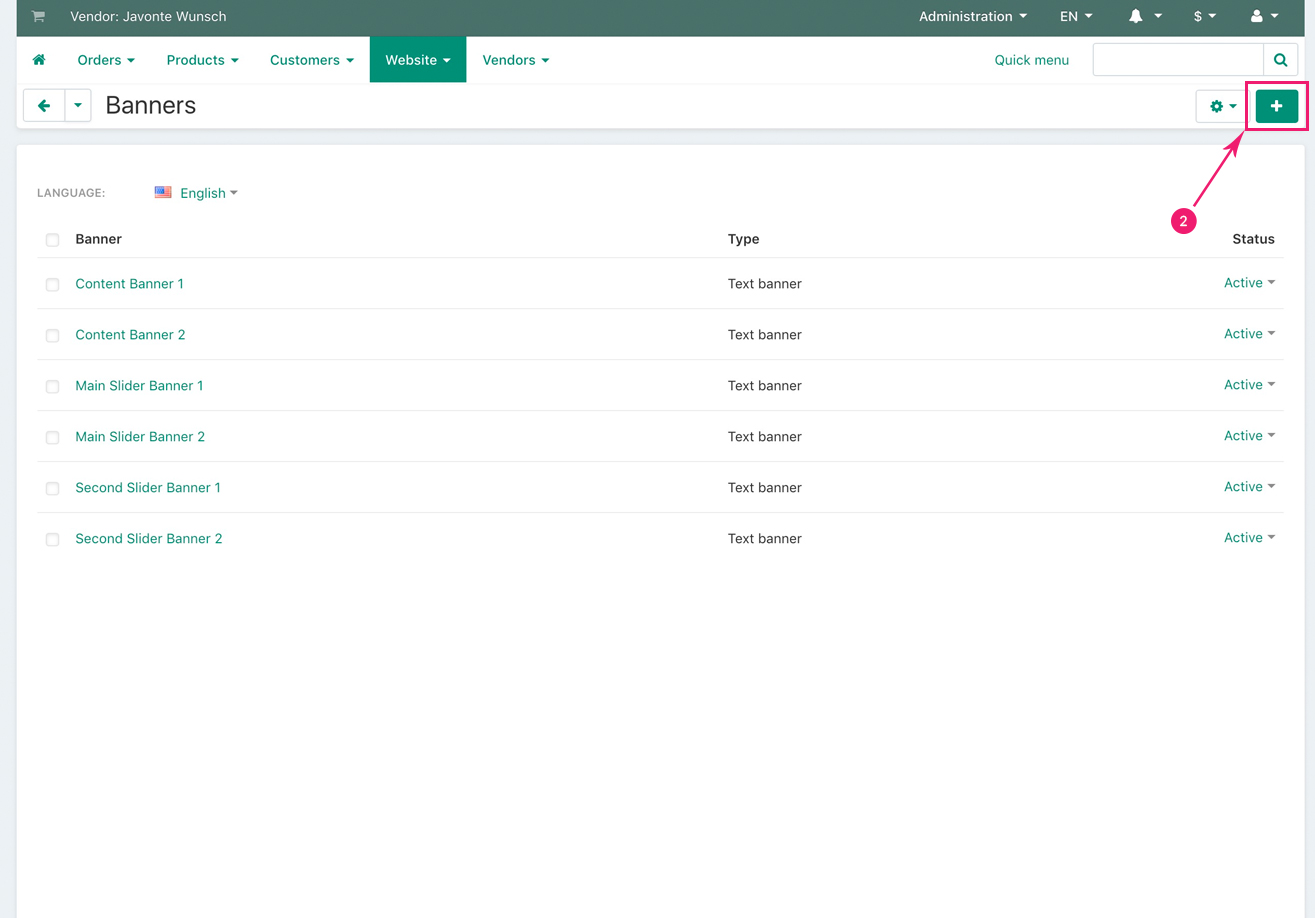
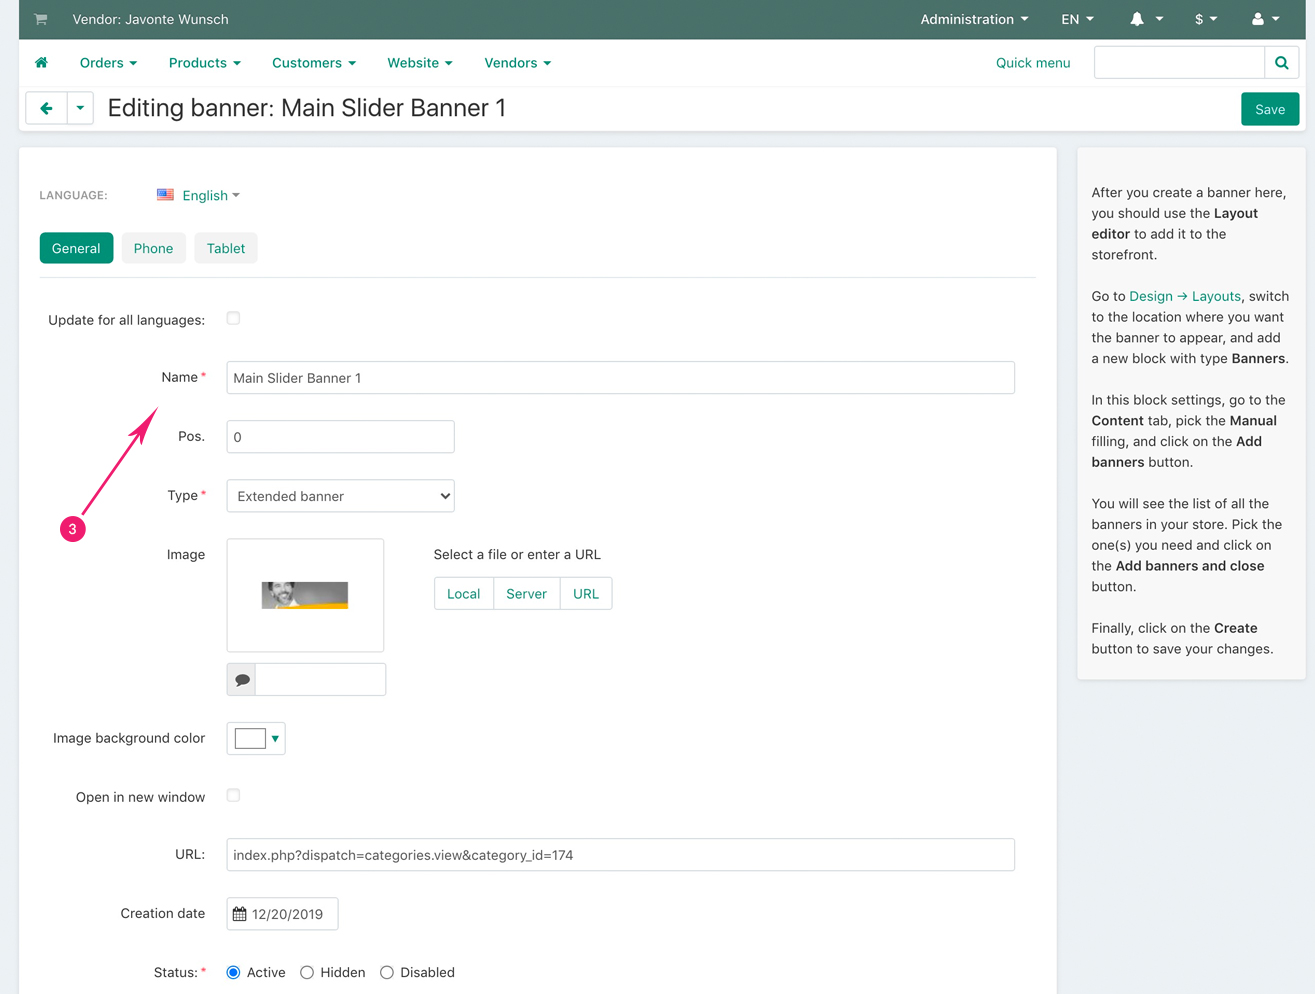
- Step 3
Create a banner and repeat the process in order to create as many banners as wanted. Vendors can also create Extended Banners, in accordance to the instructions described under section “Extended Banners Pro” The recommended banner width is 2048px, the height can be any size that vendor prefers.
- Step 4
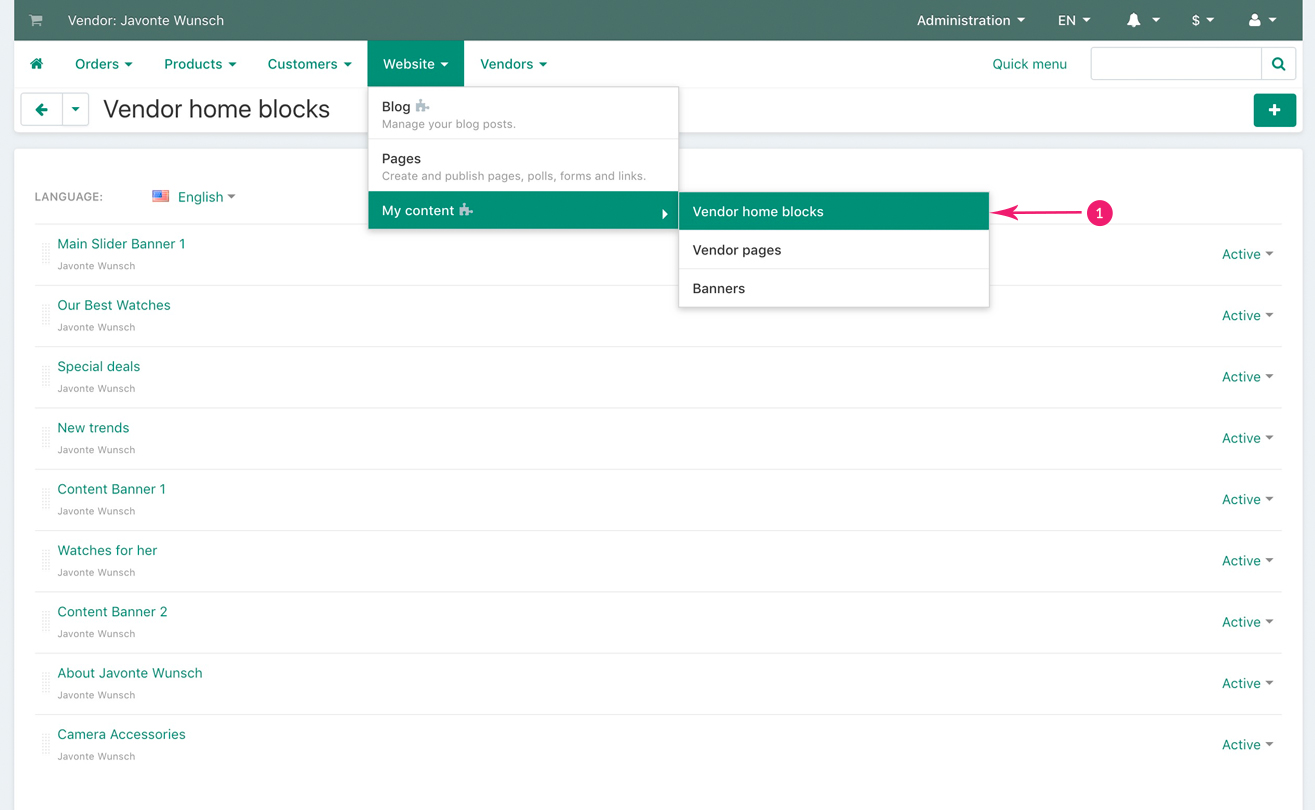
Once banners are created, Vendor needs to add them to his homepage. To do that, Vendor needs to go to “Website” - “My content” - “Vendor home blocks”

- Step 5
Click on the right side “Plus” sign in order to add a new block

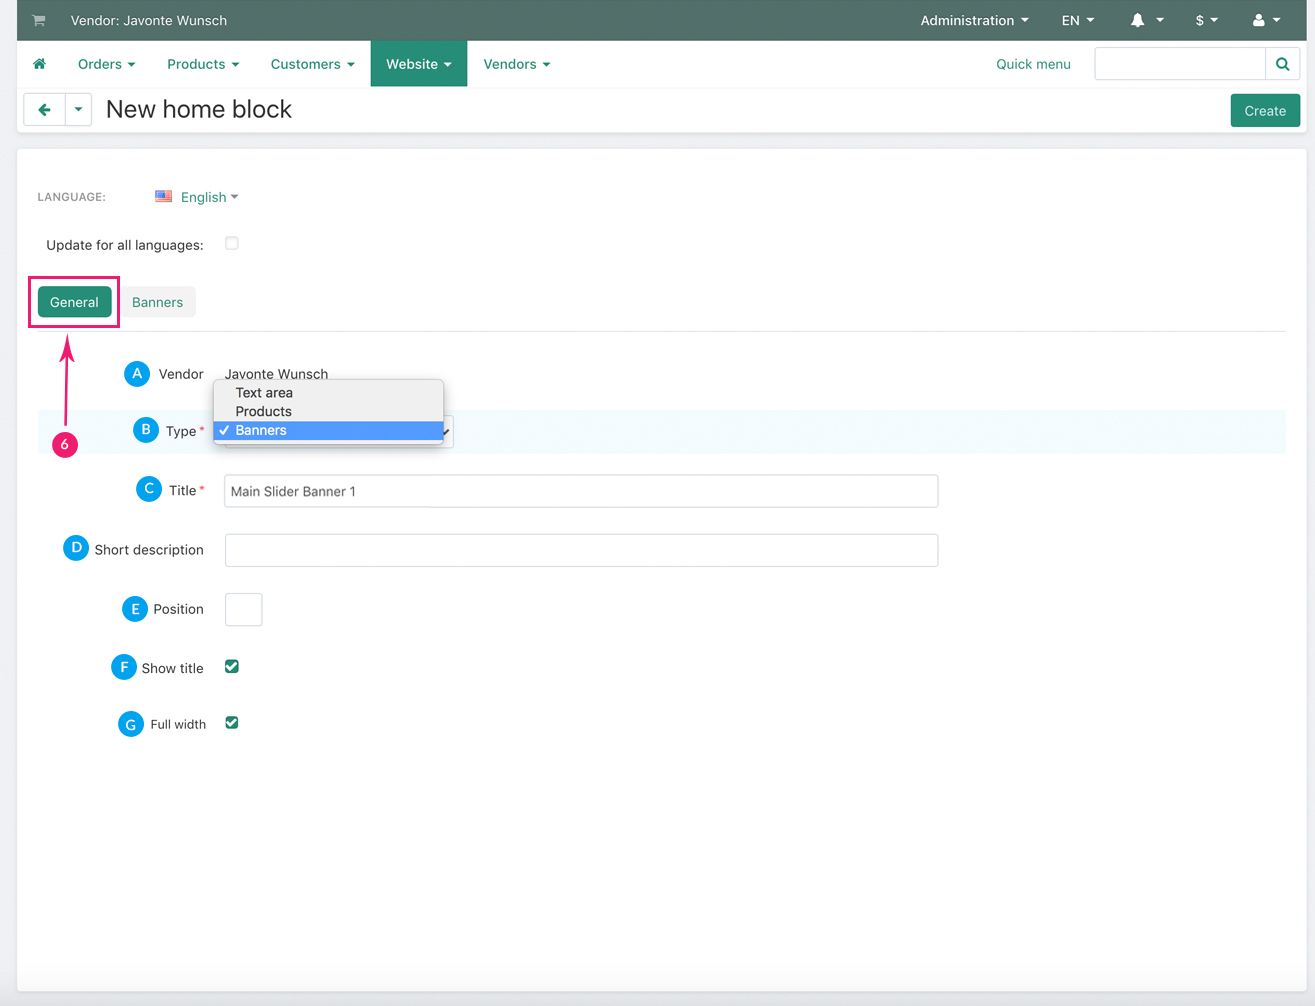
- Step 6
In the newly opened page, under the “General” tab, select the banner block settings
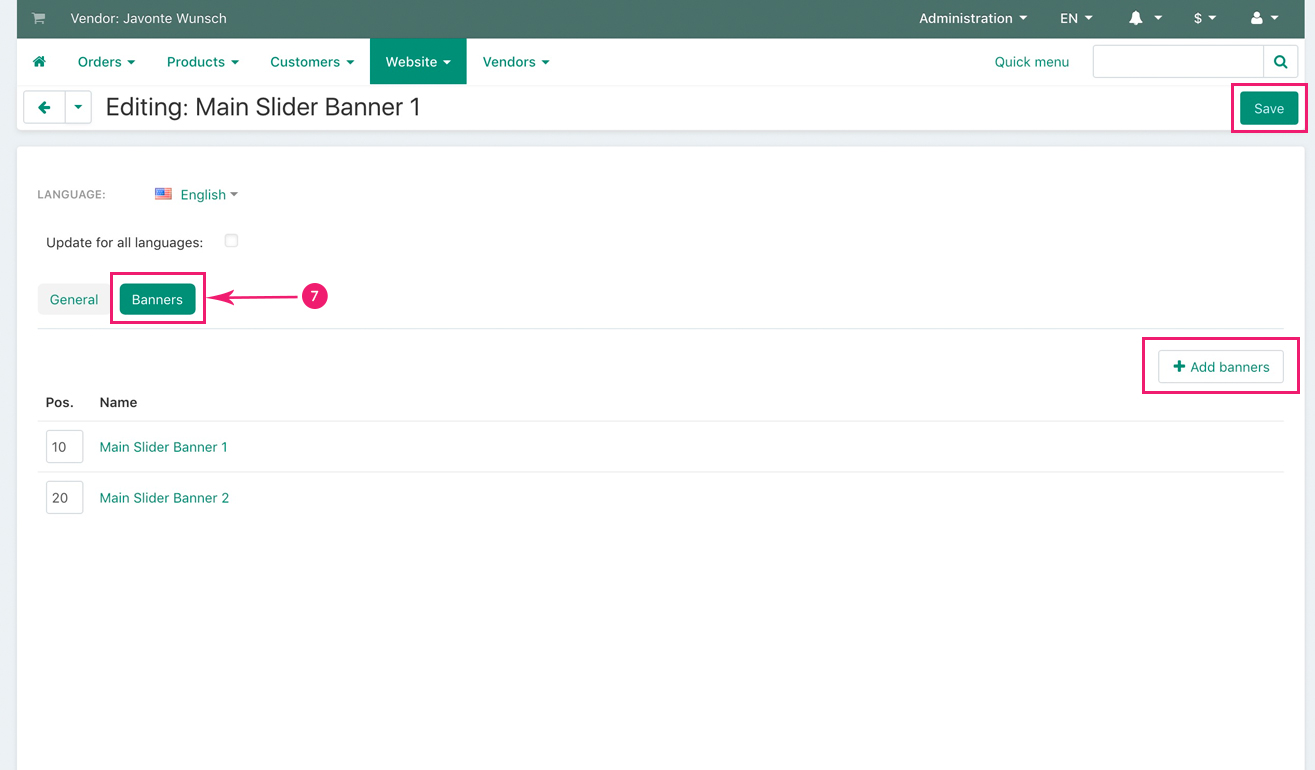
- Step 7
Next, under the “Banners” tab, Vendor needs to click on the “Add banners” button in order to add the desired banners that were already created previously, then click on the top right “Save” button when is done
Adding product blocks
On their store homepages, Vendors can easily add any number of product blocks with any products of their choice. Here’s how to do it:
- Step 1
In the Vendor admin panel, go to “Website” - “My content” - “Vendor home blocks”

- Step 2
Click on the right side “Plus” sign in order to add a new block

- Step 3
In the newly opened page, under the “General” tab, select the products block settings
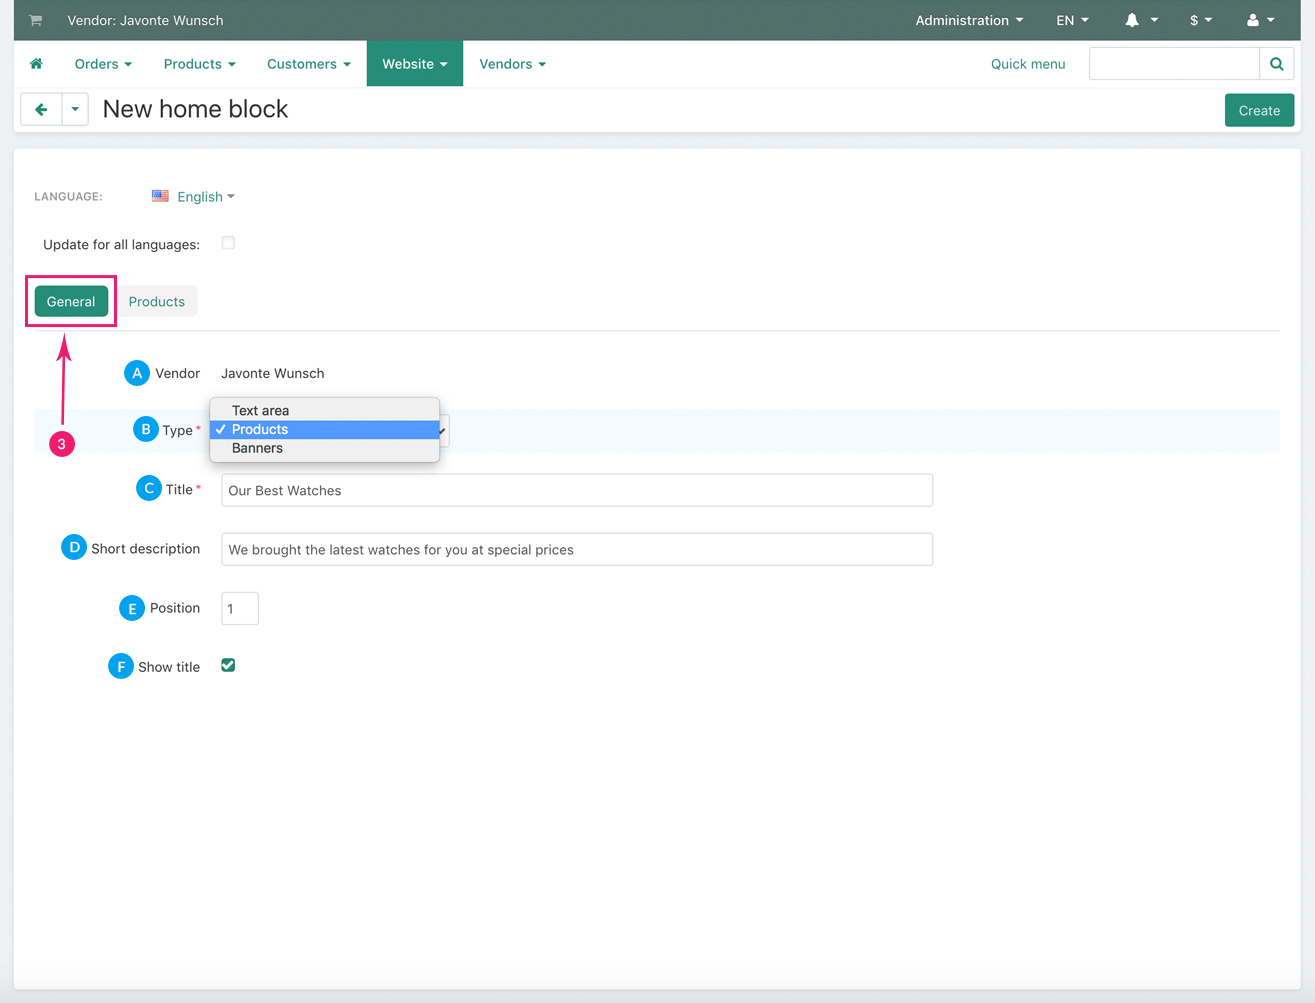
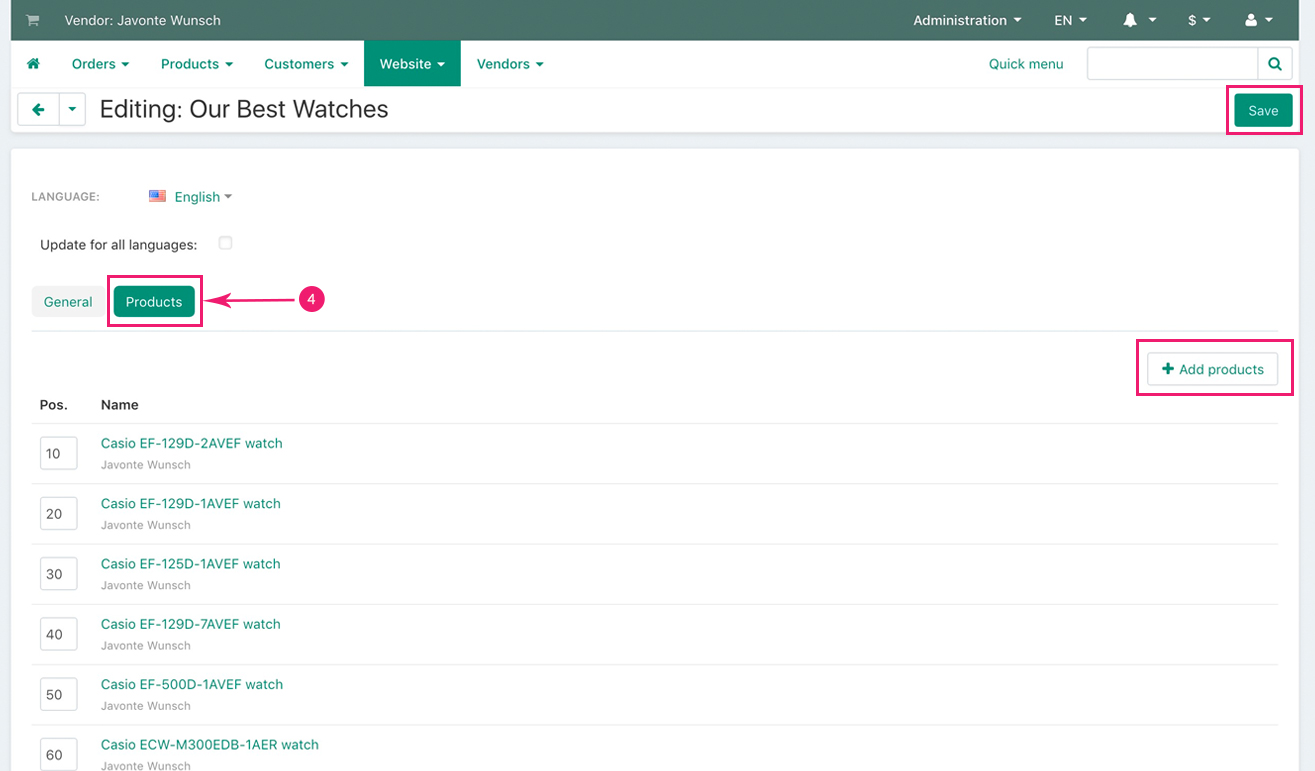
- Step 4
Next. under the “Products” tab, Vendor needs to click on the “Add products” button in order to add the desired products, then click on the top right “Save” button when is done
Adding text/HTML blocks
On their store homepages, Vendors can easily add any number of text/HTML blocks with any text/HTML of their choice. Here’s how to do it:
- Step 1
In the Vendor admin panel, go to “Website” - “My content” - “Vendor home blocks”
- Step 2
Click on the right side “Plus” sign in order to add a new block

- Step 3
In the newly opened page, under the “General” tab, select the Text area settings
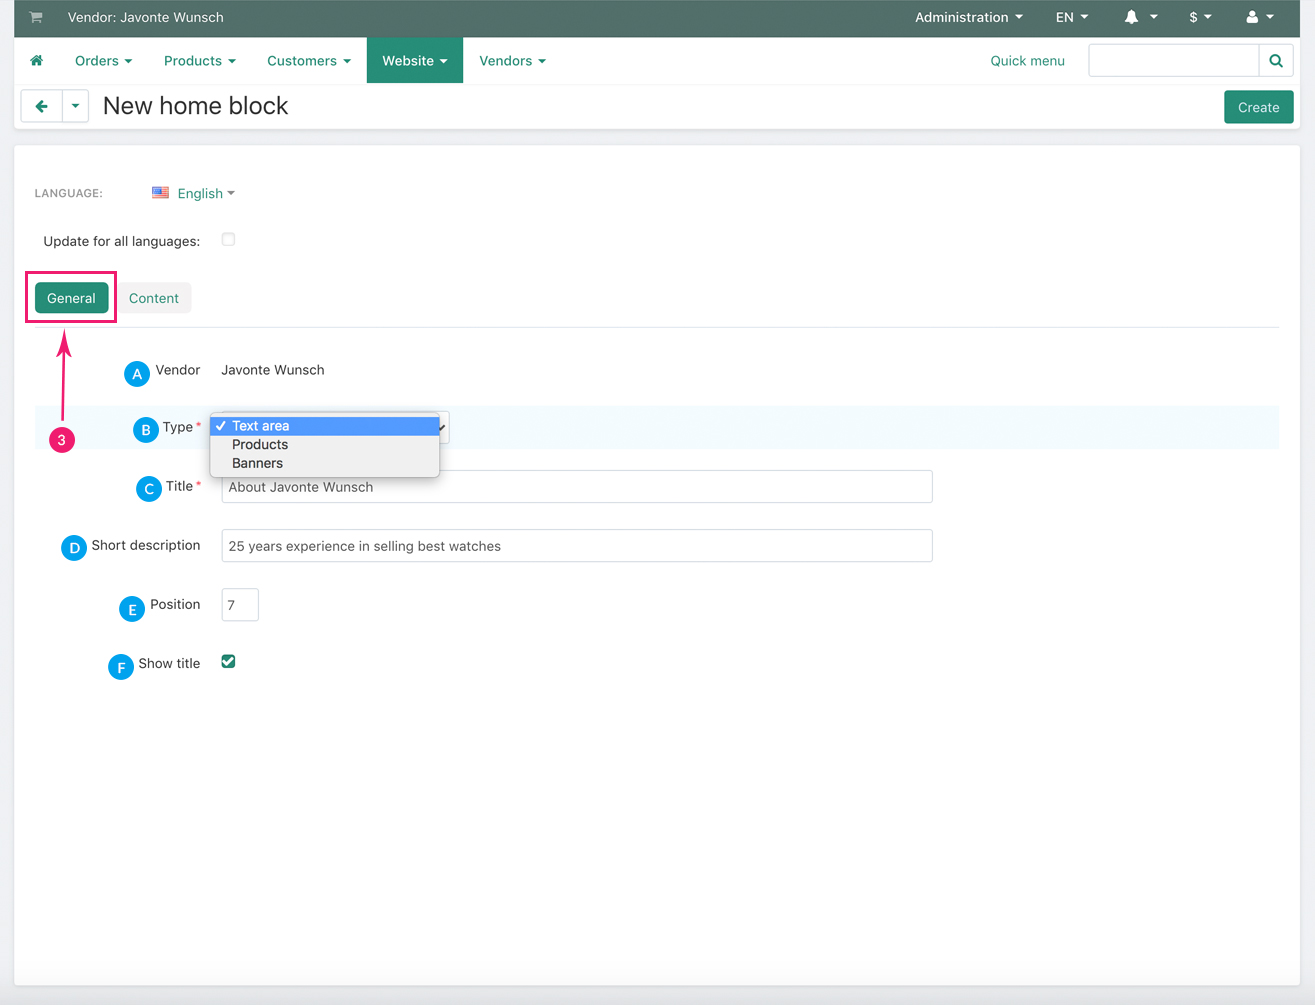
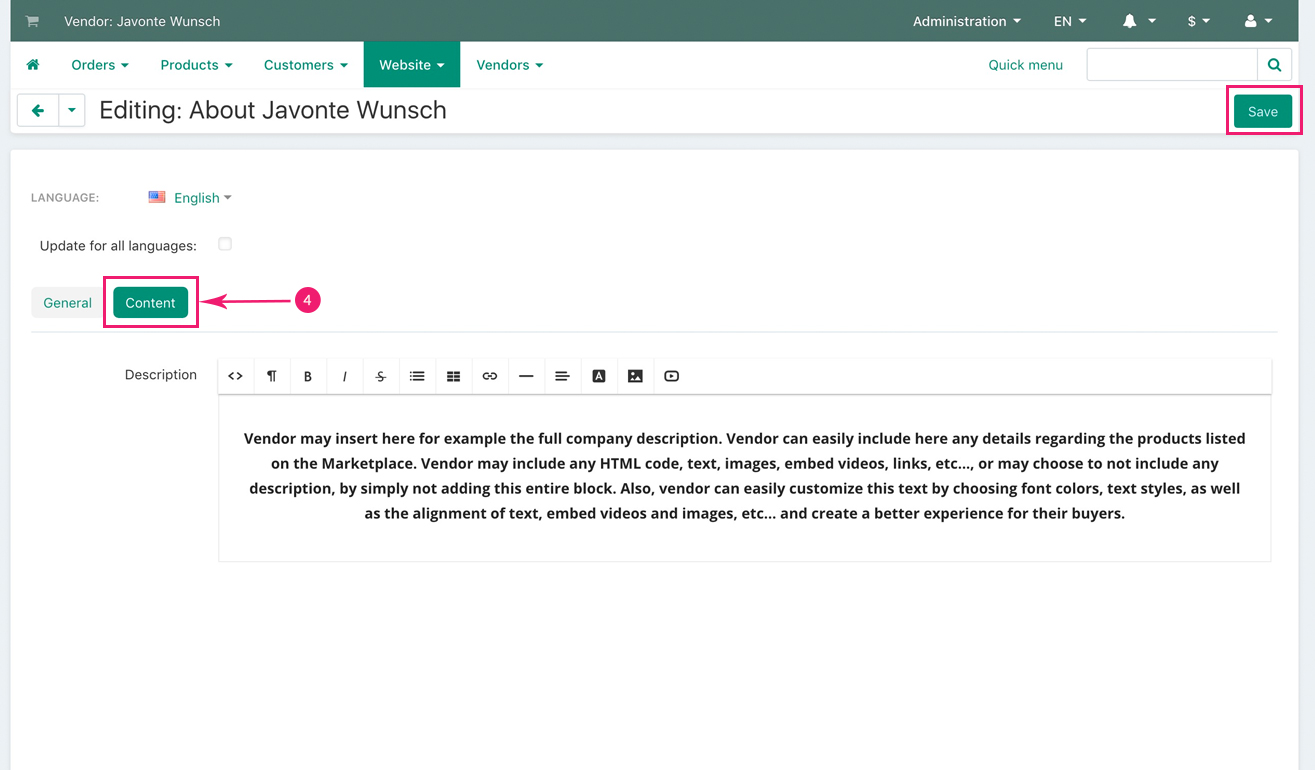
- Step 4
Next, under the “Content” tab, Vendor needs to add the desired text/HTML content, and then click on the top right “Save” button when is done
Adding content pages
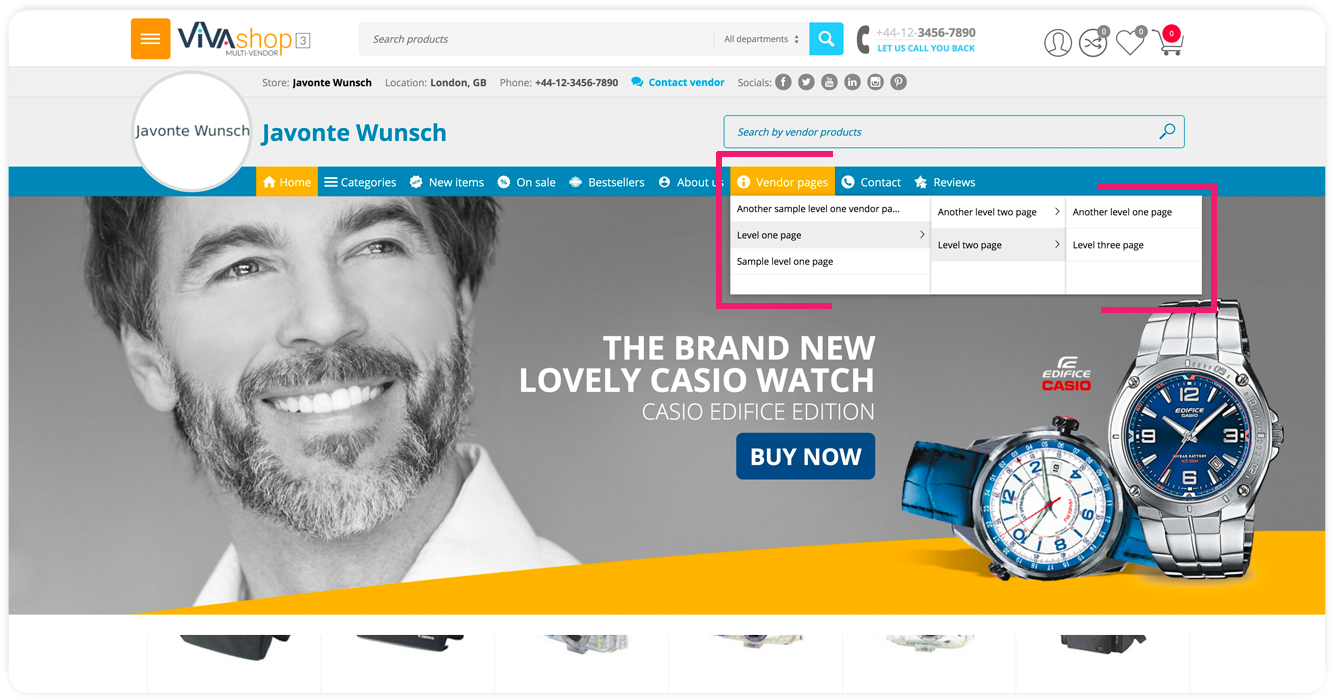
On their stores, Vendors can easily add any number HTML content pages where they can include any information they want. These pages can be structured on trees and the links to these pages are displayed directly in the Vendor main menu. Here’s how to create a content page:
- Step 1
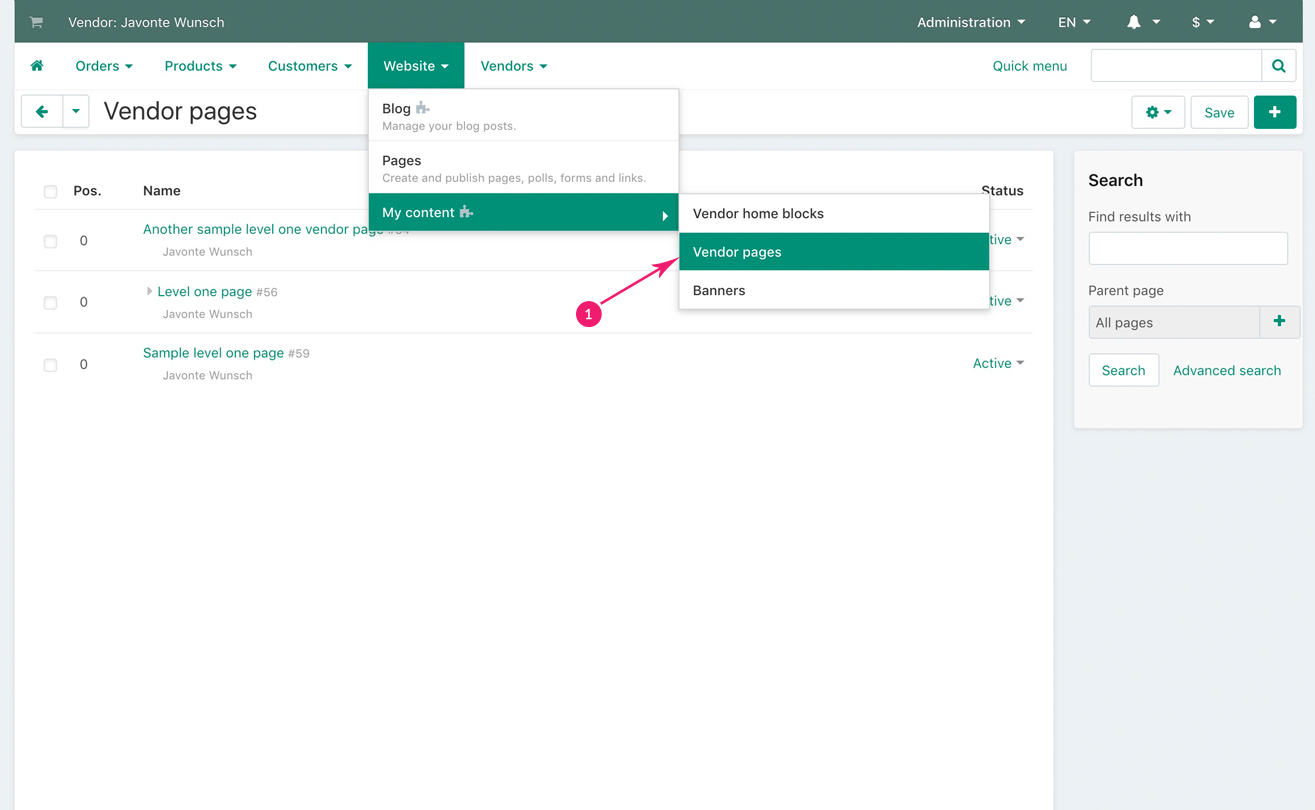
In the Vendor admin panel, go to “Website” - “My content” - “Vendor pages”
- Step 2
Click on the right side “Plus” sign in order to add a new content page
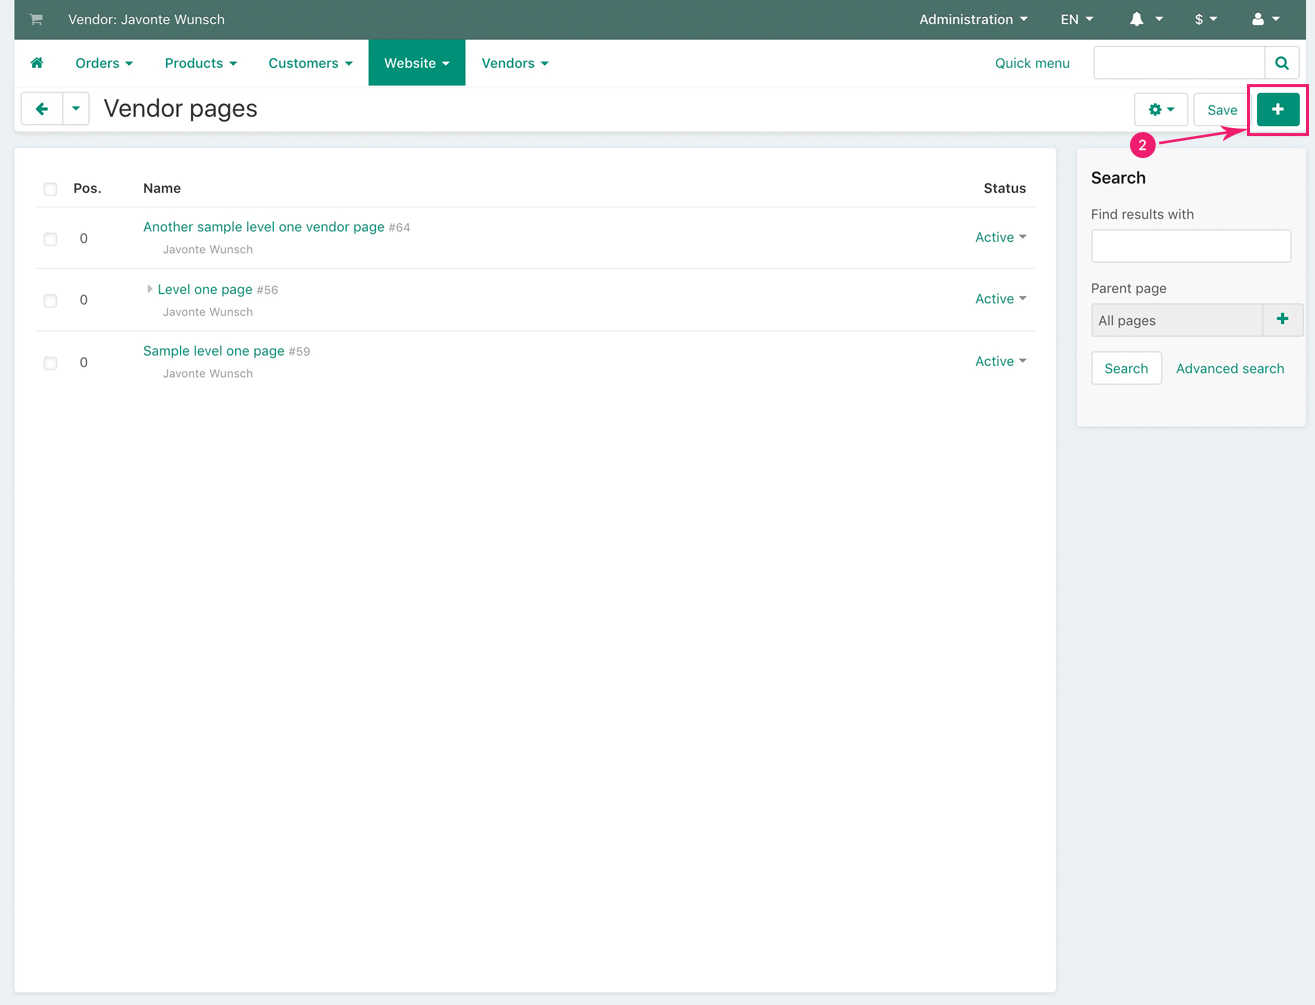
- Step 3
Simply create the page just like you create any page in Multi-Vendor, then click on the top right “Save” button when done
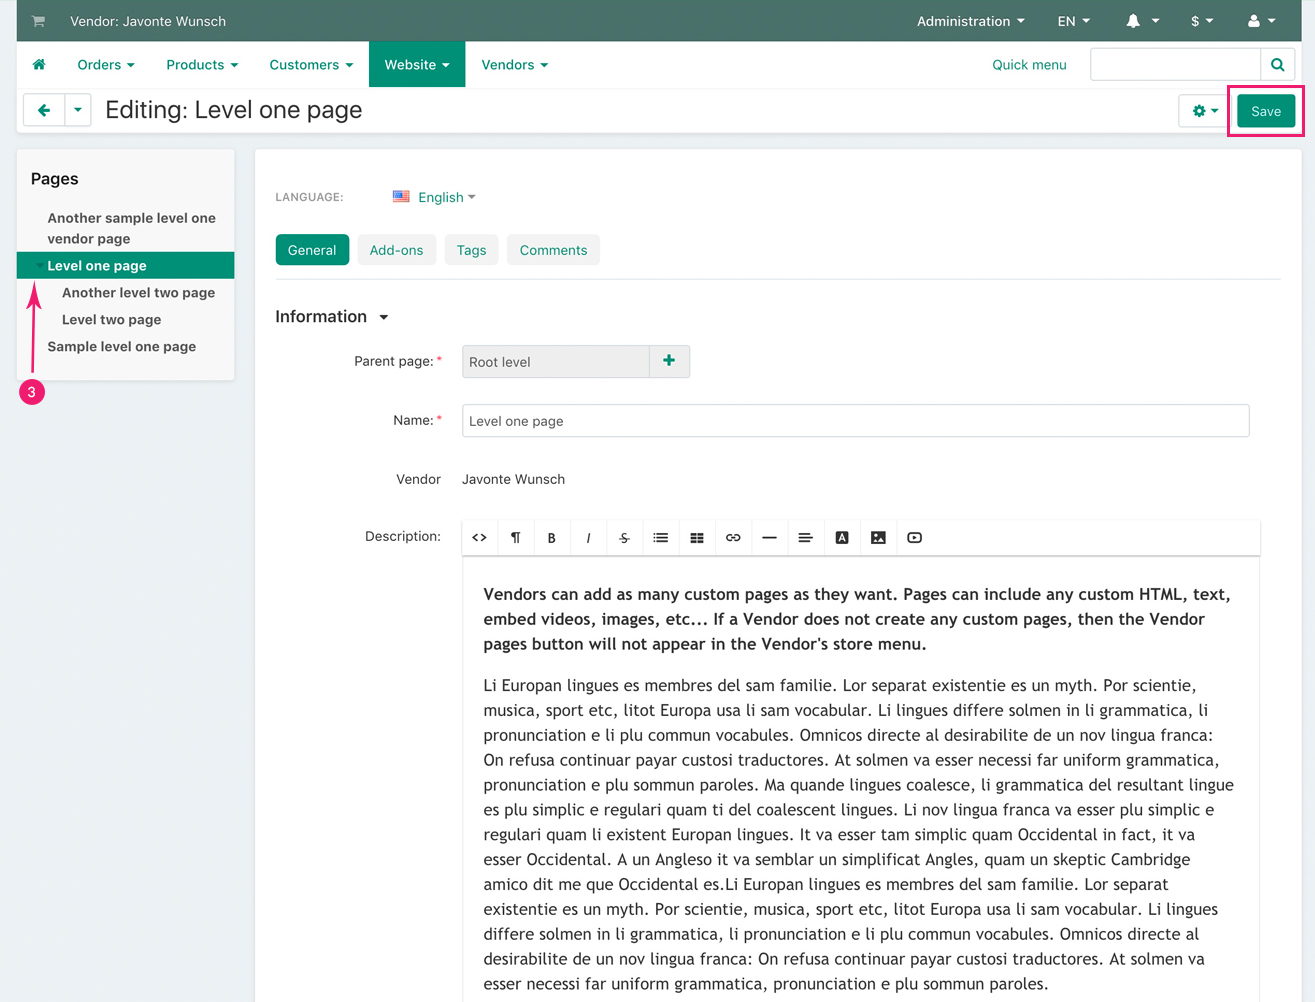
- Step 4
Repeat the above 3 steps in order to create as many content pages as wanted. As soon as these pages are created they will be displayed under the Vendor store main menu according to the created pages tree.
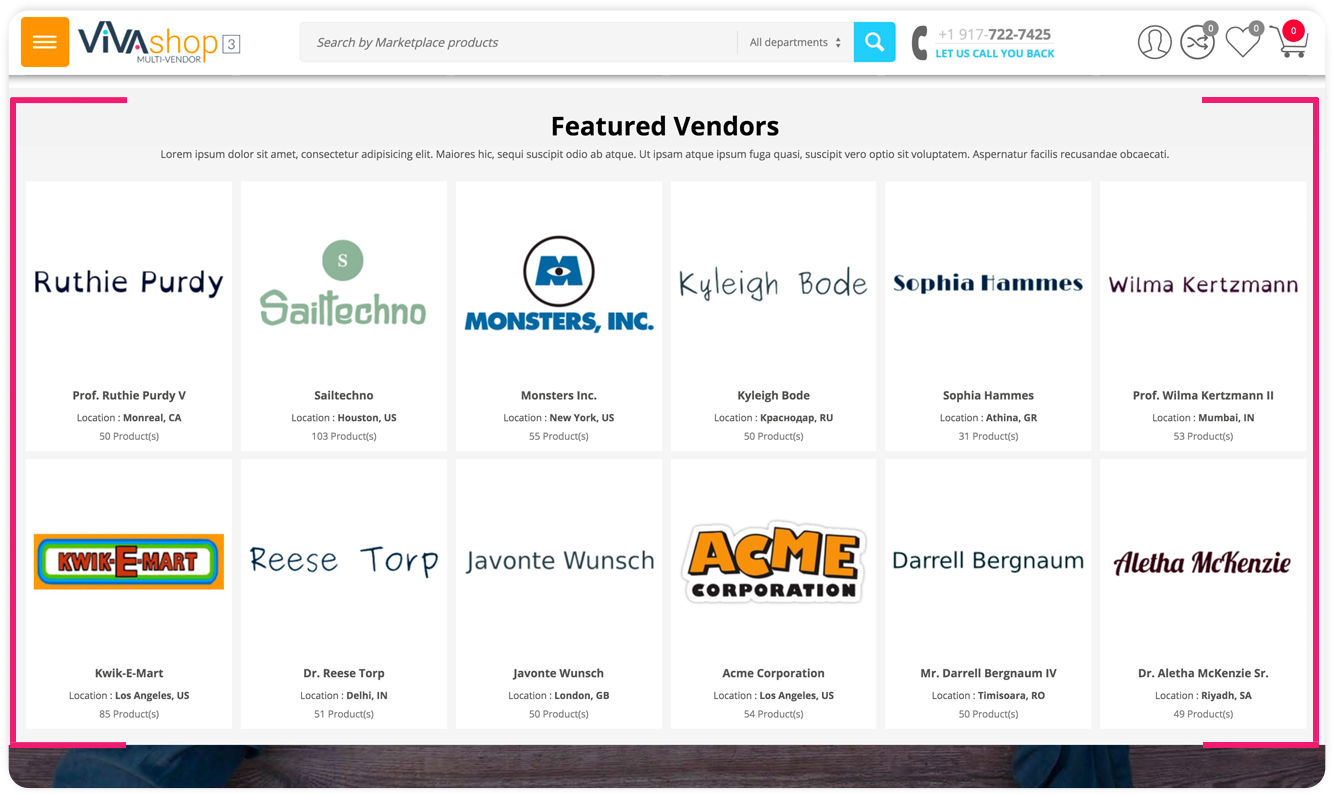
Adding featured Vendors on the Markeplace homepage and set their positions
On your homepage you can add a block with with specific Vendors of your choice that you want to feature, as well as choose the position for each of them. In addition, you can choose to add title and a short description to this block
Please follow the steps below in order to learn how to add an customize this block:
- Step 1
In your admin panel go to “Design” - “Layouts”
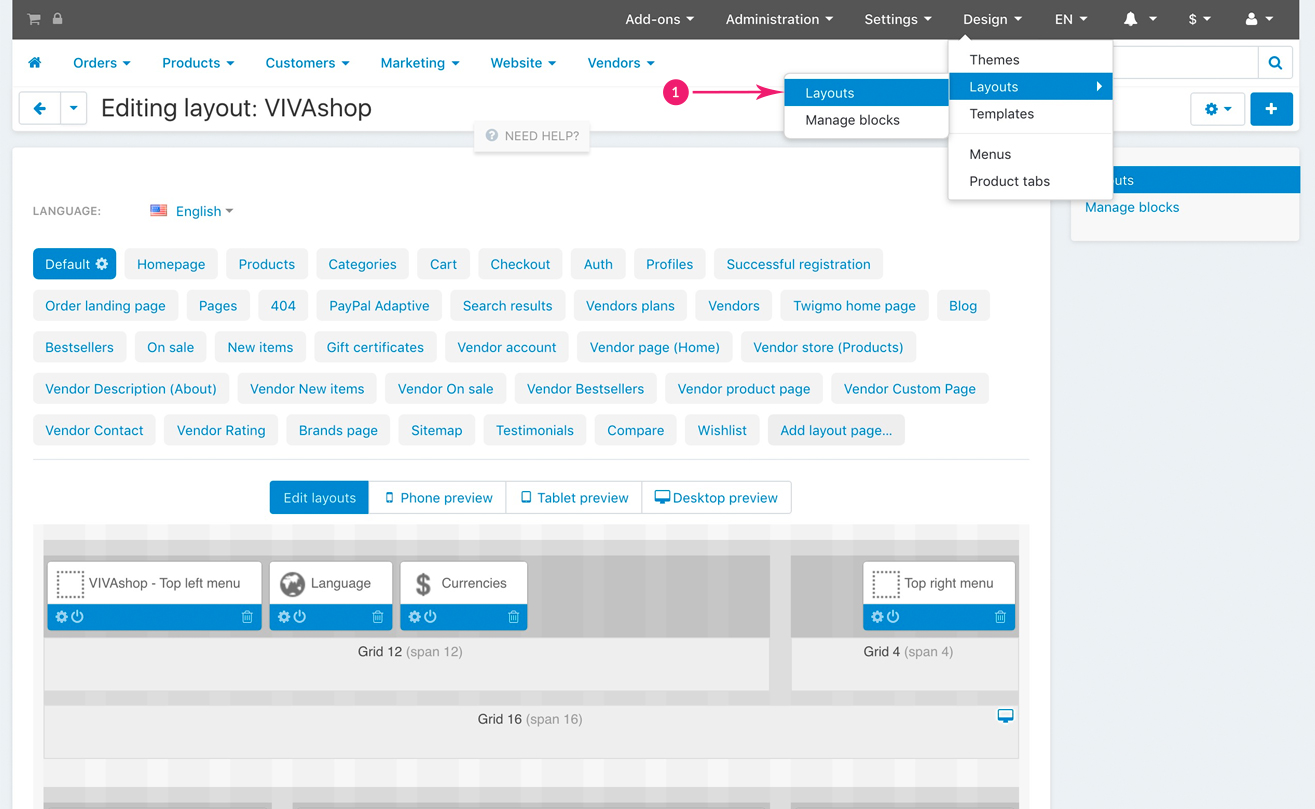
- Step 2
Click on the “Homepage” tab
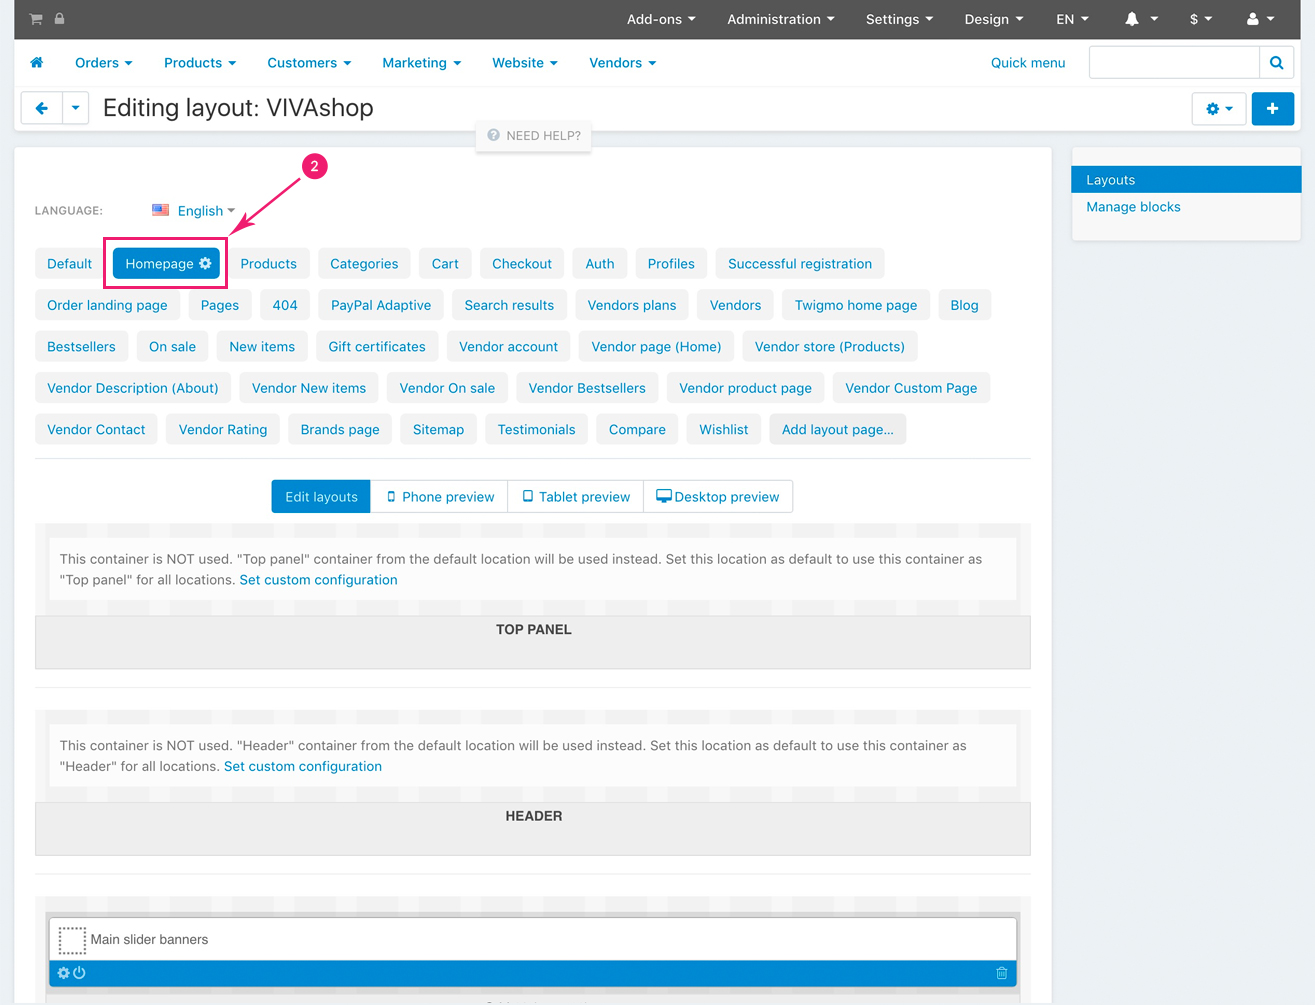
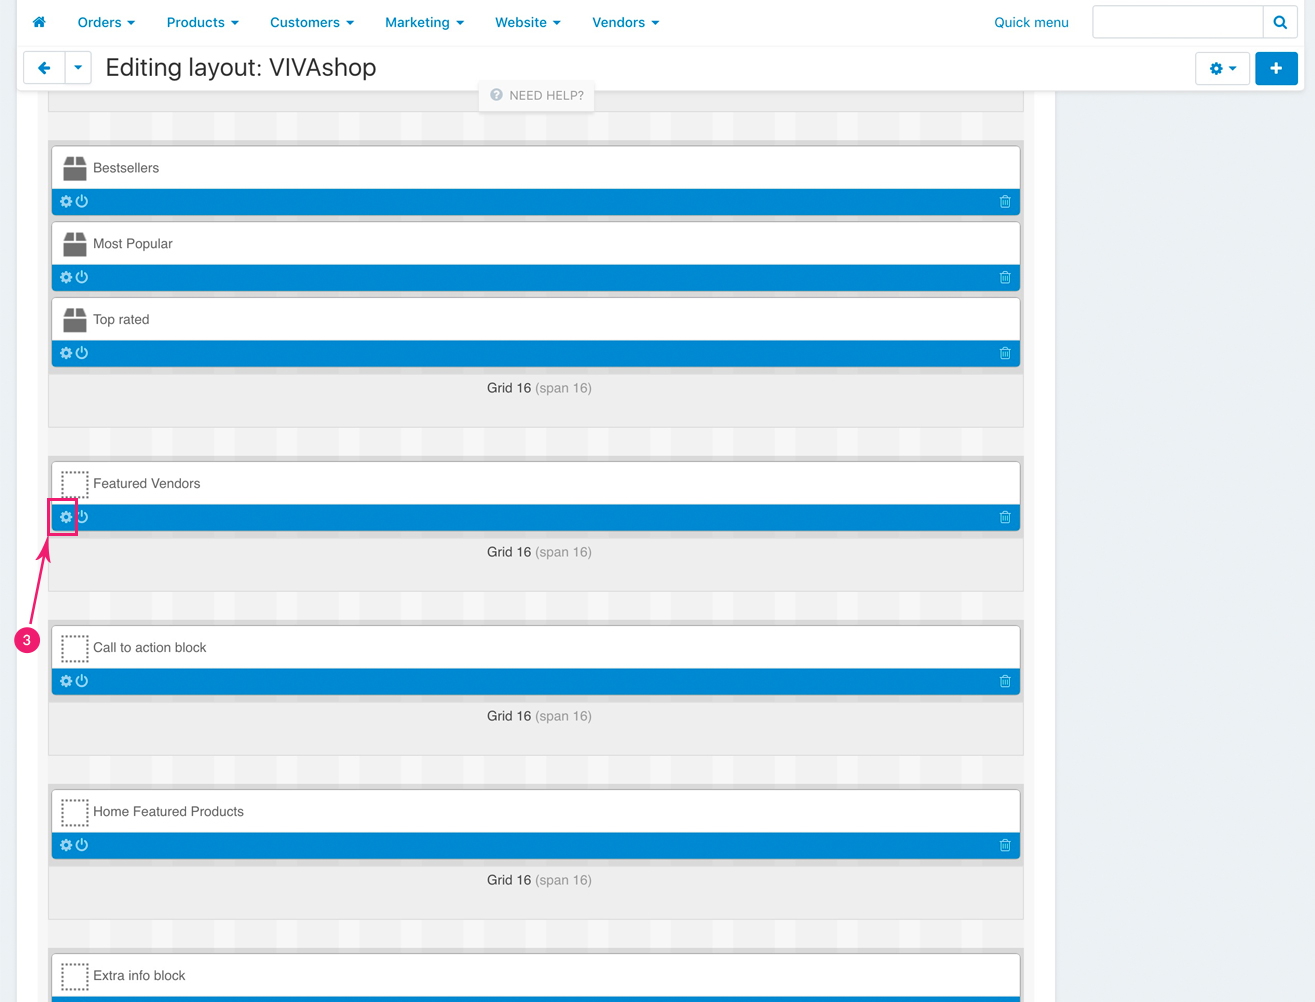
- Step 3
Scroll down to find “Featured Vendors” block and click on the “Block options” of this block
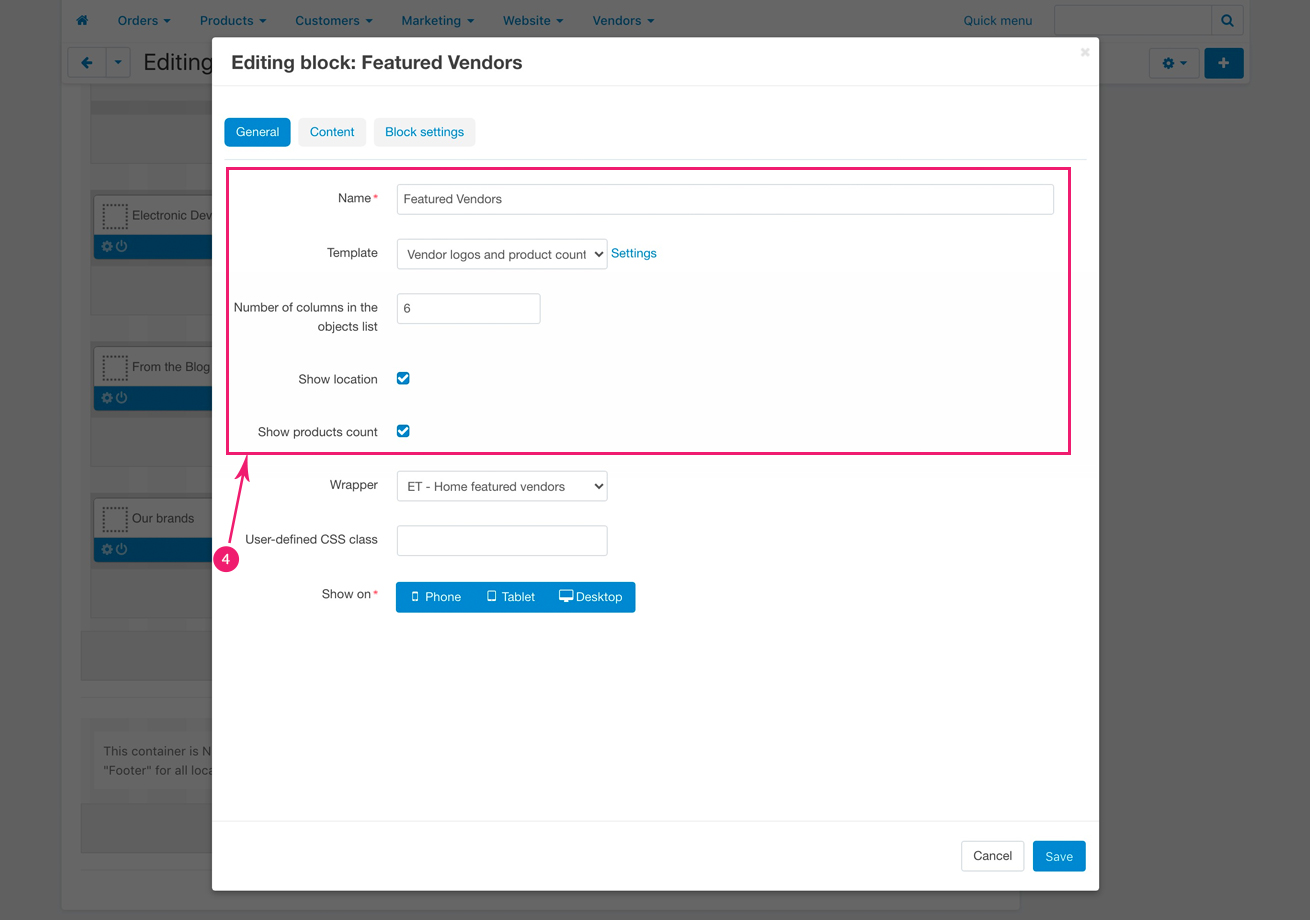
- Step 4
In the newly opened pop-up, under the “General” tab, select your settings for this block. The “Wrapper” should remain “ET- Home featured vendors”
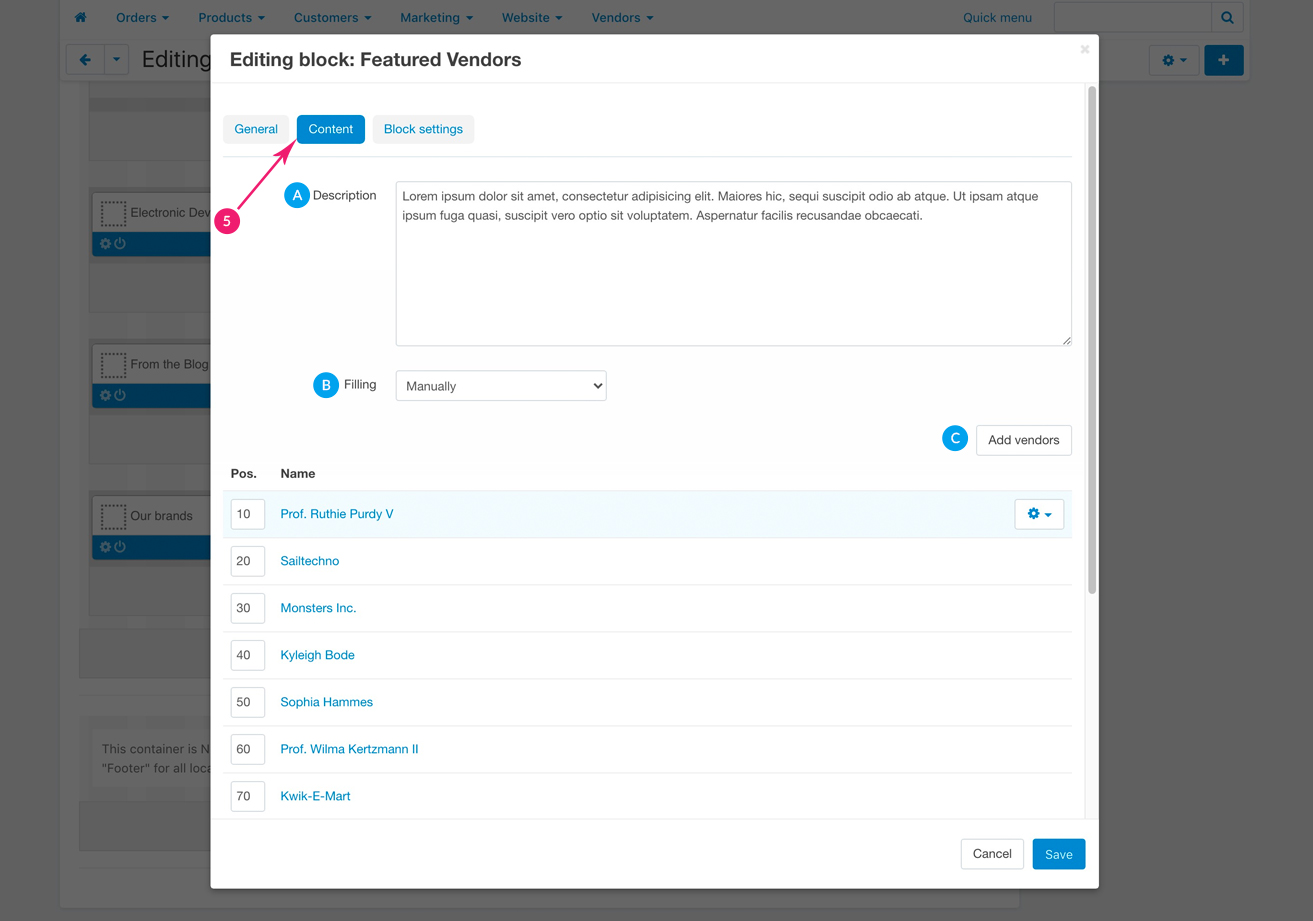
- Step 5
Under the “Content tab” choose the block Description, the Filling, as well as the Vendors that you want to feature
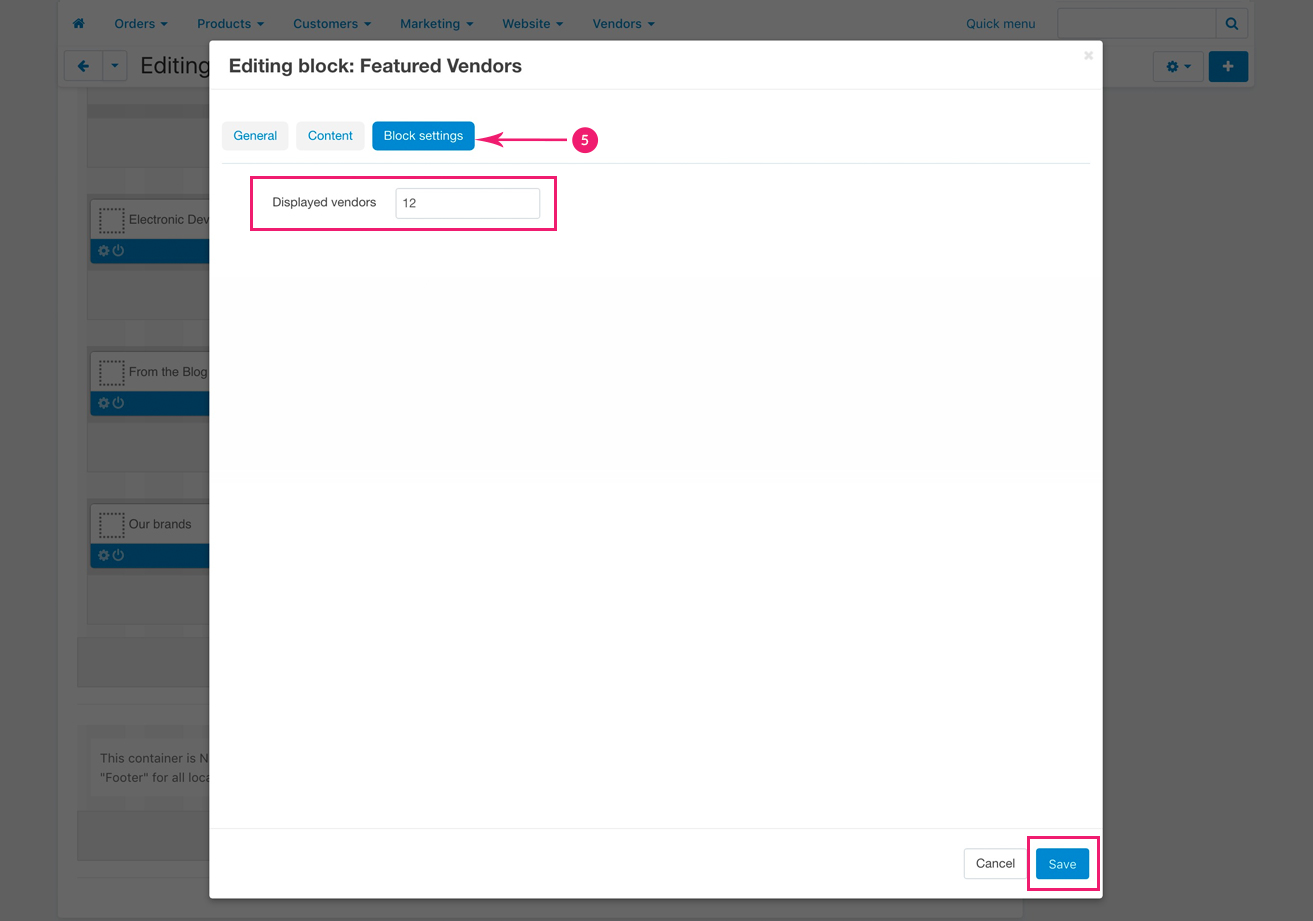
- Step 6
Under the “Block settings” tab choose the number of Vendors that you want to display. When you’re done, click on the bottom blue “Save” button