Manually add content: Adding content to homepage blocks
In addition to the banner blocks we mentioned about in the "Adding banners” section, VIVAshop also comes with several other blocks on the homepage, like product blocks, a call-to-action block, an extra info block, a blog posts scroller, a brands scroller as well as several blocks with featured products and banner tabs. Below we’ll go through all of them so you may learn how to add content to these blocks, as well as customize them.
Product blocks
1. Products scroller tabs

Right below the homepage main slider banners, we have included 3 tabs with products scollers: "Bestsellers”, "Most Popular” and "Top Rated”. Of course you can change the name of any of them, as well as choose any products of your choice to display under each tab. Below are the steps that you need to take in order to add content to the "Bestsellers” block, for the other two blocks ("Most Popular” and "Top Rated”) all you have to do is to simply repeat the process:
- Step 1
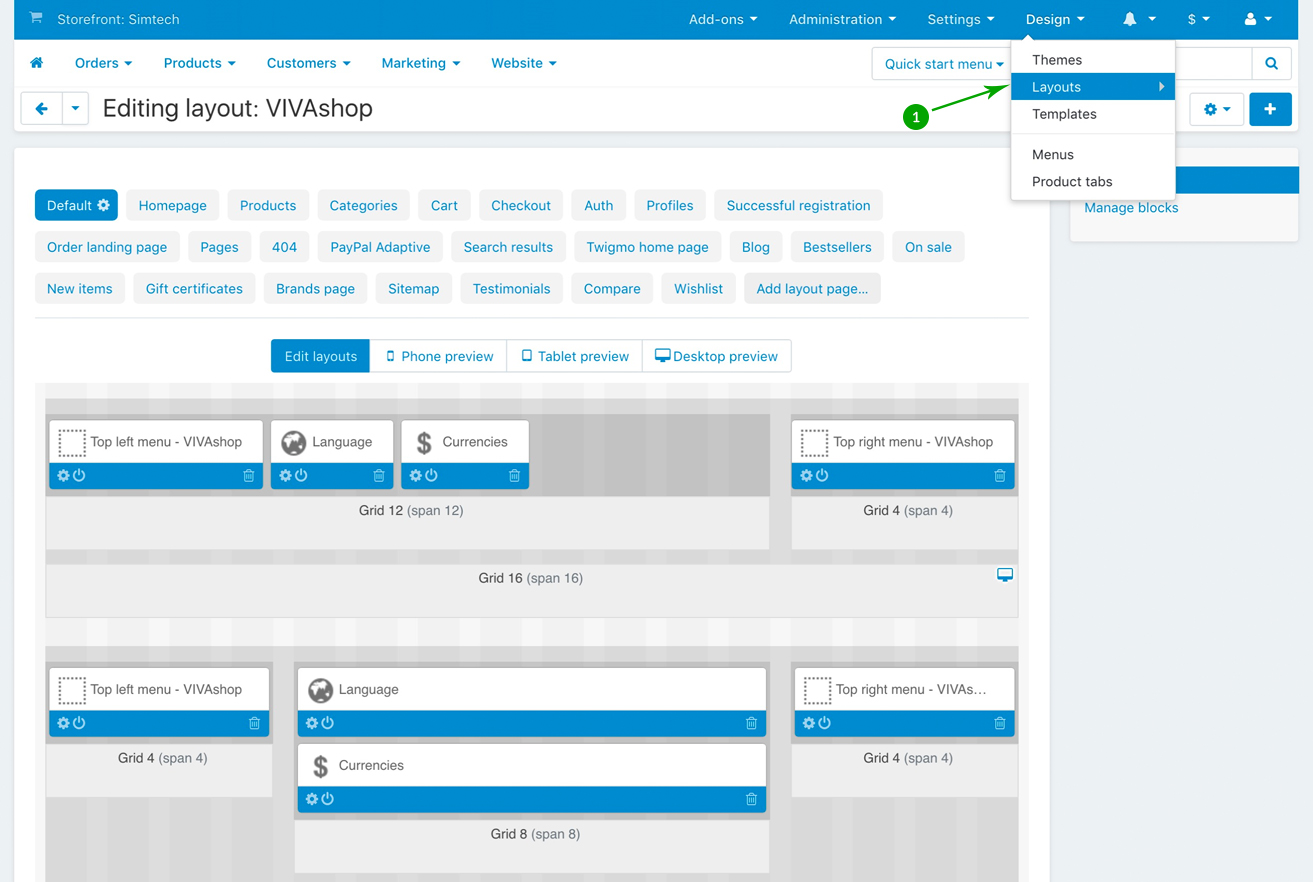
In your admin panel, go to "Design” - "Layouts”:
- Step 2
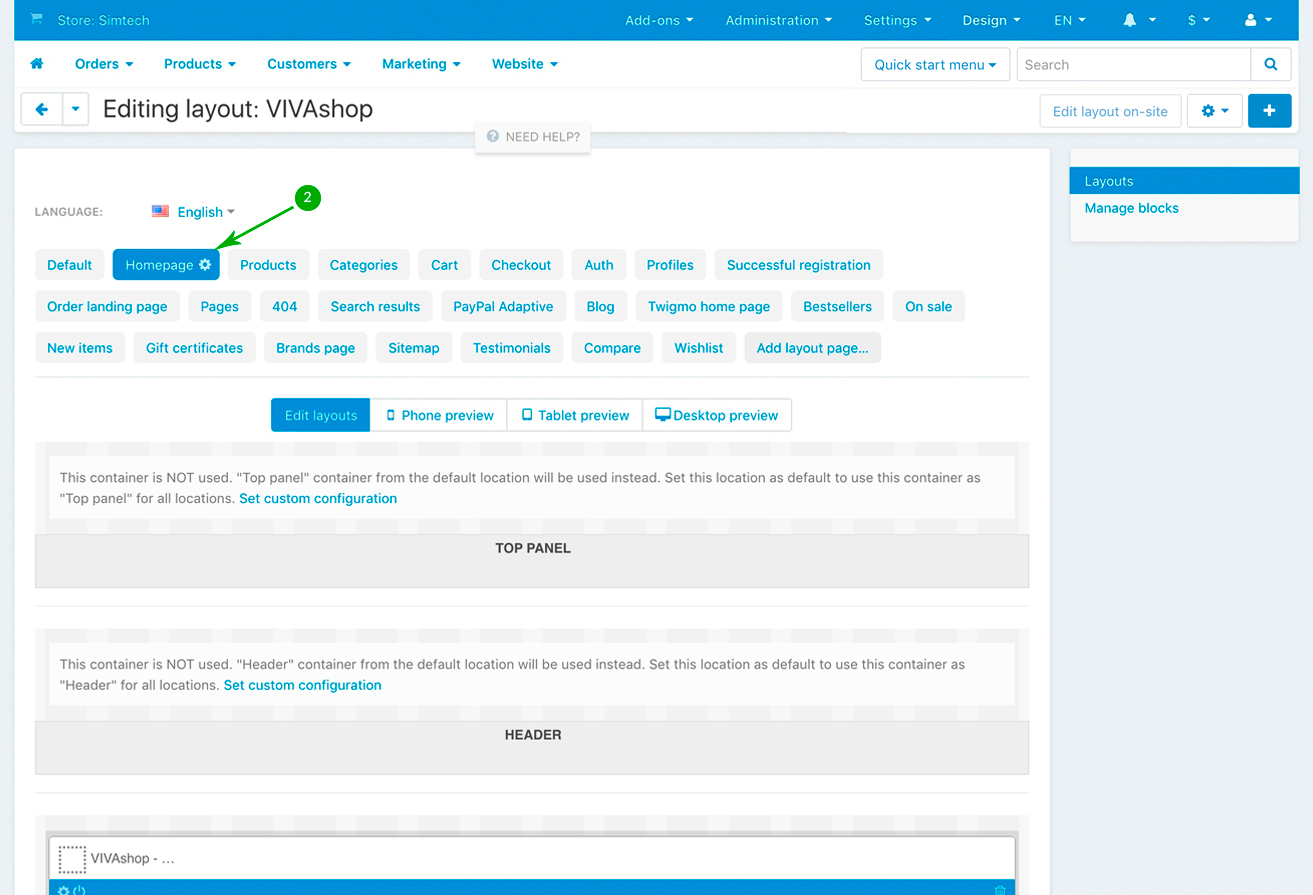
Click on the "Homepage” tab
- Step 3
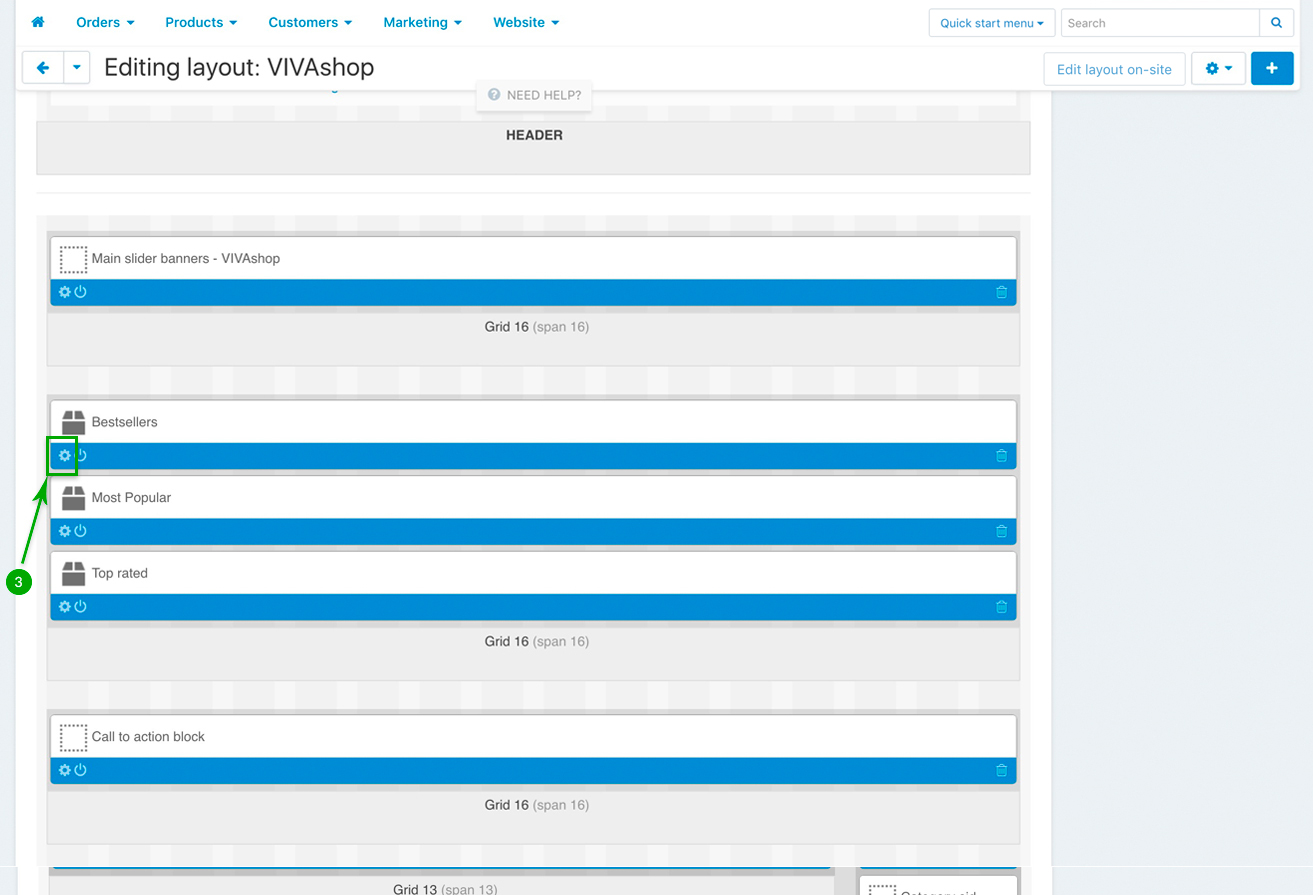
Scroll down and look for the “Bestsellers” block, and click on the “Block options” of this block
- Step 4
In the newly opened pop-up window, under the “General” tab, if you wish, change the block Name, as well as the other settings according to your preferences. The “Template” should however be “Scroller”, as well as the “Wrapper” should remain “ET - Multi scroller”
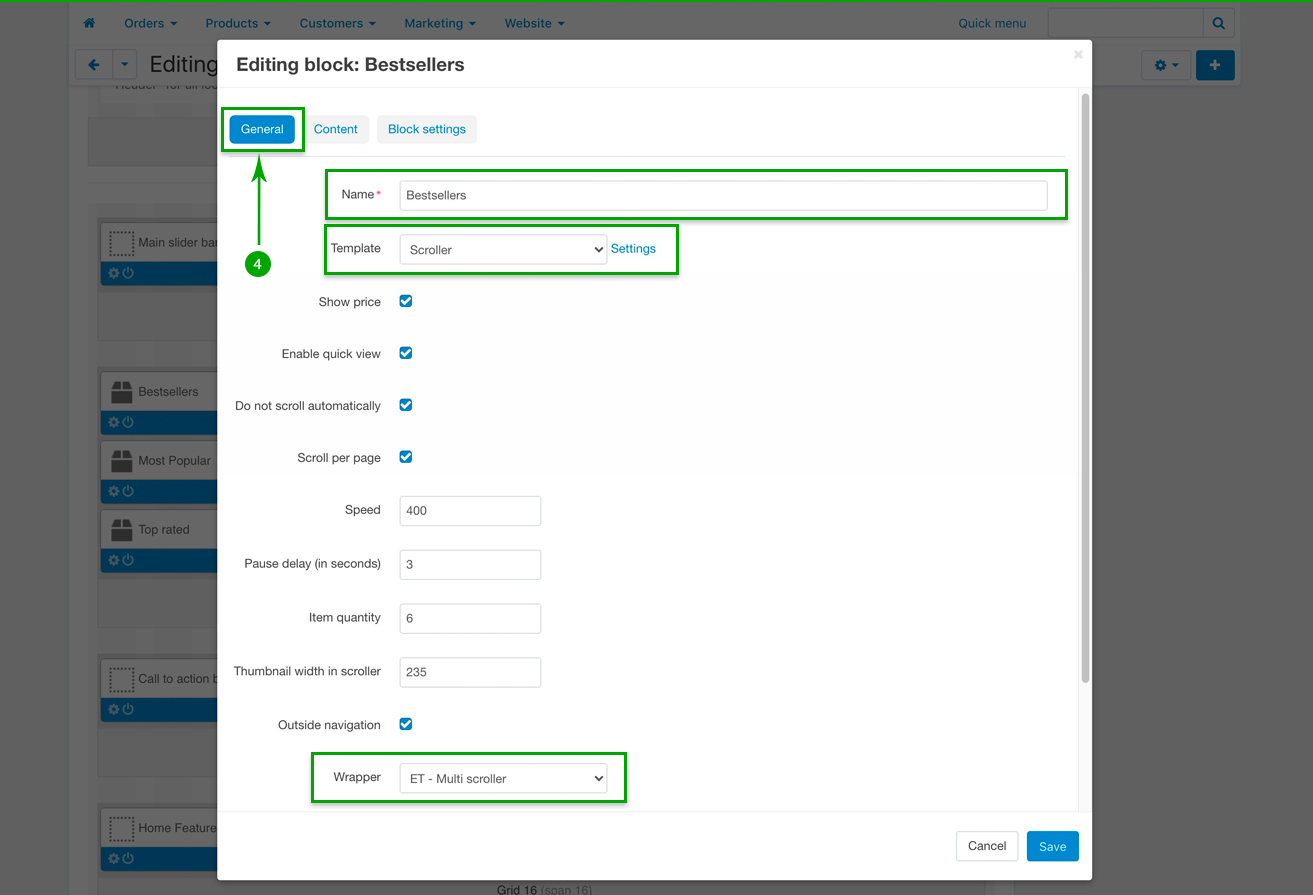
- Step 5
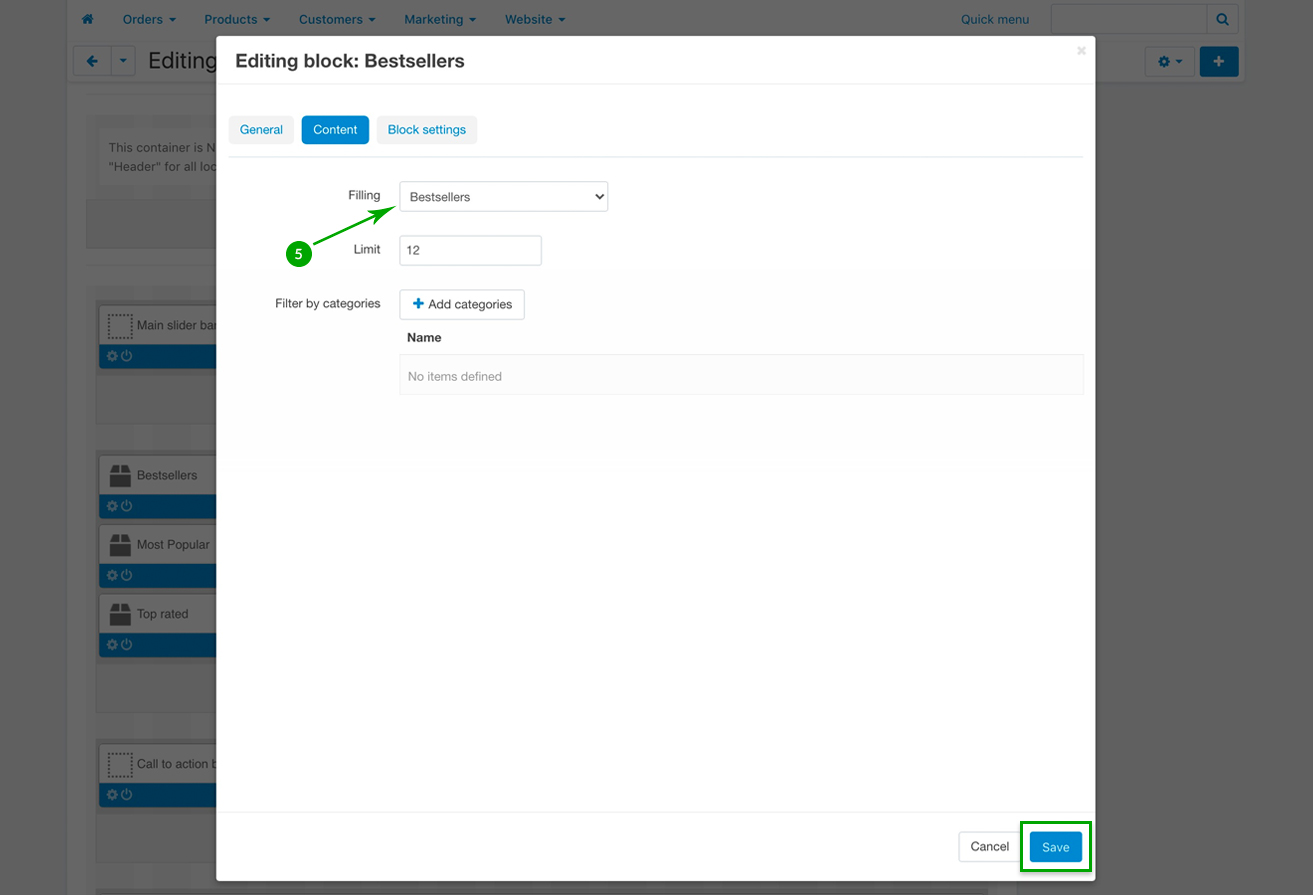
Next, because this example is about how to add bestseller products, under the “Content” tab, choose “Bestsellers” from the “Filling” dropdown. However, you can choose any other filling, reflecting the products you want to add under these tabs. When you’re done, simply click on the bottom right “Save” button.
- Step 6
Repeat the above 5 steps in order to add content to the other two blocks (“Most Popular” block and “Top Rated” block).
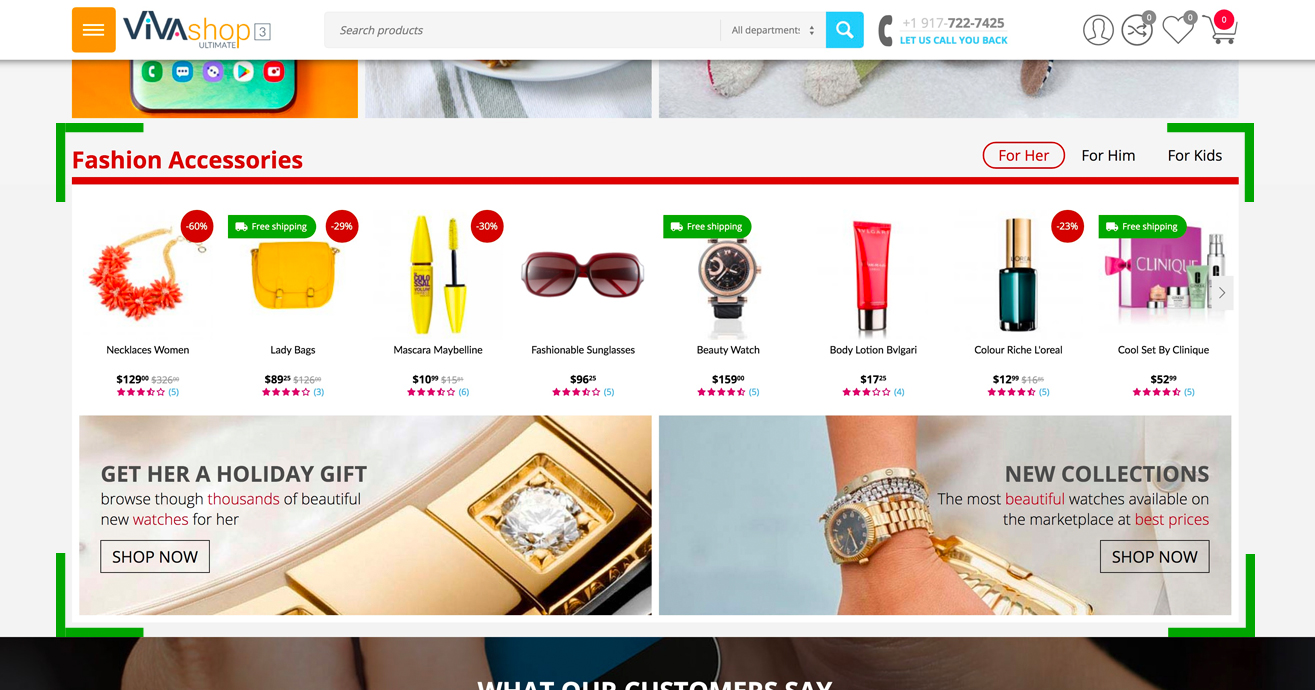
2. Home featured products
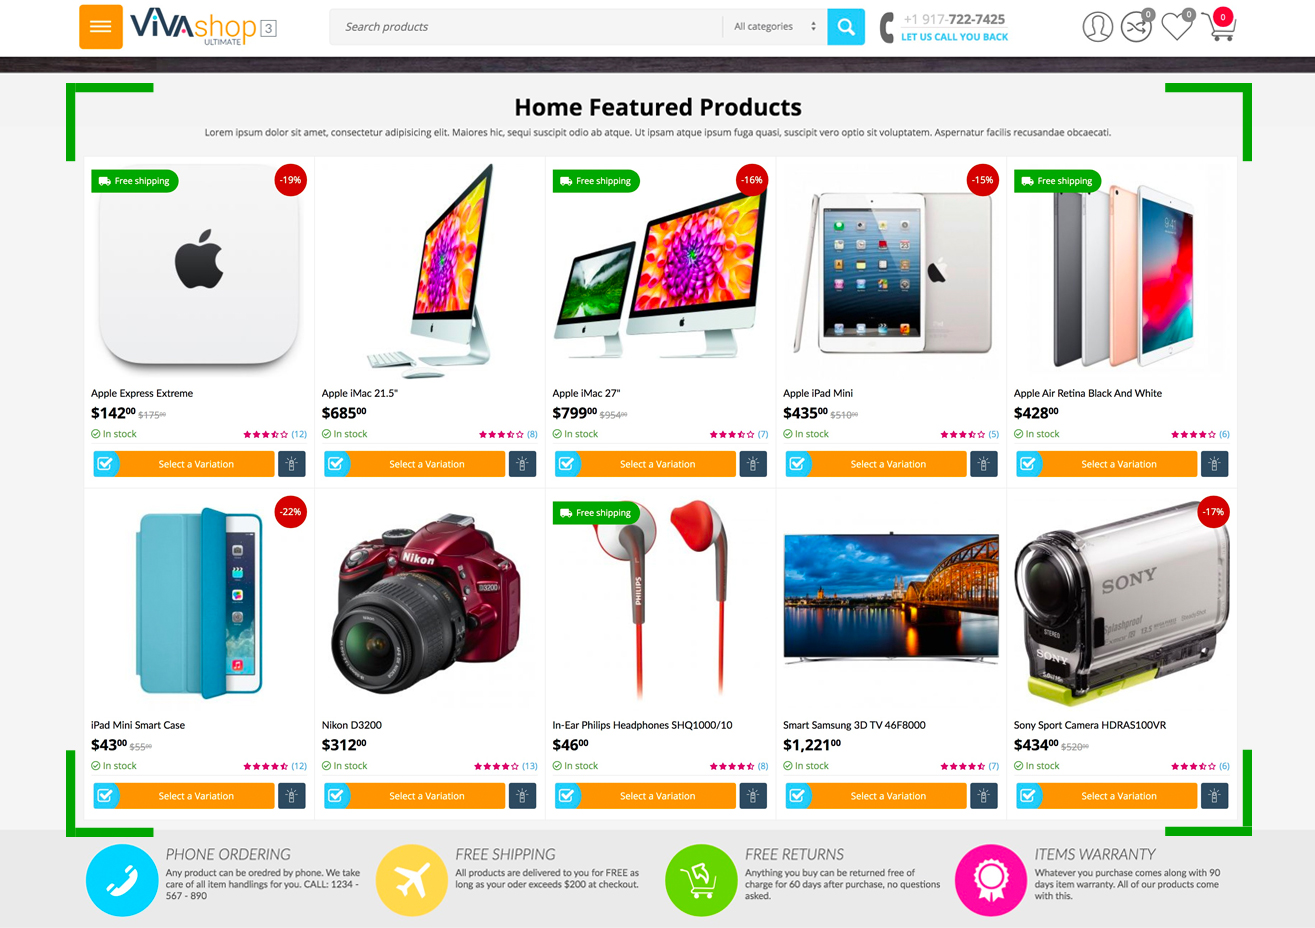
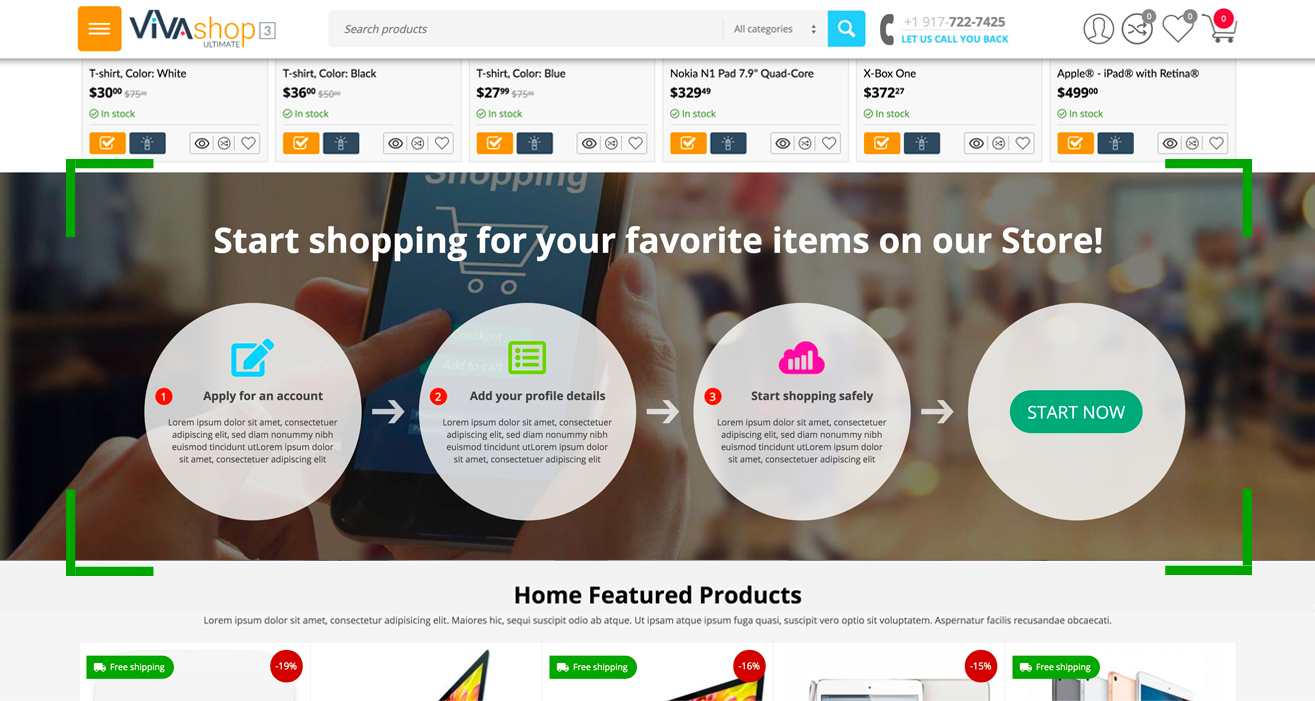
On the homepage we have included a block where you can add any products of your choice. You can choose your own block name, as well as add any custom description you want, telling your visitors a few words about the products you are featuring on your homepage. We have called this block “Home Featured Products”, but again, you can change its name accordingly. Please find below the steps you need to take in order to customize this block with products:
- Step 1
In your admin panel, go to "Design” - "Layouts”:
- Step 2
Click on the "Homepage” tab
- Step 3
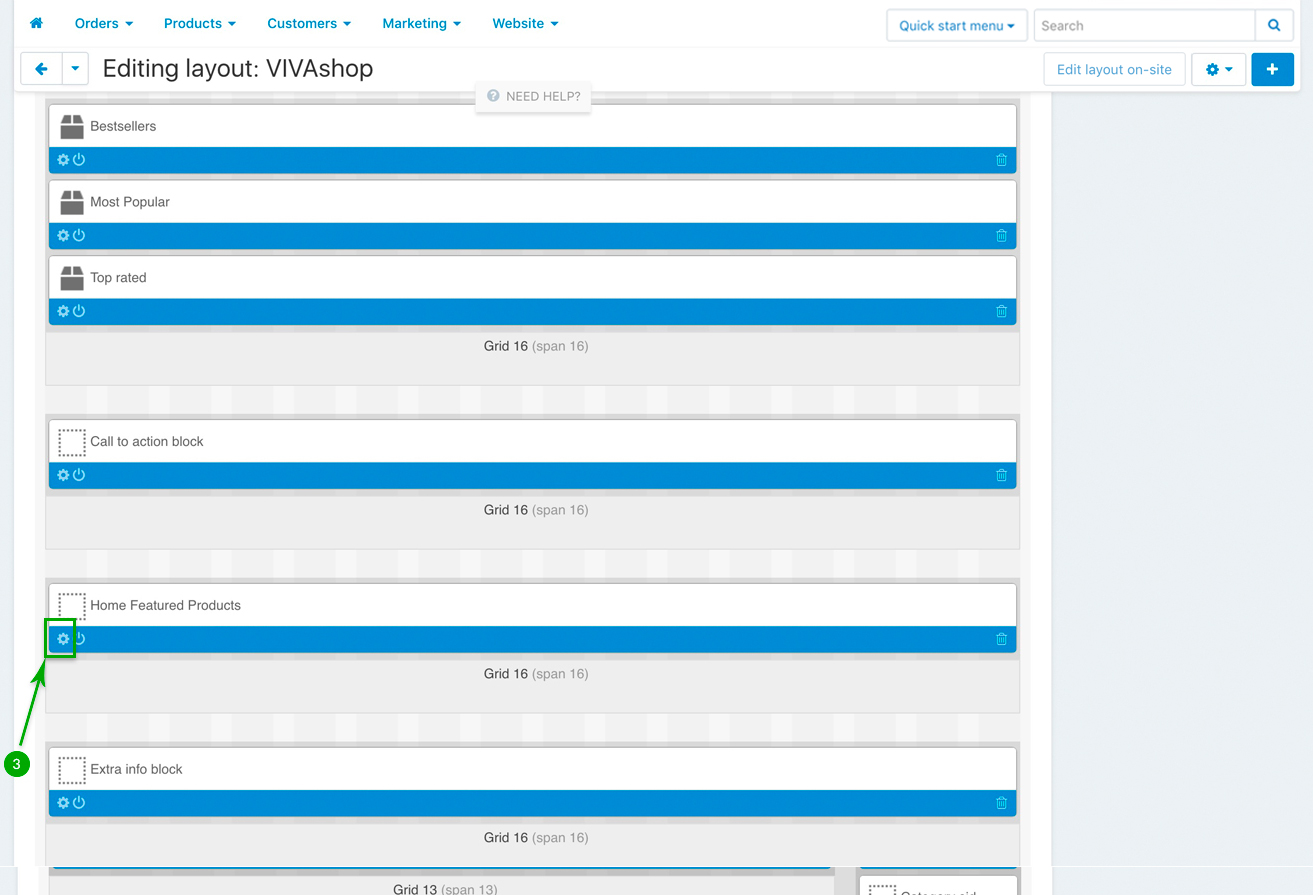
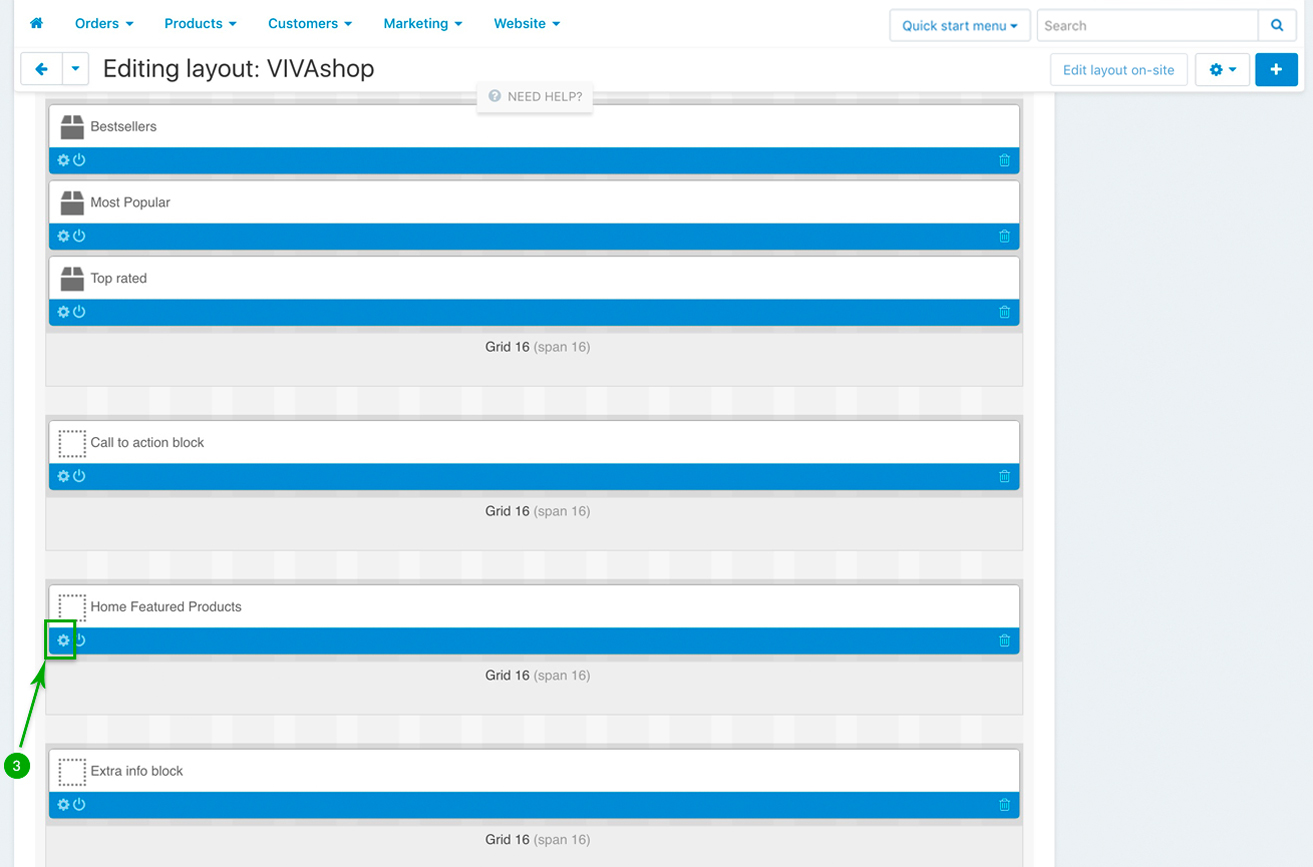
Scroll down and look for the “Home Featured Products” block, and click on the “Block options” of this block
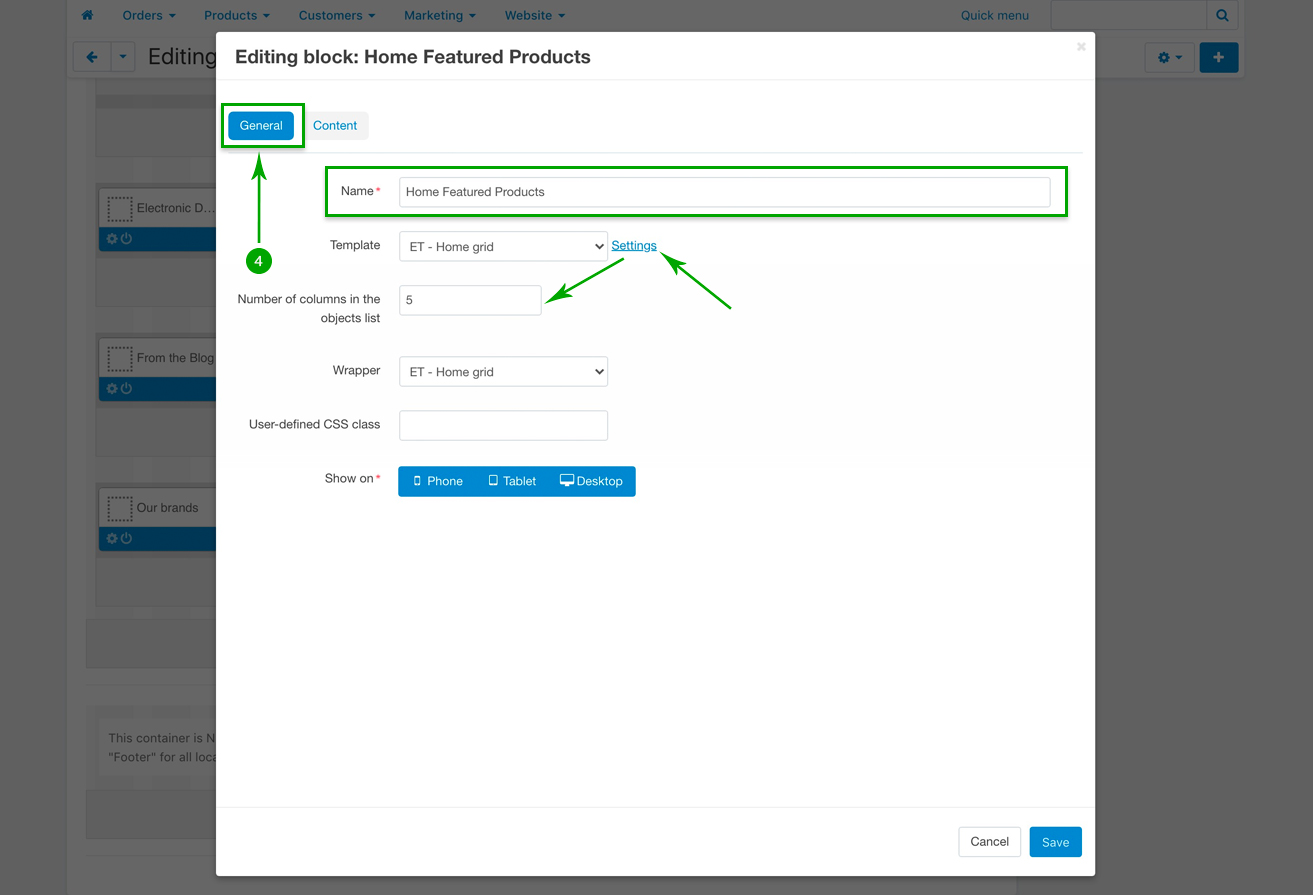
- Step 4
In the newly opened pop-up window, under the “General” tab, if you wish, change the block Name, then click on the “Settings” link and set the “Number of columns in the objects list”, which is the number of columns that you want the featured products to be displayed in. The “Template” should remain “ET - Home grid”, and the “Wrapper” should remain “ET - Home grid” as well.
- Step 5
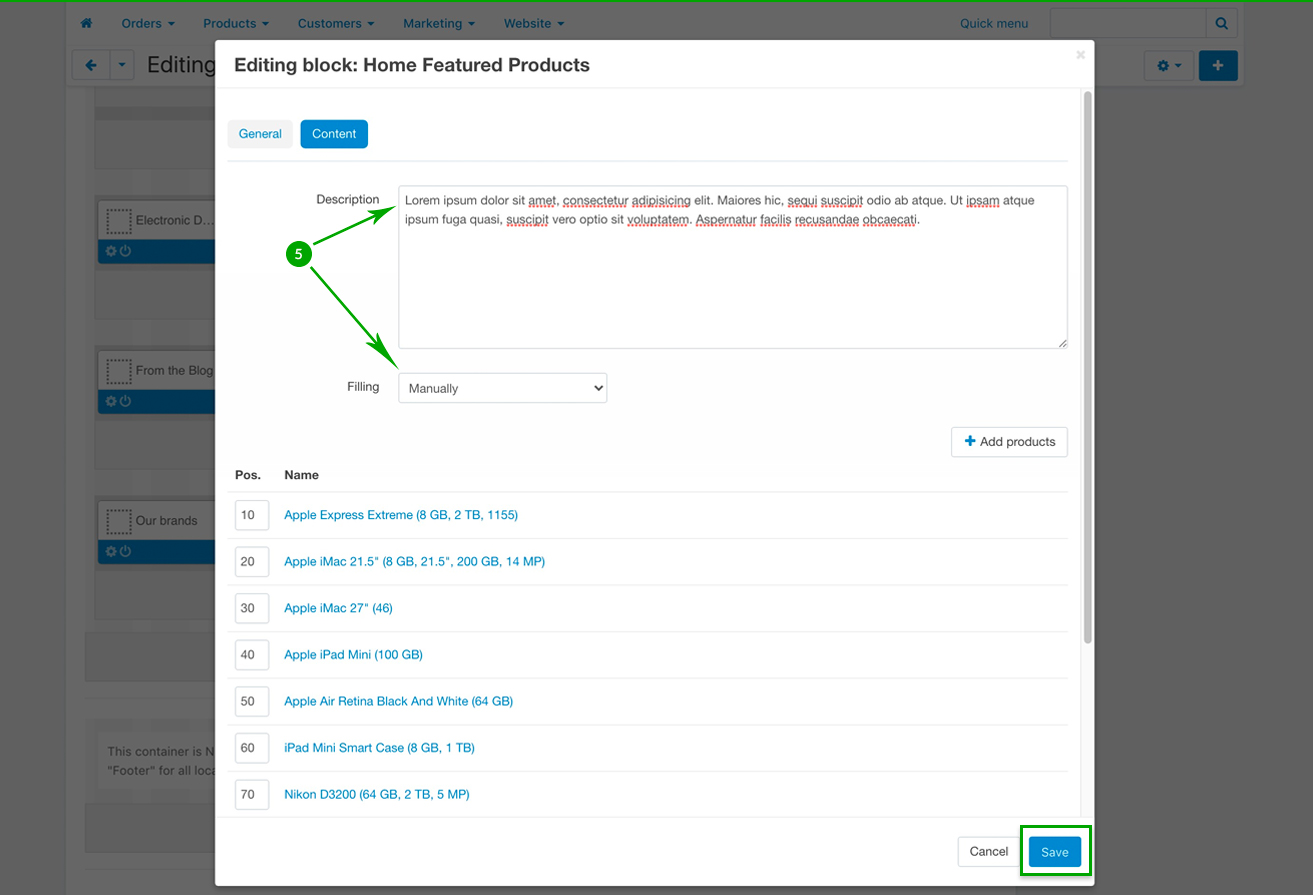
Next, under the “Content” tab, add your own block description, and then choose your filling from the “Filling” dropdown. In this particular example we have manually added products that we wanted to feature on the homepage, so we have chosen the “Manually” filling. When you’re done, click on the bottom right “Save” button.
Call-to-action block
Make your customers take an action of your choice in 3 steps with the help of the “Call to action block” that we have included on the homepage. You can completely customize this block according to your own wishes. Here’s how to do it, as well as the customization options that you have available:
- Step 1
In your admin panel, go to "Design” - "Layouts”:
- Step 2
Click on the "Homepage” tab
- Step 3
Scroll down and look for the “Call to action block” block, and click on the “Block options” of this block
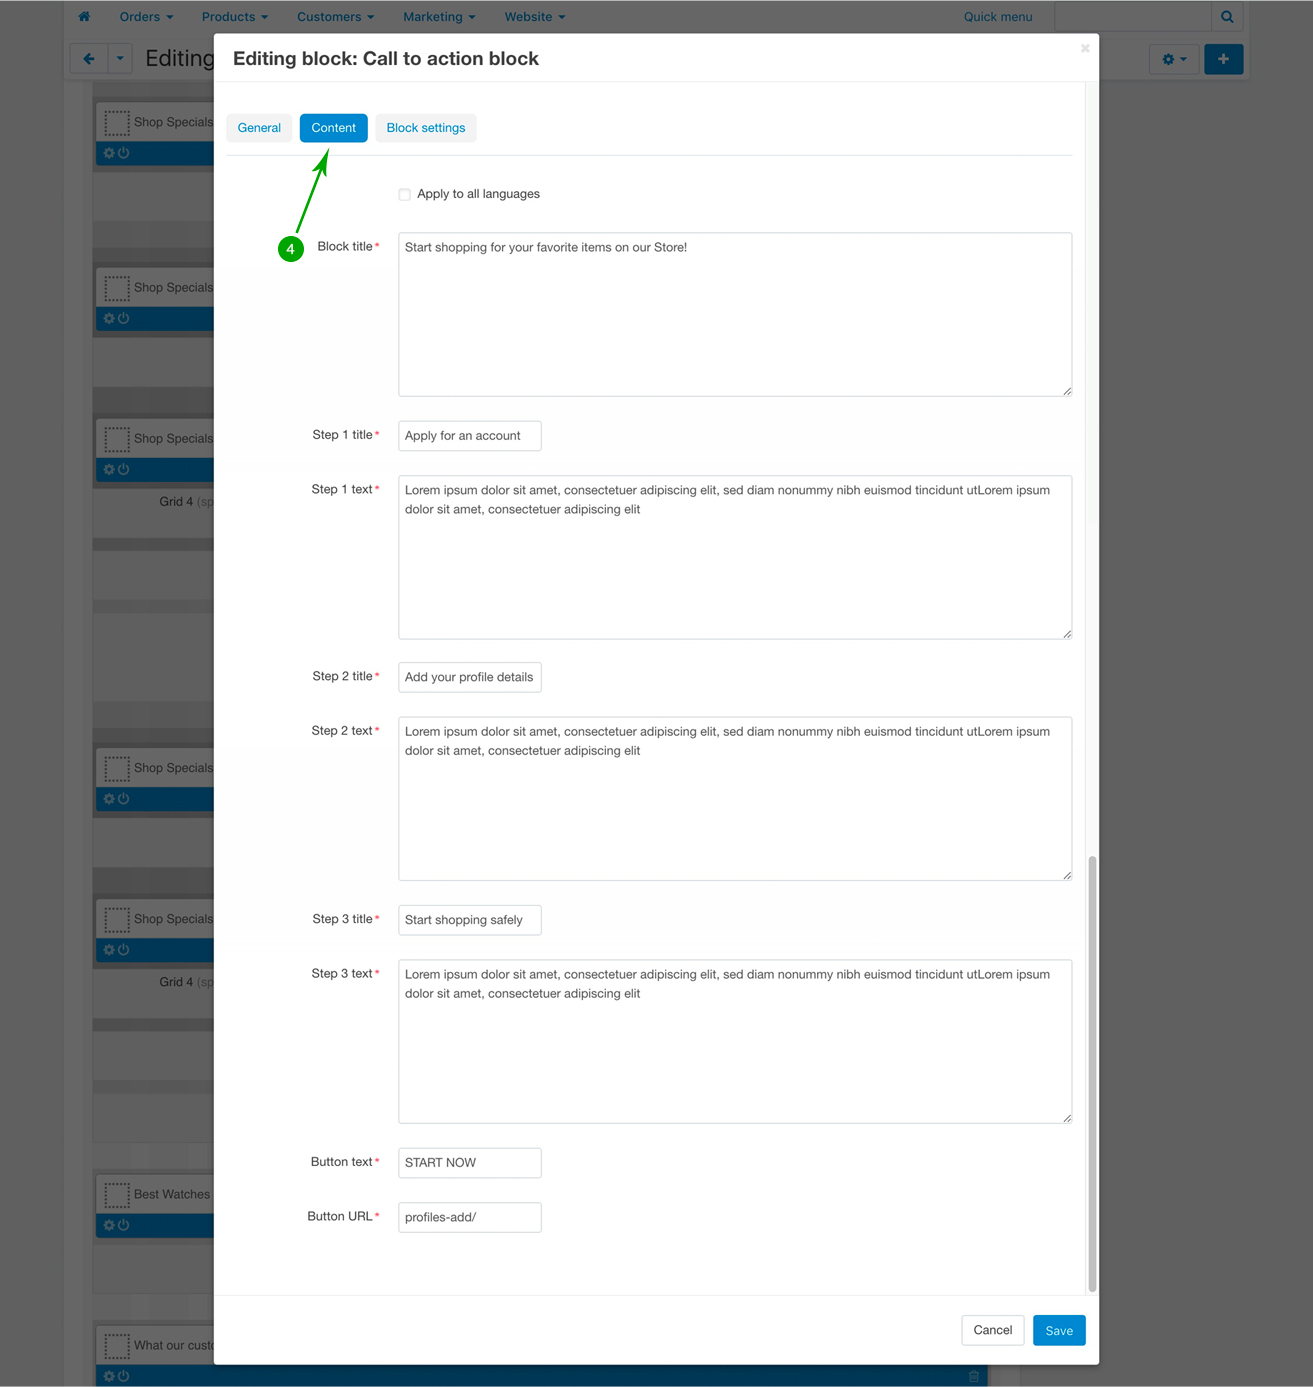
- Step 4
In the newly opened pop-up window, under the “Content” tab, type the text content for your block: block title, step titles and text, button text, as well as the link where you want to forward users when they click on it.
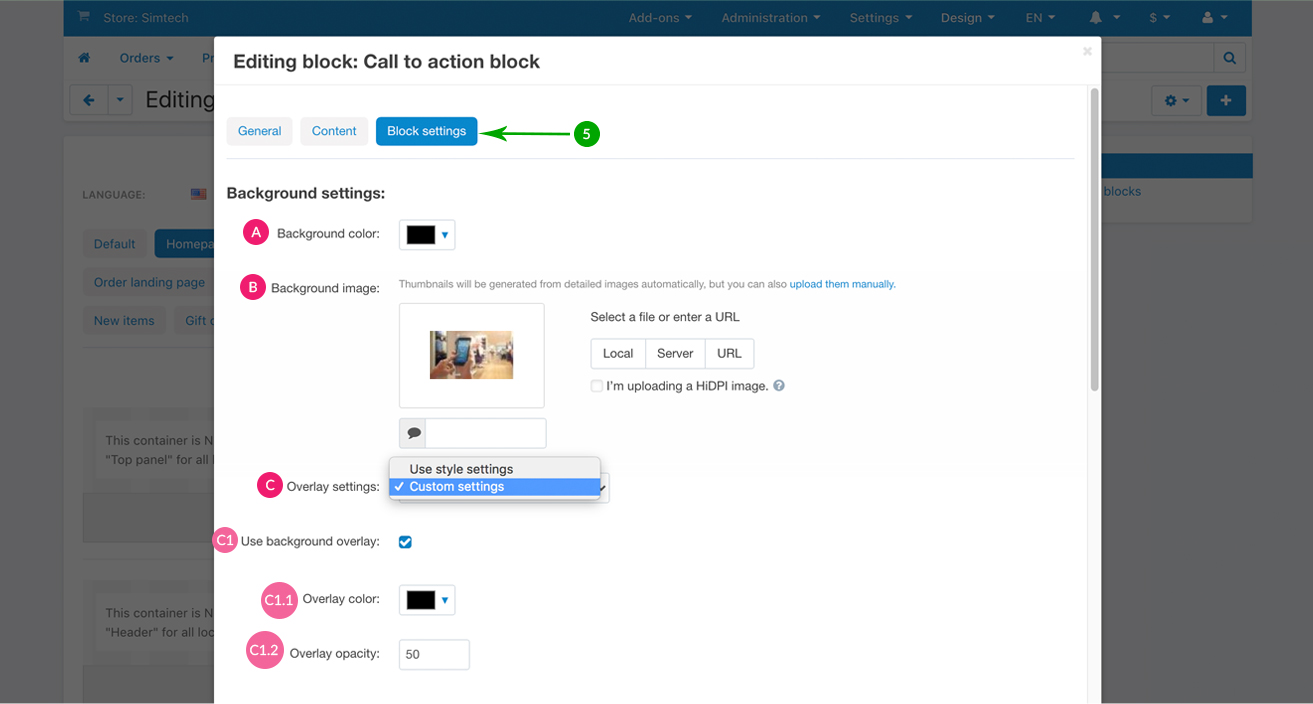
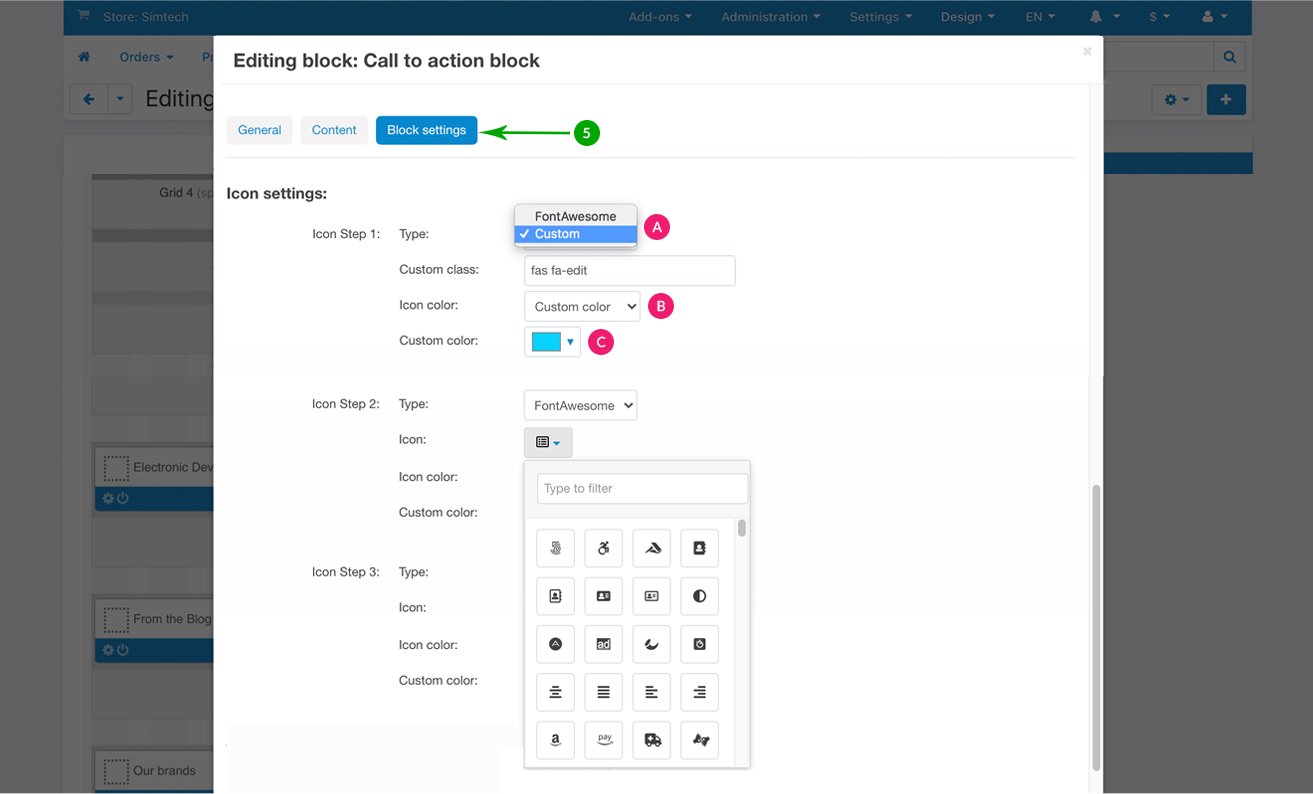
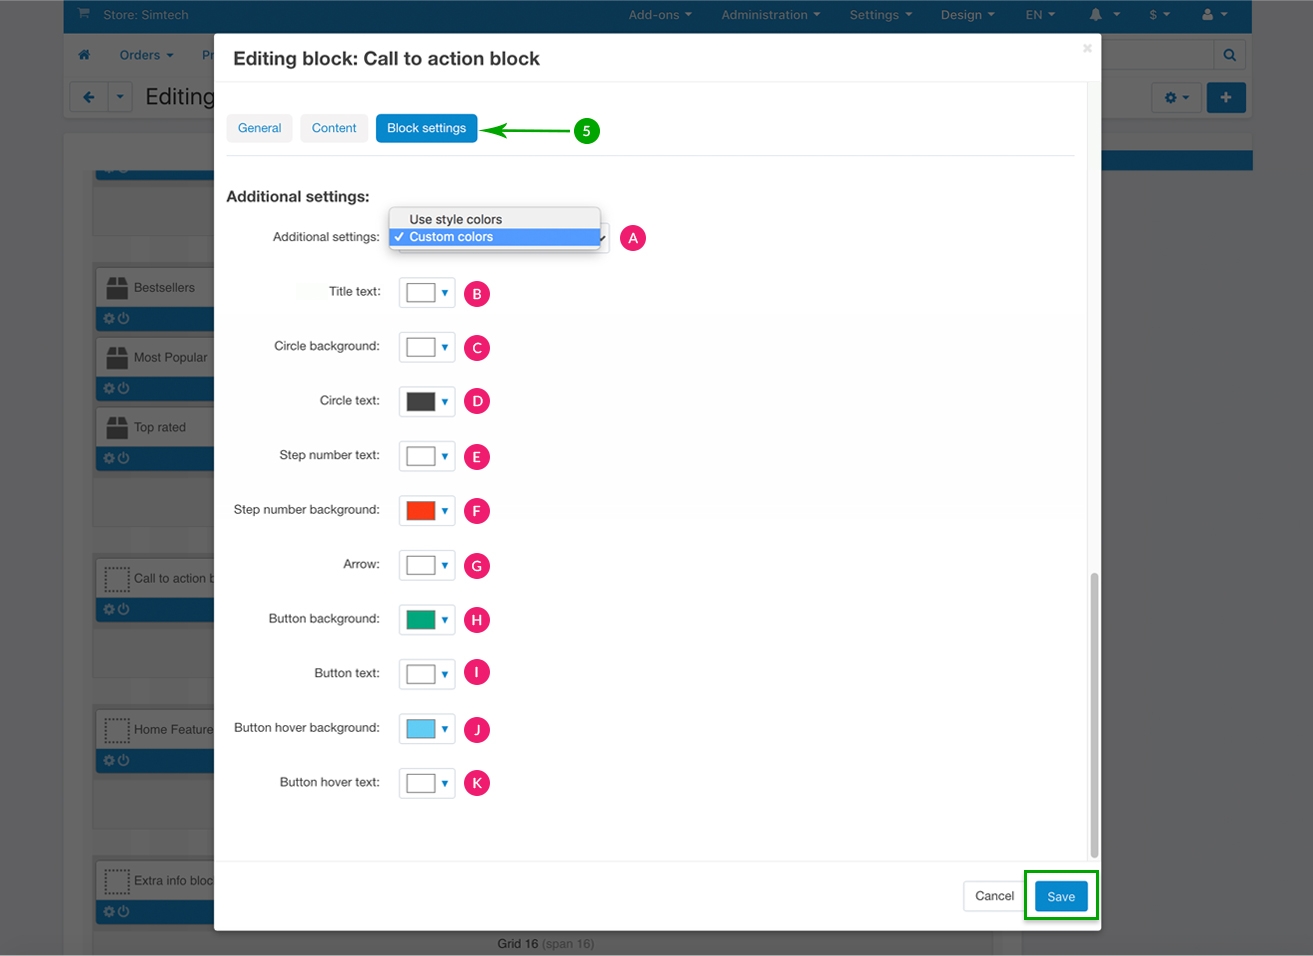
- Step 5
Next, under the “Block settings” tab you can choose your settings for the block background, for the block icons, as well as choose from the available additional settings. Below we’ll explain each section so let’s start with the block background:
Background settings
Icon settings
Additional settings
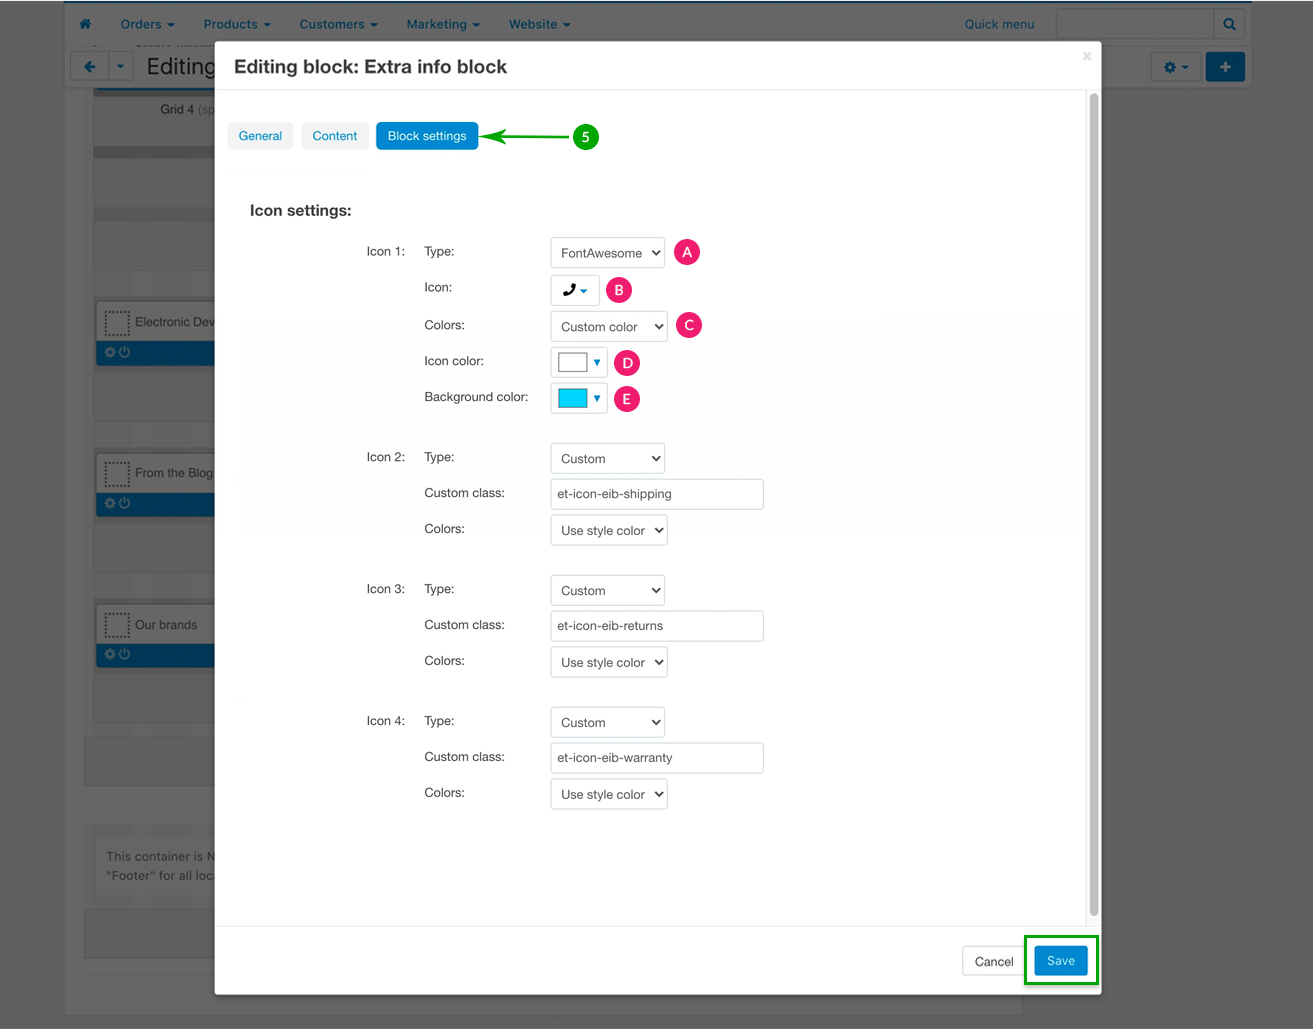
Extra info block
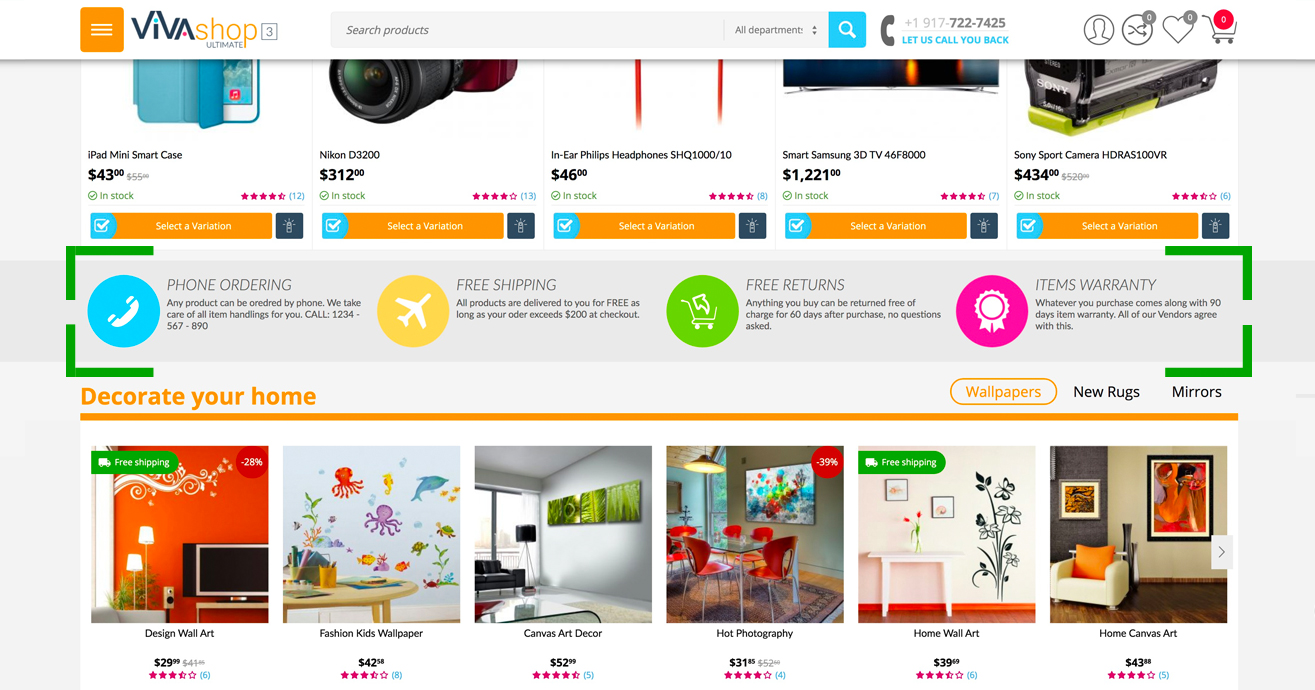
In order to catch your visitor’s attention, on the theme homepage you can include a few important pints specific to your store, though the “Extra info block”. You can completely customize this block according to your own wishes. Here’s how to do it, as well as the customization options that you have available:
- Step 1
In your admin panel, go to "Design” - "Layouts”:
- Step 2
Click on the "Homepage” tab
- Step 3
Scroll down and look for the “Extra info block” block, and click on the “Block options” of this block
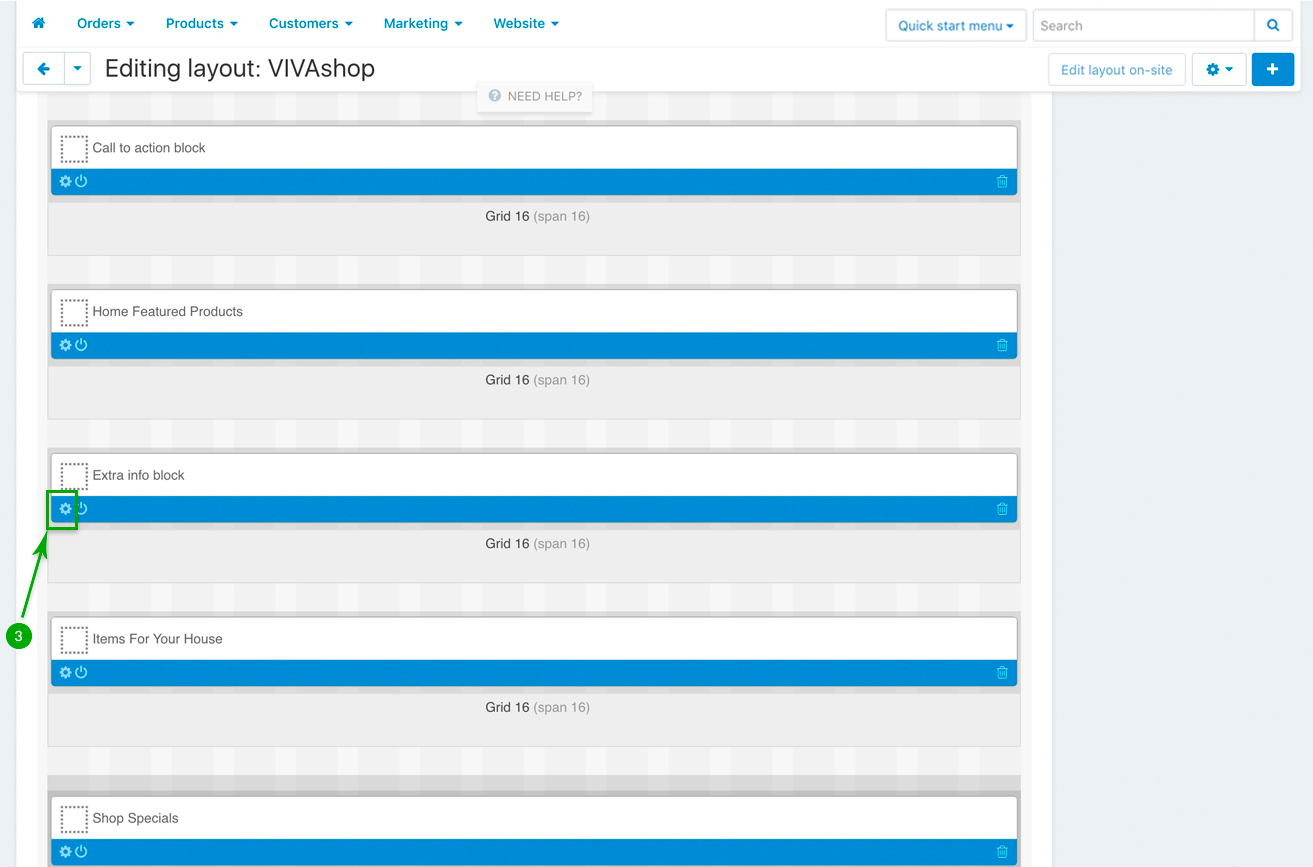
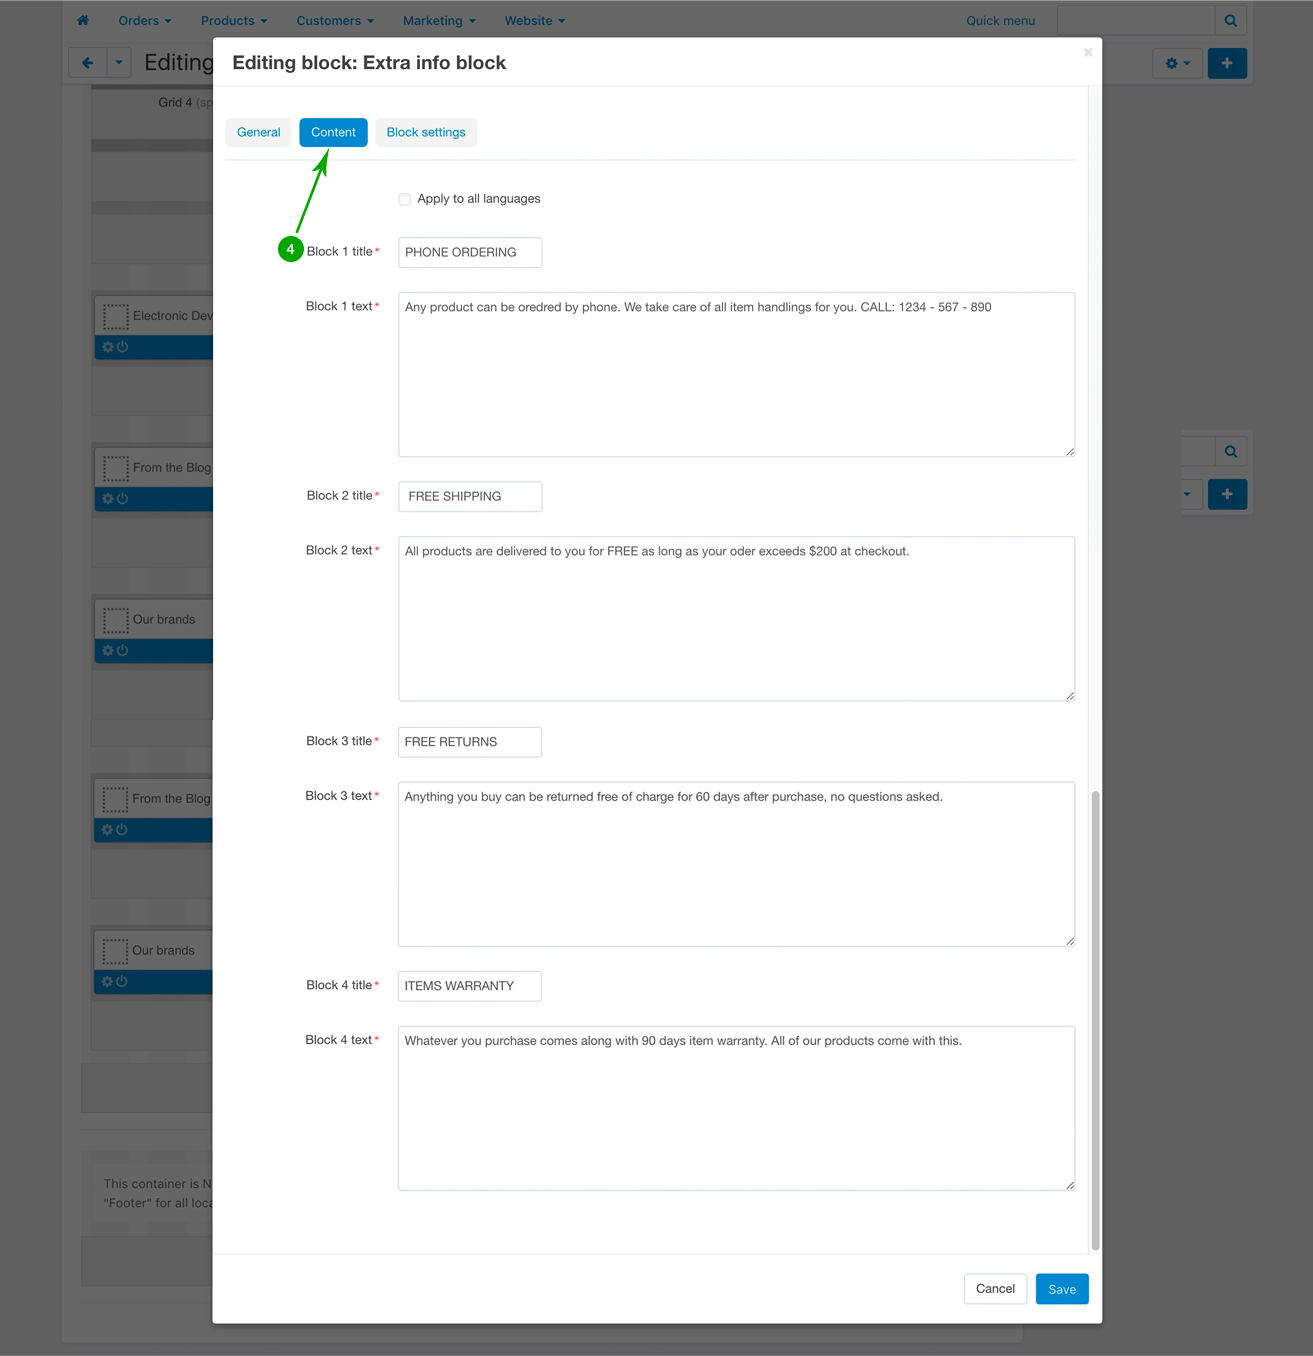
- Step 4
In the newly opened pop-up window, under the “Content” tab, type your desired title and the your custom text for each of the 4 points available in the “Extra info block”.
- Step 5
Next, under the “Block settings” tab you can choose your settings for the block background, icons and text.
Block settings
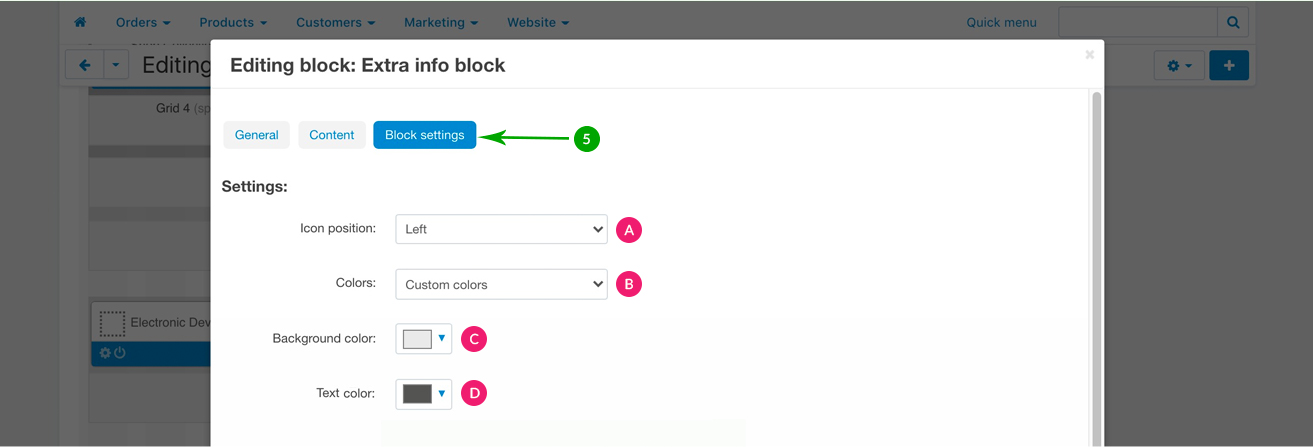
Icon settings
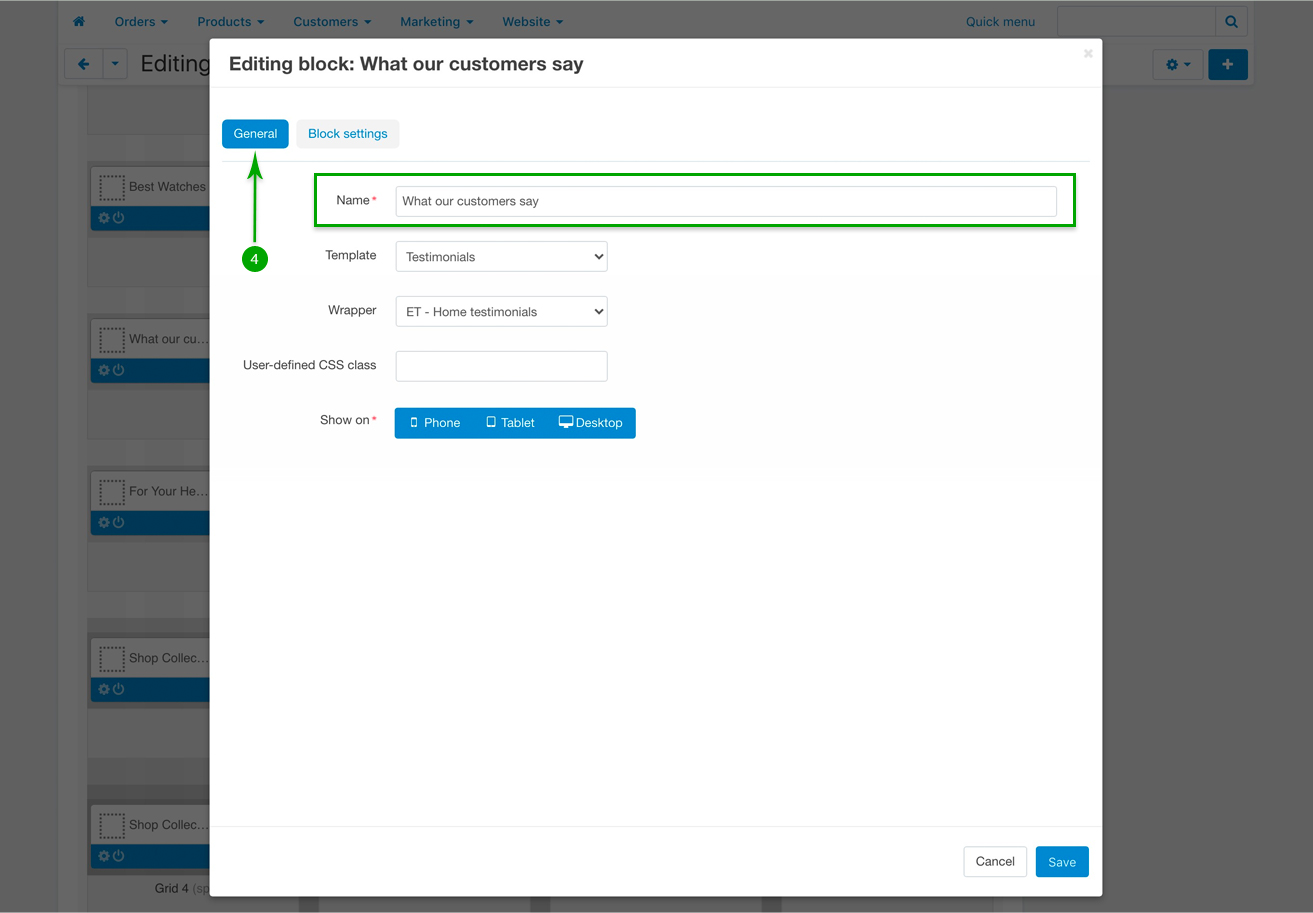
Testimonials block (”What our customers say”)
The theme homepage also contains a block where you can display your customers’ feedback. This block can be customized in accordance to your own wishes, so please follow the steps below in order to choose your own settings for your this block:
- Step 1
In your admin panel, go to "Design” - "Layouts”:
- Step 2
Click on the "Homepage” tab
- Step 3
Scroll down and look for the “What our customers say” block, and click on the “Block options” of this block

- Step 4
In the newly opened pop-up window, under the “General” tab, type your desired block name. This name will appear as a title for the block on your homepage. The “Template” should remain “Testimonials”, and the Wrapper should also remain “ET - Home testimonials”.
- Step 5
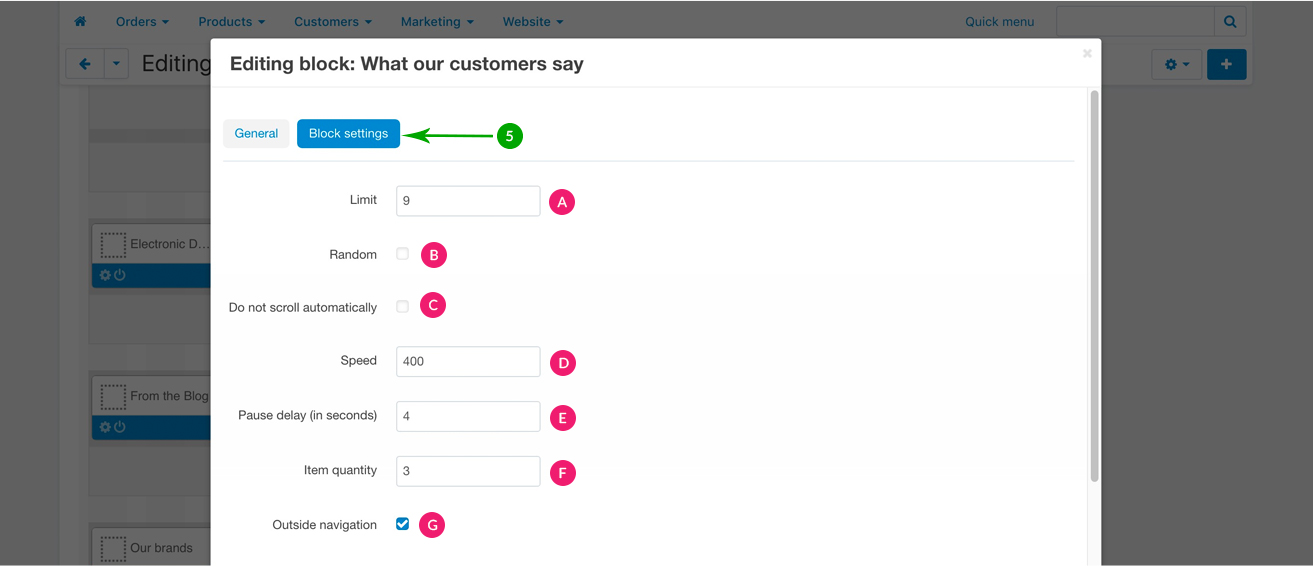
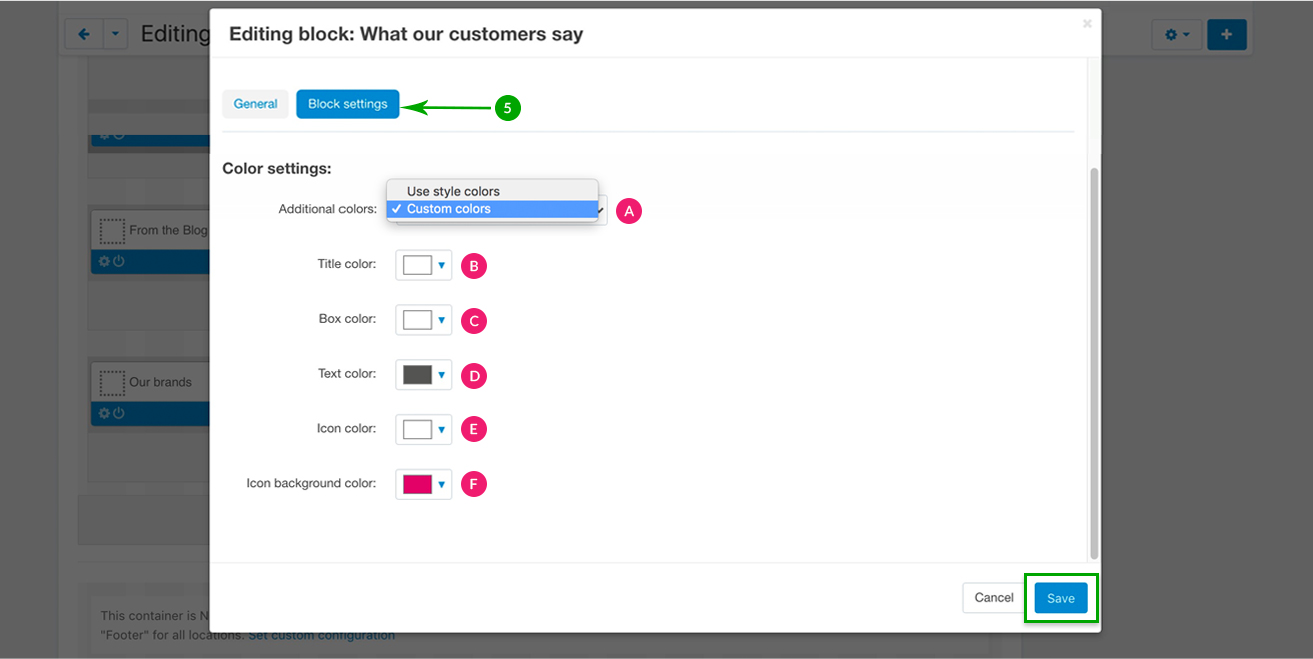
Next, under the “Block settings” tab you can choose your settings for the testimonials block, as well as the background and color settings. Click the bottom right “Save” button when you’re done.
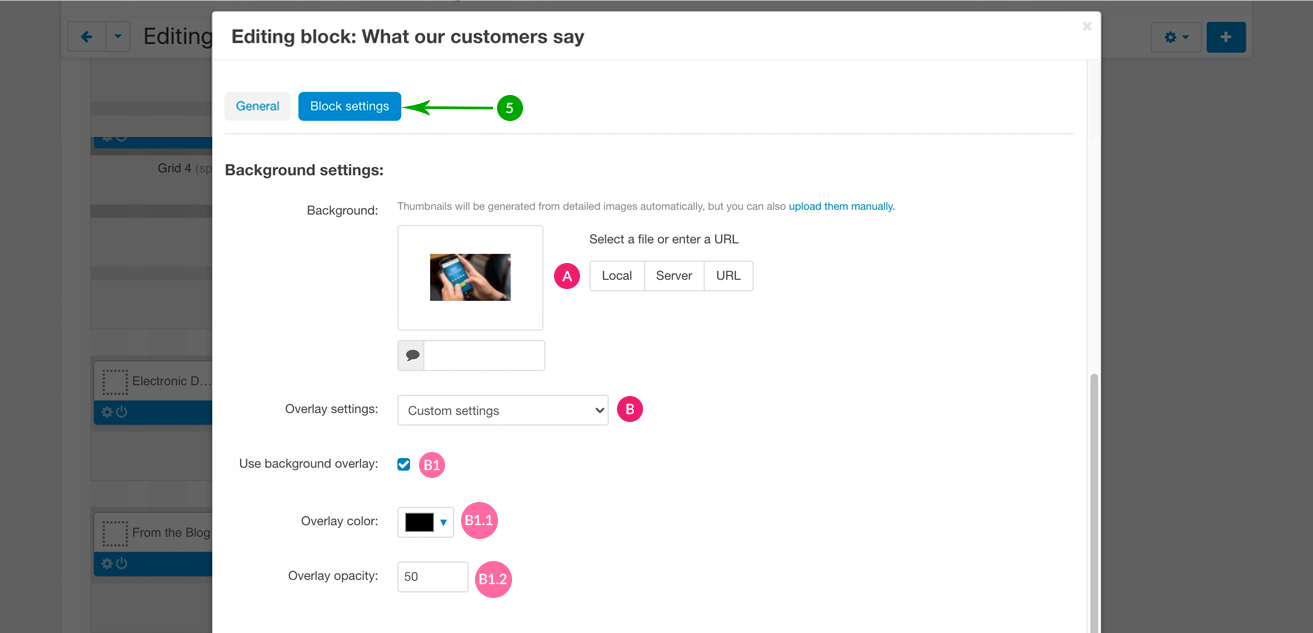
Block settings
Background settings
Colors settings
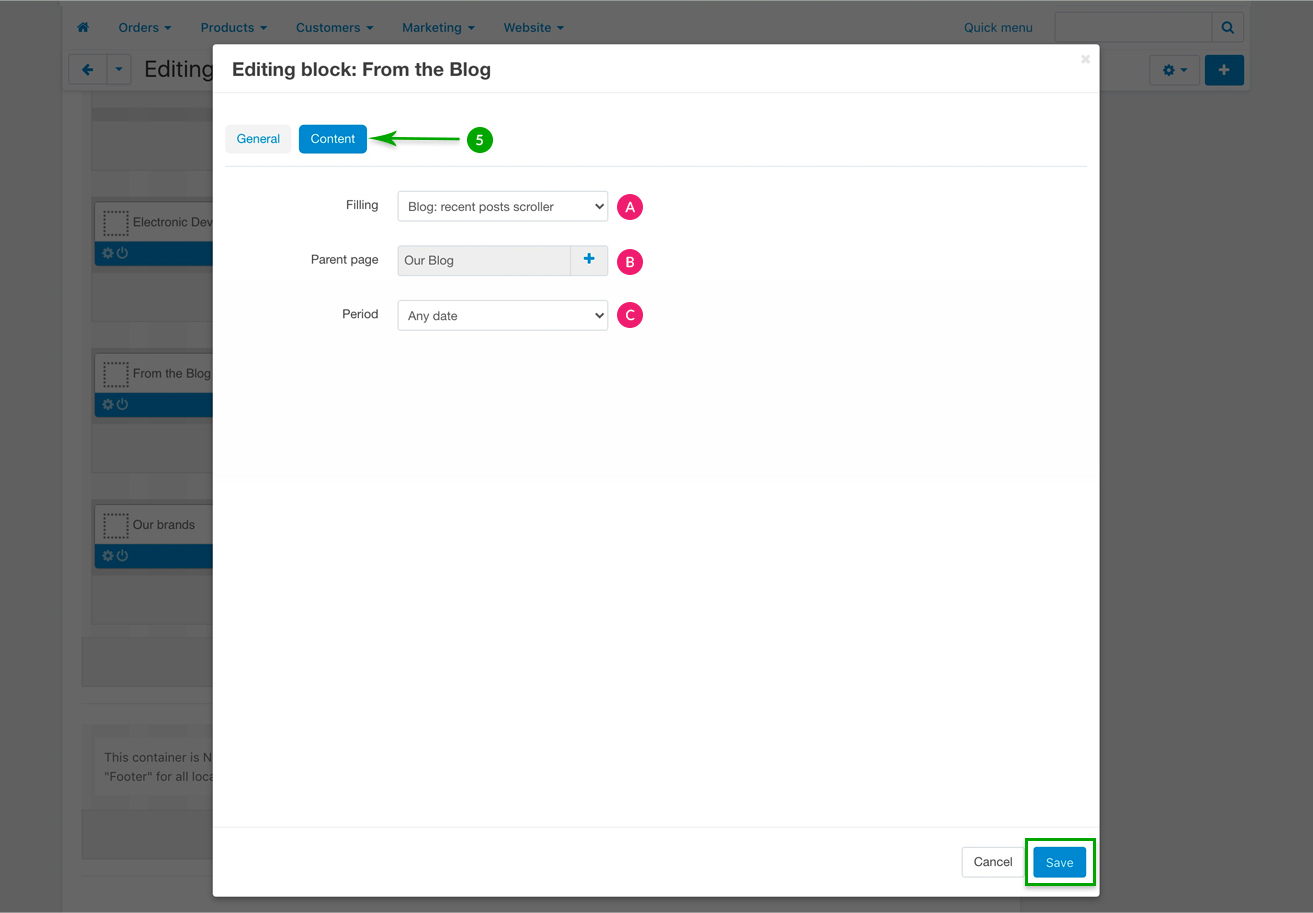
Blog scroller ("From the blog")
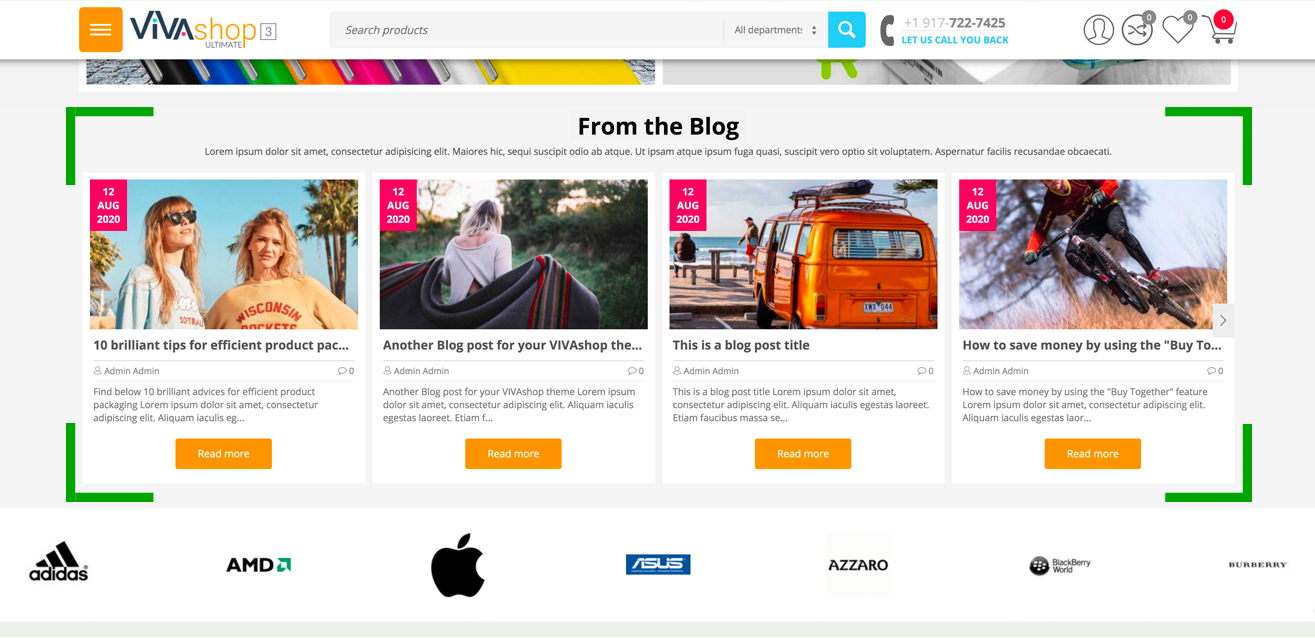
On the VIVAshop theme homepage you can display a scroller with any articles you have created in your blog. Follow the steps below in order to learn how to add blog posts to your homepage blog scroller, as well as how to configure it:
- Step 1
In your admin panel, go to "Design” - "Layouts”:
- Step 2
Click on the "Homepage” tab
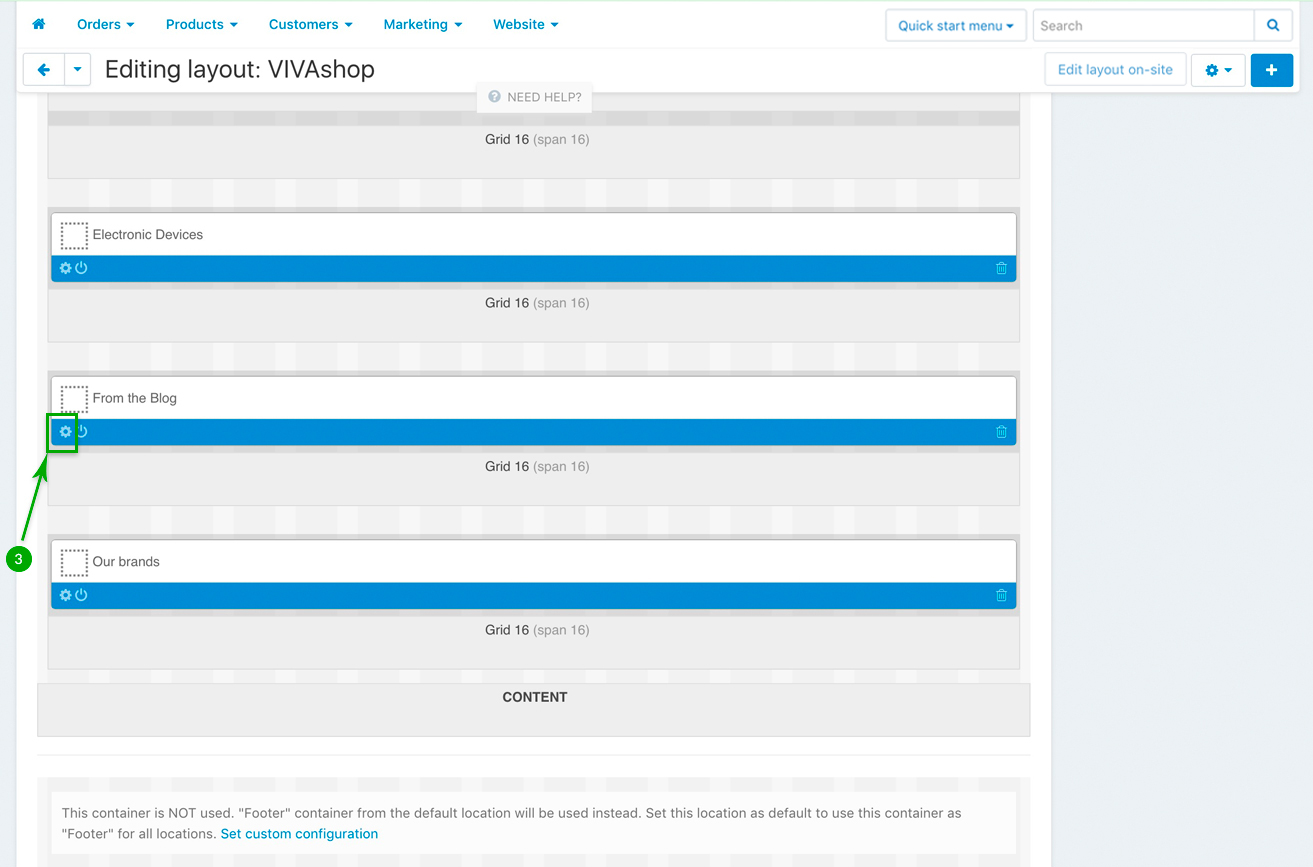
- Step 3
Scroll down and look for the “From the blog” block, and click on the “Block options” of this block
- Step 4
Under the “Content” tab select the content of your “From the blog” block, and then lick on the bottom right “Save” button.
Brands scroller

Display your brands on your shop homepage using the Brands scroller which you can simply configure it by following the guidelines below:
- Step 1
In your admin panel, go to "Design” - "Layouts”:
- Step 2
Click on the "Homepage” tab
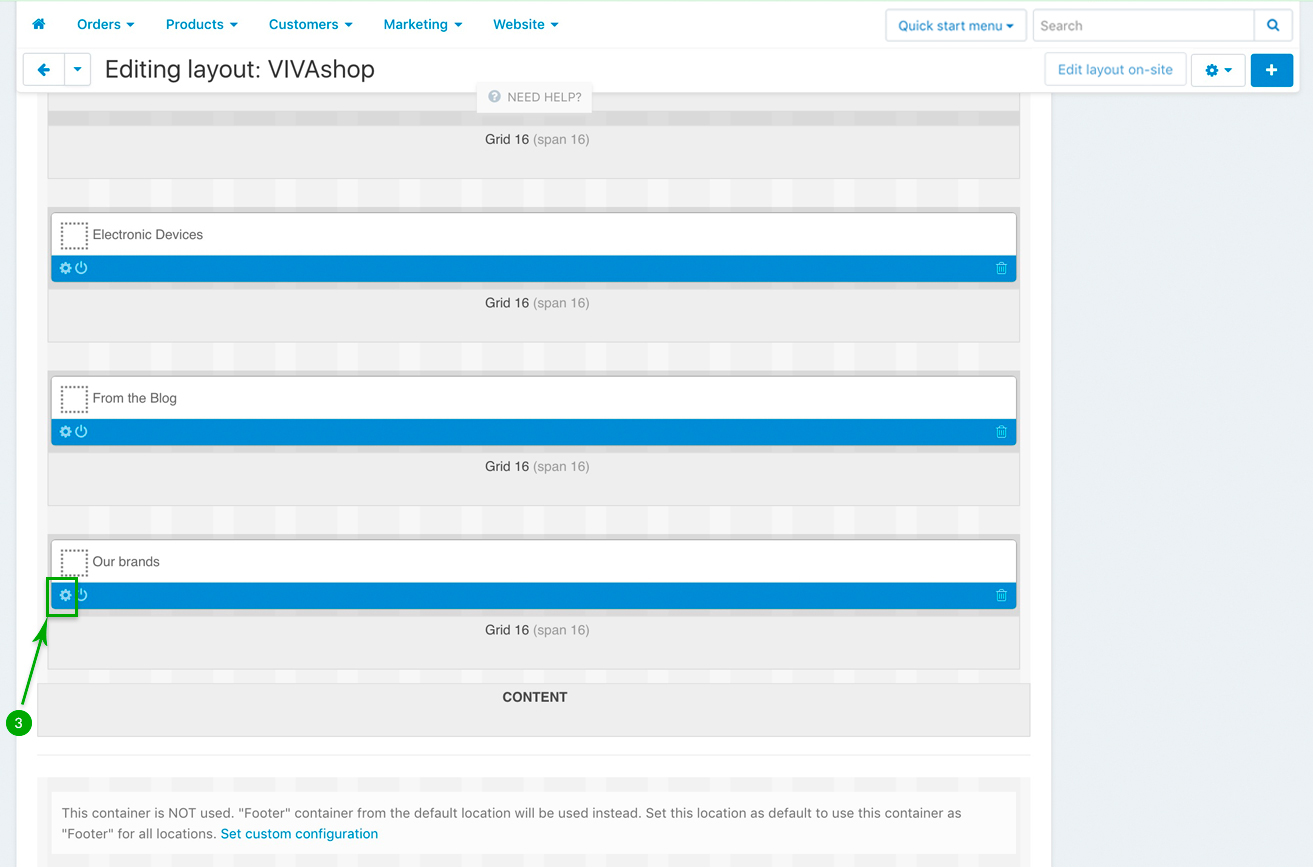
- Step 3
Scroll down and look for the “Our brands” block, and click on the “Block options” of this block
- Step 4
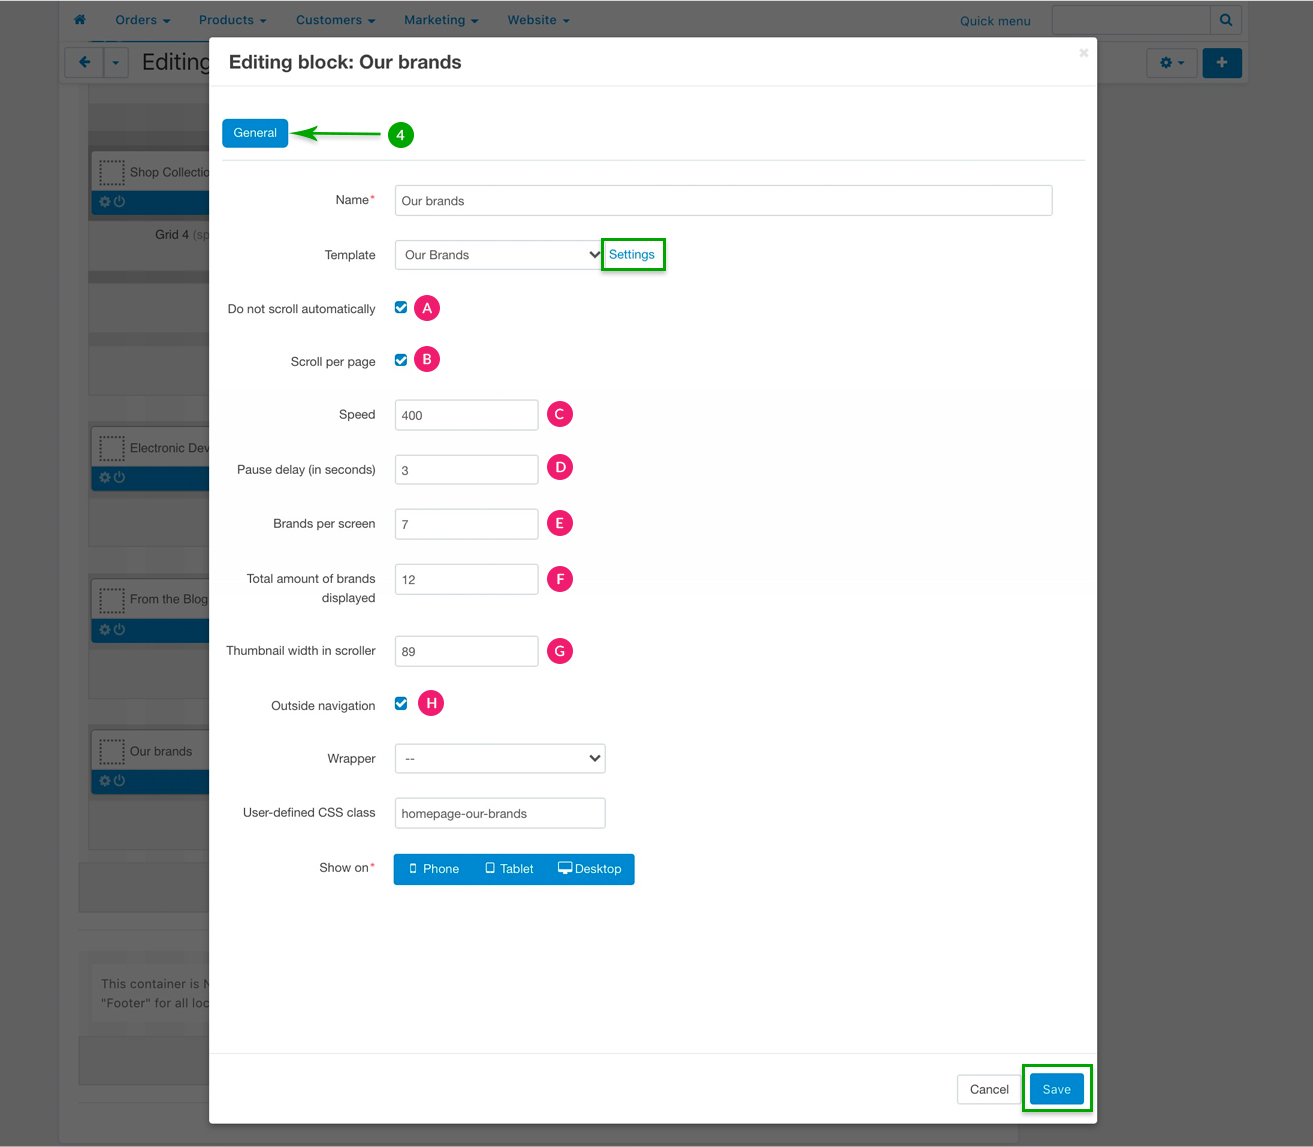
Under the “General” tab, give your block a custom name if you want, the “User-defined CSS class” should remain “homepage-our-brands”. If you click on the “Settings” link right next to the “Template” field, the blog scroller options will be displayed so you may configure it. Choose your configuration options, then click on the bottom right “Save” button.
Other homepage blocks
1. Footer info block
Simply add some other important and catchy information specific to your store using the “Footer info block”. This block is not only displayed on your homepage, but on every single page of your shop. The way you configure this block is just the same as the “Extra info block” which we explained above, so please follow the same steps we described for “Extra info block”.
2. Featured product and banner tabs
On the theme homepage we have included several blocks with featured products and banners. These blocks can be created with the help of the “Featured product and banner tabs” add-on that we have developed and included in the theme package. Therefore, please refer to section “Featured product and banner tabs” in order to learn how to create and configure these blocks.