Manually add content: Adding menus
VIVAahop theme comes with several menus that you can customize as per your own needs: “Top left menu - VIVAshop”, “Top right menu - VIVAshop”, “Main menu - VIVAshop”, and the “Advanced Mega Menu”. Below you can find the way you can customize them:
Top left and right menus
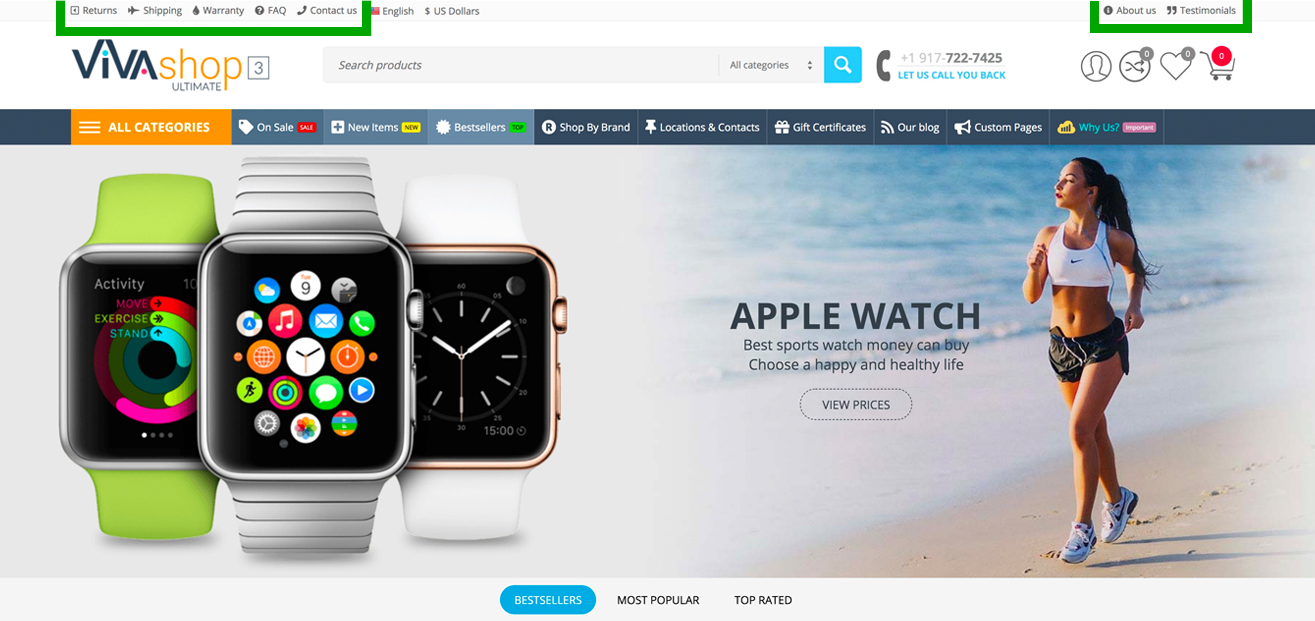
On the top of every page there are two menus which are automatically installed together with the theme: “Top left menu - VIVAshop”, on the top left of your site, and “Top right menu - VIVAshop”, on the right side. In each menu you can add any custom text, links, colors, as well as pick any icons of your choice. Each menu can contain any number of menu items. Below we’ll explain how to add menu items to the “Top left menu - VIVAshop”. For the “Top right menu - VIVAshop”. all you have to do is to simply follow the same procedure.
- Step 1
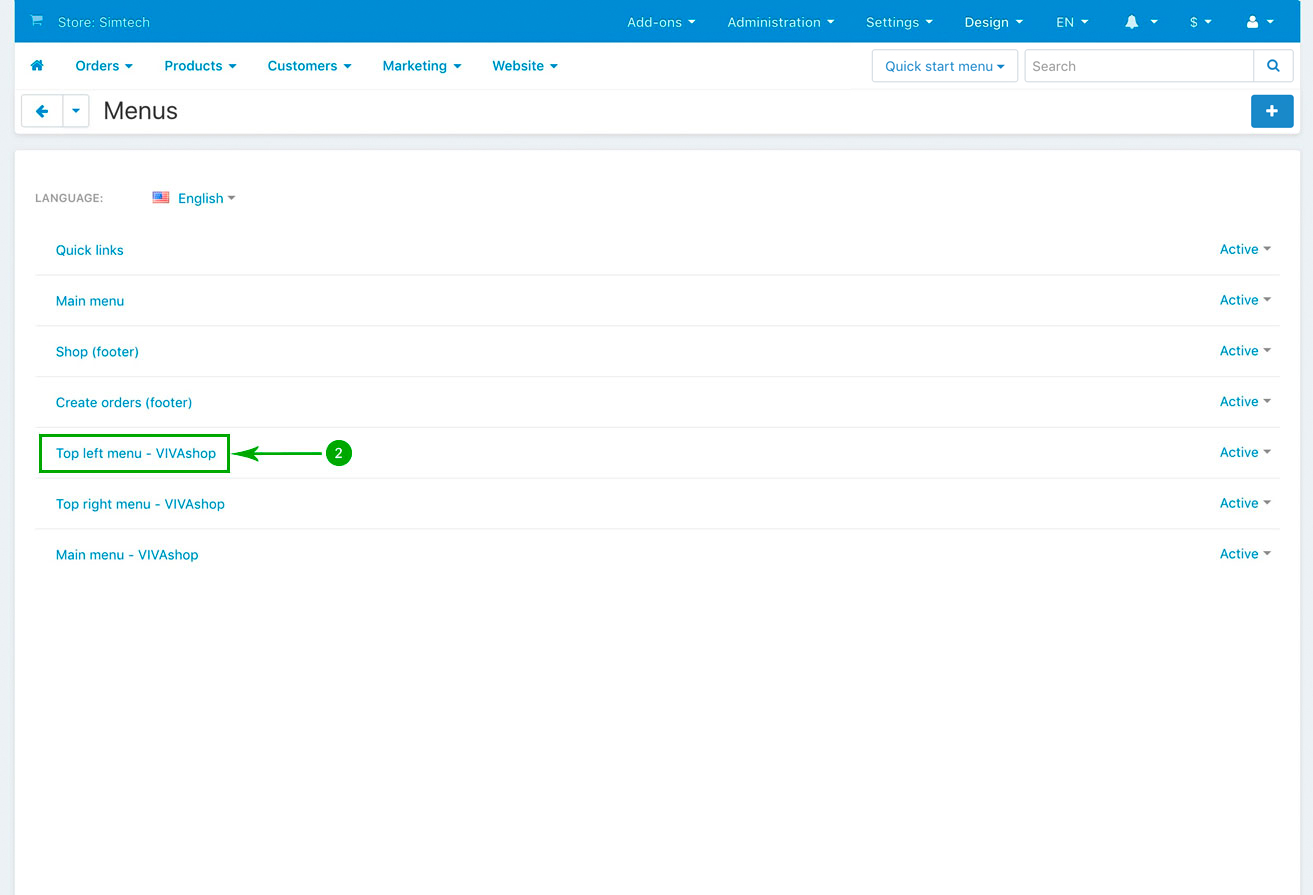
In your admin panel, go to “Design” - “Menus”

- Step 2
Click on the “Top left menu - VIVAshop” link
- Step 3
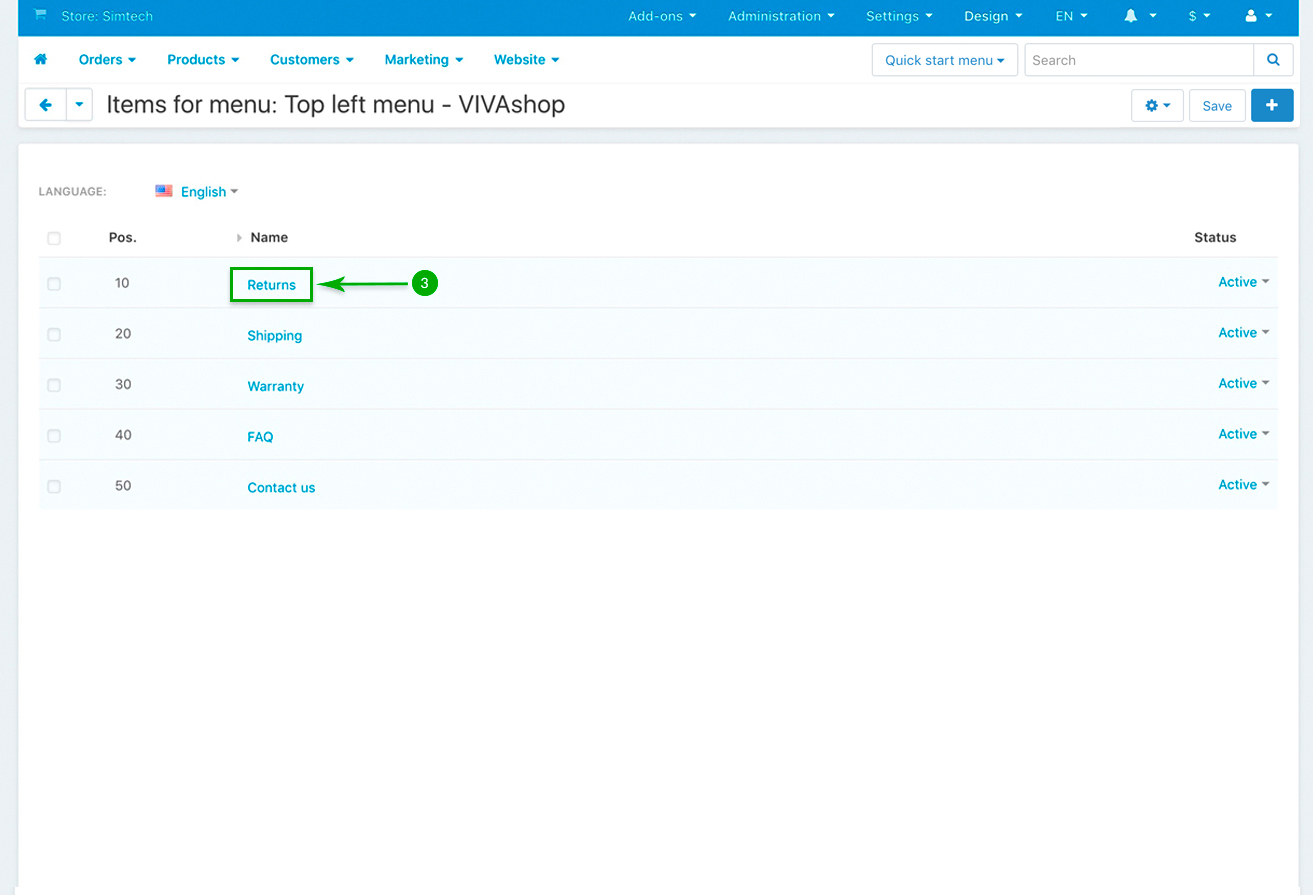
In the next opened page, click on the top right blue “Plus” sign button (”Add item”) to add a menu item, or simply edit the already existing ones. Below we’ll show you how to edit the “Returns” menu item. Changing the other menu items will be just the same. So click on the “Returns” link:
- Step 4
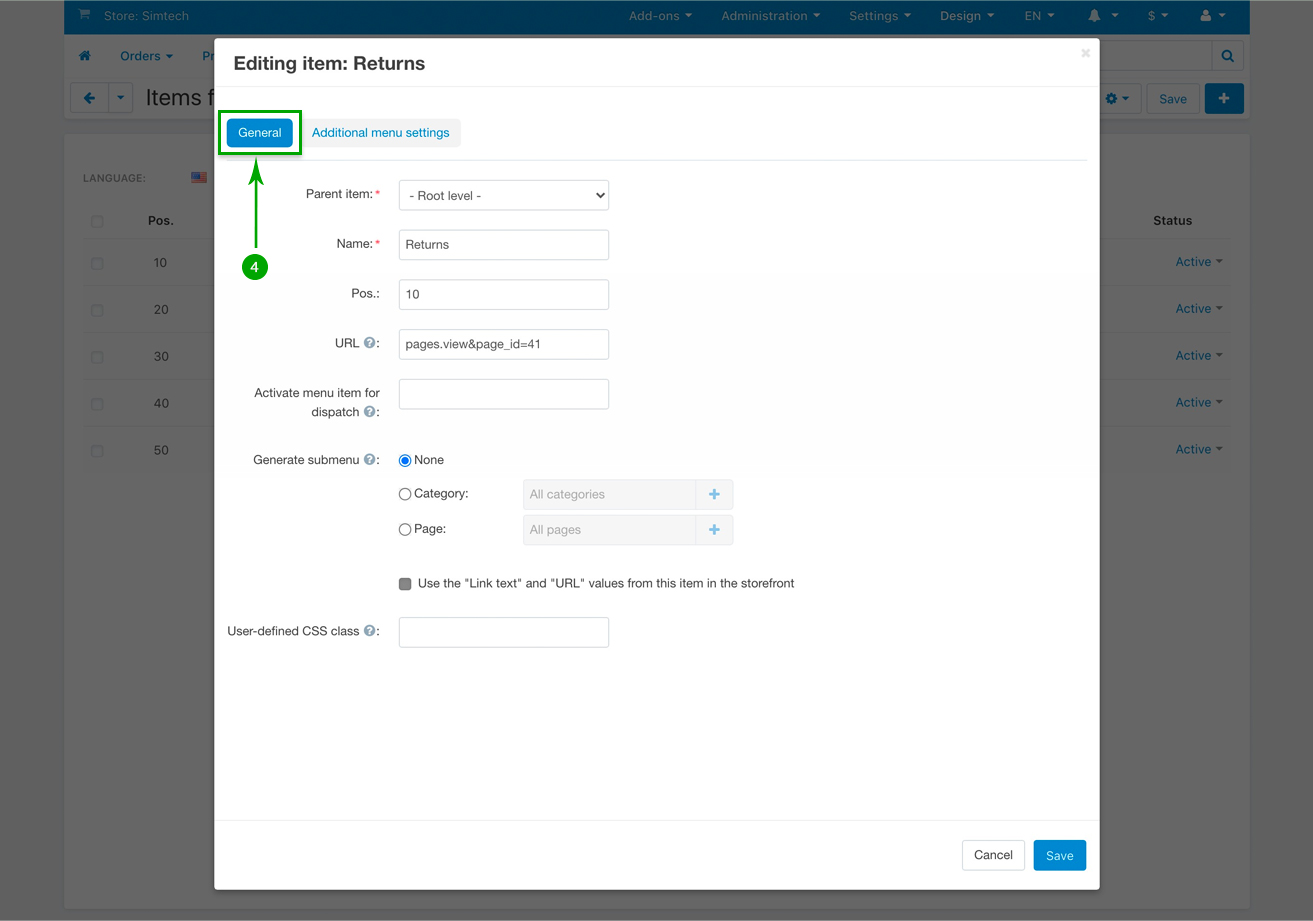
In the newly opened pop-up window, under the “General” tab, if you wish, change the menu item “Name”, “Position” as well as the URL link that you want to forward visitor when they click in the “Returns” menu item.
- Step 5
Next, under the “Additional menu settings” tab, customize your menu item. When you’re done, simply click on the bottom right “Save” button.

- A1: Enabled - Check this box if you want to add your custom colors or use the VIVAshop pre-defined theme style colors. If this box remains unchecked, the menu item colors will use the style colors defined in your Theme Editor for “Top panel links” and “Top panel links hover” under the “Colors” section.
- A2: Use tyle colors/Custom colors - Select if you want to use the already pre-defined VIVAshop style colors, or use your own custom colors.
- A3: Text color - If you chose to use your own custom colors for the menu item text, then choose your desired color from the color picker.
- A4: Background color - The menu item can also have a background. Simply choose your custom color from the color picker.
- B1: Enabled - Check this box if you want to add an icon to the menu item. If this box remains unchecked, then no menu icon will be displayed.
- B2: Type - If you chose to add an icon to your menu item, select the type of icon you want to use. You can choose between picking a “Font Awesome” icon, or add your own “Custom” icon.
- B3: Icon/Custom class - If at the above “Type” section you selected “Font Awesome” option, then simply choose your desired icon from the icon picker. If you selected to add your own custom icon, insert the class of your custom icon in the “Custom class” field.
- B4: Icon color - For the icon color you have two options: “Inherit color” and “Custom color”. If you select the “Inherit color” option, then the icon will take the same color as the menu item text color which you have defined above, in section A3. If you choose “Custom color” then the B5 option will open so you may choose your desired icon color.
- B5: Custom color - If you chose the “Custom color” option for “Icon color”, then just pick your desired color from the color picker.
- Step 6
Repeat the above 5 steps in order to customize all of the menu items from the “Top left menu - VIVAshop”, or to add any custom menu items inside this menu. The exact same procedure is used to customize or create menu items in the “Top right menu -VIVAshop”. Once these menus are configured/created, you can simply add them to the respective blocks, by going to “Design” - “Layouts”, then click on the “Block options” of the “Top left menu - VIVAshop” block (or “Top right menu - VIVAshop” block), and then, in the newly opened pop-up, click on the “Content” tab and select “Top left menu - VIVAshop” from the “Menu” dropdown (or select “Top right menu - VIVAshop” if you are editing the “Top right menu - VIVAshop” block). However, please note that, by default, after you install the theme demo data, the “Top left menu - VIVAshop” and “Top right menu - VIVAshop” are already created and allocated to their respective blocks.
Main Menu
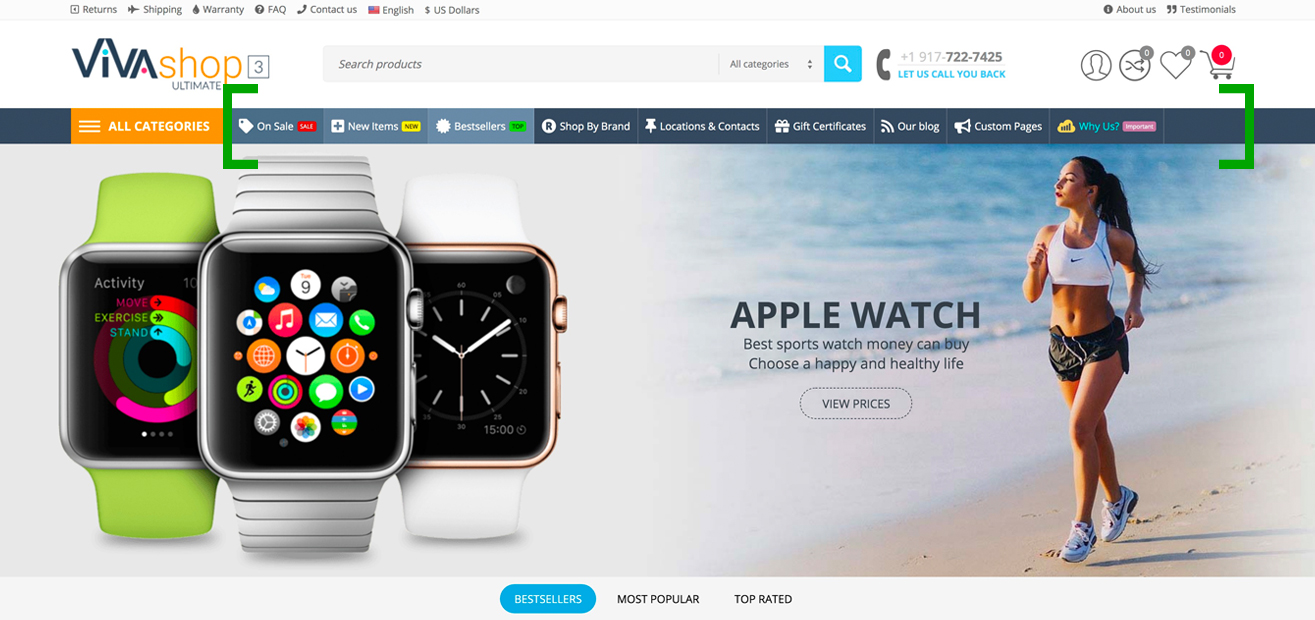
The “Main Menu” is the horizontal menu right next to the “All Categories” menu. In the “Main Menu” you can display any menu items of your choice, and you can customize it by adding any custom text, links, colors, labels, as well as pick any icons of your choice. The “Main Menu” can contain any number of menu items. Follow the steps below in order to learn how to add menu items to the “Main menu - VIVAshop”.
- Step 1
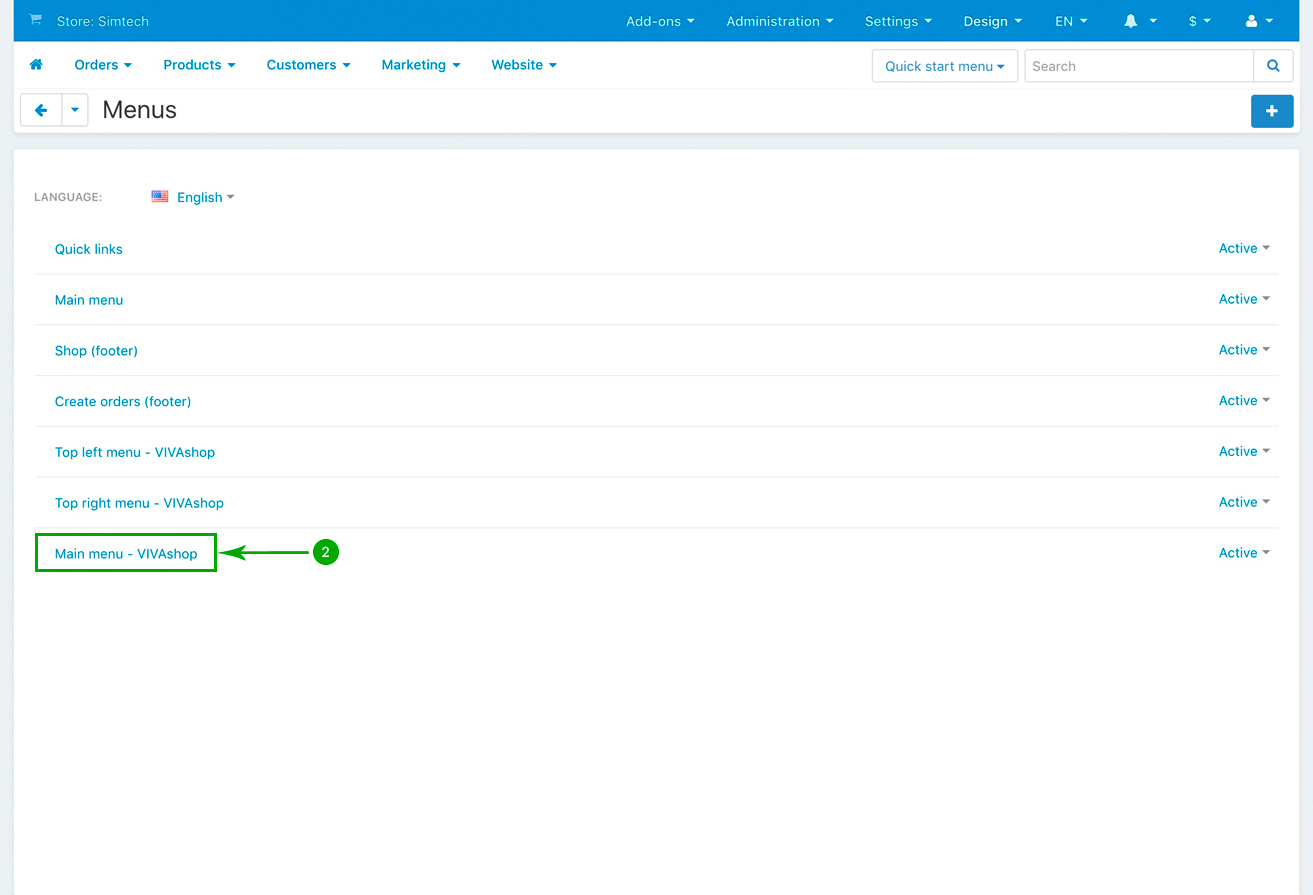
In your admin panel, go to “Design” - “Menus”
- Step 2
Click on the “Main menu - VIVAshop” link
- Step 3
In the next opened page, click on the top right blue “Plus” sign button (”Add item”) to add a menu item, or simply edit the already existing ones. Below we’ll show you how to edit the “On Sale” menu item. Changing the other menu items will be just the same. So click on the “On Sale” link:

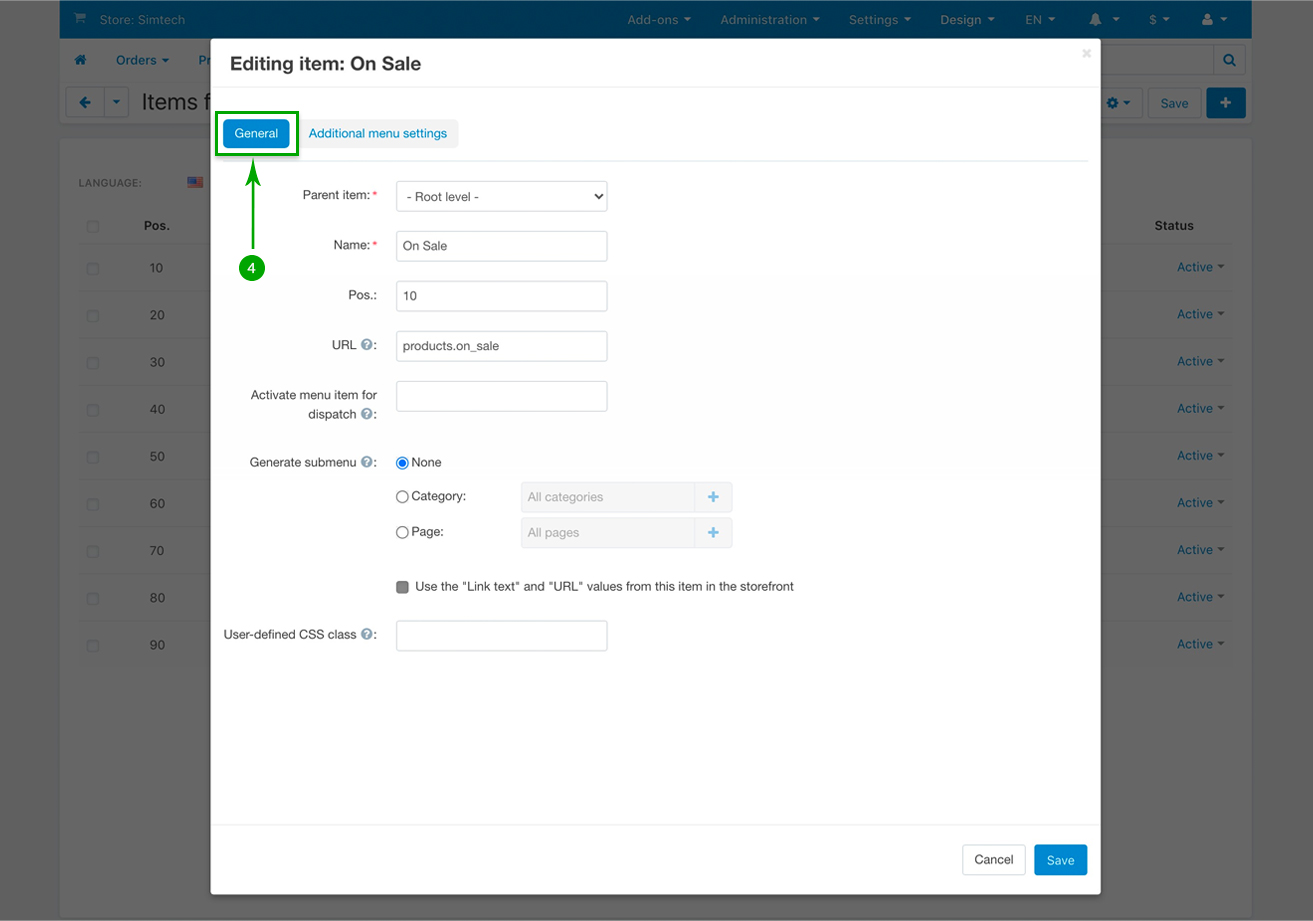
- Step 4
In the newly opened pop-up window, under the “General” tab, if you wish, change the menu item “Name”, “Position” as well as the URL link that you want to forward visitor when they click in the “On Sale” menu item. In this case, the link for all discounted products is “products.on_sale”
- Step 5
Next, under the “Additional menu settings” tab, customize your menu item. When you’re done, simply click on the bottom right “Save” button.
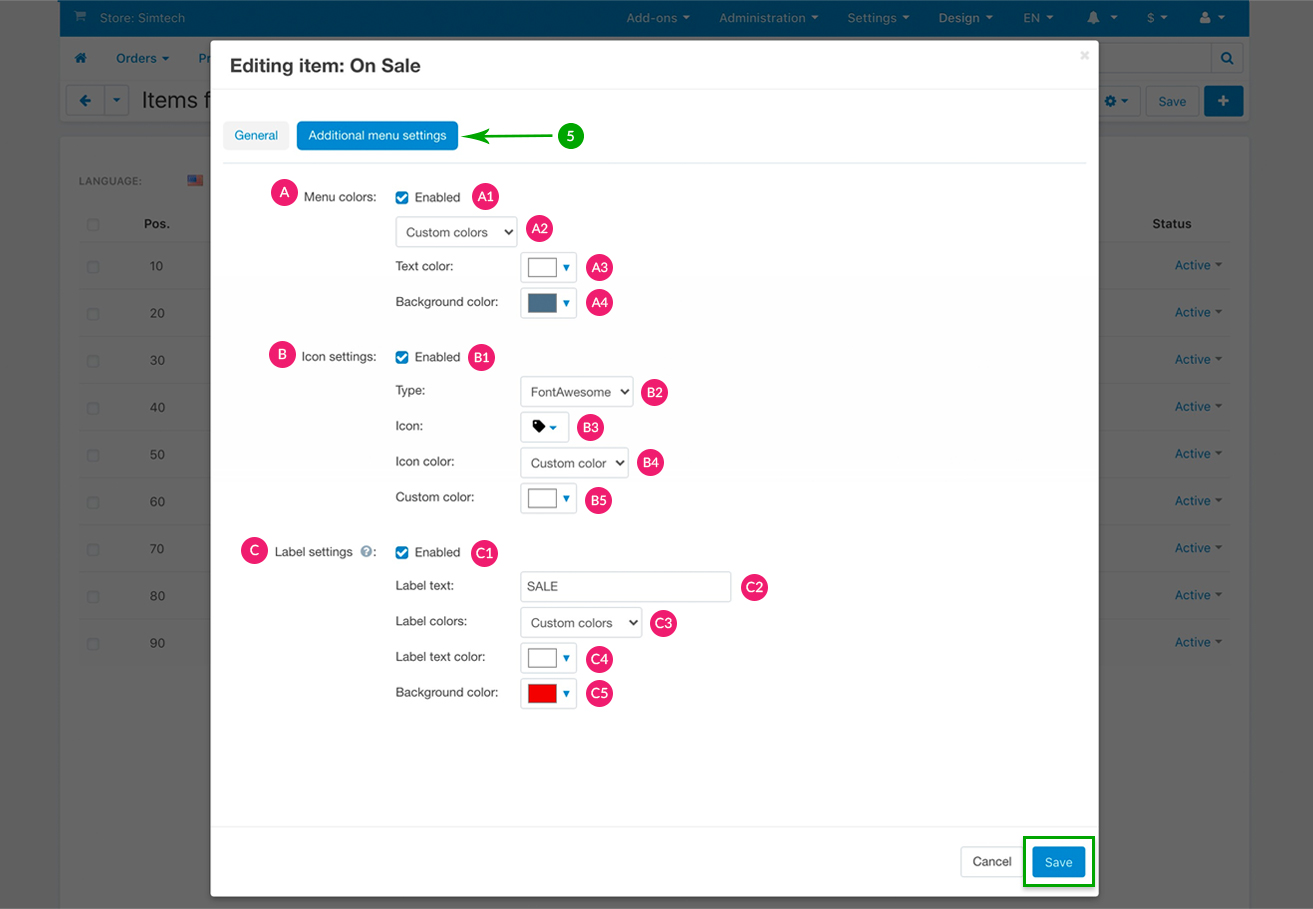
- A1: Enabled - Check this box if you want to add your custom colors or use the VIVAshop pre-defined theme style colors. If this box remains unchecked, the menu item colors will use the style colors defined in your Theme Editor for “Top panel links” and “Top panel links hover” under the “Colors” section.
- A2: Use tyle colors/Custom colors - Select if you want to use the already pre-defined VIVAshop style colors, or use your own custom colors.
- A3: Text color - If you chose to use your own custom colors for the menu item text, then choose your desired color from the color picker.
- A4: Background color - The menu item can also have a background. Simply choose your custom color from the color picker.
- B1: Enabled - Check this box if you want to add an icon to the menu item. If this box remains unchecked, then no menu icon will be displayed.
- B2: Type - If you chose to add an icon to your menu item, select the type of icon you want to use. You can choose between picking a “Font Awesome” icon, or add your own “Custom” icon.
- B3: Icon/Custom class - If at the above “Type” section you selected “Font Awesome” option, then simply choose your desired icon from the icon picker. If you selected to add your own custom icon, insert the class of your custom icon in the “Custom class” field.
- B4: Icon color - For the icon color you have two options: “Inherit color” and “Custom color”. If you select the “Inherit color” option, then the icon will take the same color as the menu item text color which you have defined above, in section A3. If you choose “Custom color” then the B5 option will open so you may choose your desired icon color.
- B5: Custom color - If you chose the “Custom color” option for “Icon color”, then just pick your desired color from the color picker.
- C1: Enabled - Check this box if you want to add a label to the menu item. If this box remains unchecked, then no label will be displayed.
- C2: Label text - Enter any text that you want to appear in the label.
- C3: Label colors - For the label colors you have two options: to use the theme style color, which uses the colors we have pre-defined in the VIVAshop style that you have chosen to use, while the other choice is to use your own custom colors. So pick your choice.
- C4: Label text color - If you chose the “Custom colors” option for “Label colors”, then, from the color picker, select the color for the label text.
- C5: Background color - You can have a background for your label so just pick your desired background color from the color picker.
- Step 6
Repeat the above 5 steps in order to customize all of the menu items from the “Main menu -VIVAshop”, or to add any custom menu items inside this menu. Once this menu is configured/created, you can simply add it to the respective block, by going to “Design” - “Layouts”, then click on the “Block options” of the “Main menu - VIVAshop” block, and then, in the newly opened pop-up, click on the “Content” tab and select “Main menu - VIVAshop” from the “Menu” dropdown. However, please note that, by default, after you install the theme demo data, the “Main menu - VIVAshop” is already created and allocated to the respective block.
For the “Shop By Brand” link you will need to determine your own Brands filter ID, as this ID is different from store to store. So you firstly need to create a filter by Brands feature. After you have created your Brands filter, go to "Products" - "Filters". Here you should see the “Brands #XX”. Notice that the number "XX" is your Brands filter ID number. Use this ID number to change the already pre-defined ID number in the link inside the “Shop By Brand” menu item of the “Main Menu”.
For the “Our blog” link you will need to determine the page ID for the root of your blog, as this ID may be different from the pre-defined link in the “Our blog” menu item. You firstly need to create a blog, so please refer to section “Creating a blog” in order to learn how to do that. After you have created your blog, go to "Website" - "Blog". Here you should see the “Our Blog #XX”. Notice that the number "XX" is the ID of the root page of your blog. Use this ID number to change the already pre-defined ID number in the link inside the “Our Blog” menu item of the “Main Menu”.
“All Categories” menu
The “All categories” menu is part of the “Advanced Mega Menu” add-on which we have specifically created for VIVAshop and included in the theme package. To learn more about how to customize the the “All categories” menu, please refer to the “Advanced Mega Menu” section.